|
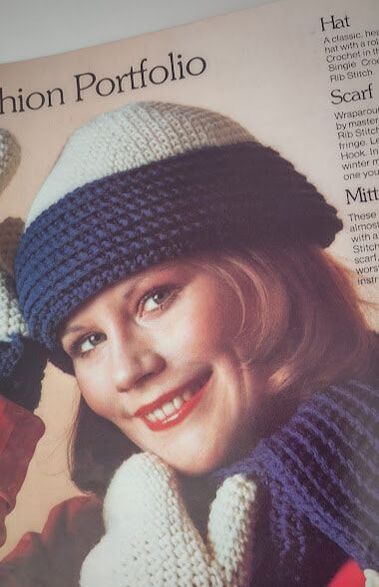
This is the hat that gave me the idea for doing just hats this year. It's from Boye's "I Taught Myself to Crochet" booklet #7702 from 1967. (Edit - this is 1975 - not 1967)
I was looking for an easy hat to make with some of my scrap worsted weight yarn and saw this one in my library. I used Knit Picks Wool of the Andes in Blackberry for the white part in the photo above and Herrschners Chenille for their blue section. This is a very easy pattern. The top of the hat is done in single crochet rounds to teach increasing and working in the rounds. For the brim it switches to back and forth in rows, achieving the ribbing by doing the single crochets in back loop only. To finish they sew the ends of the ribbing together and then fold the ribbing to the inside, sewing the first and last row of ribbing together. 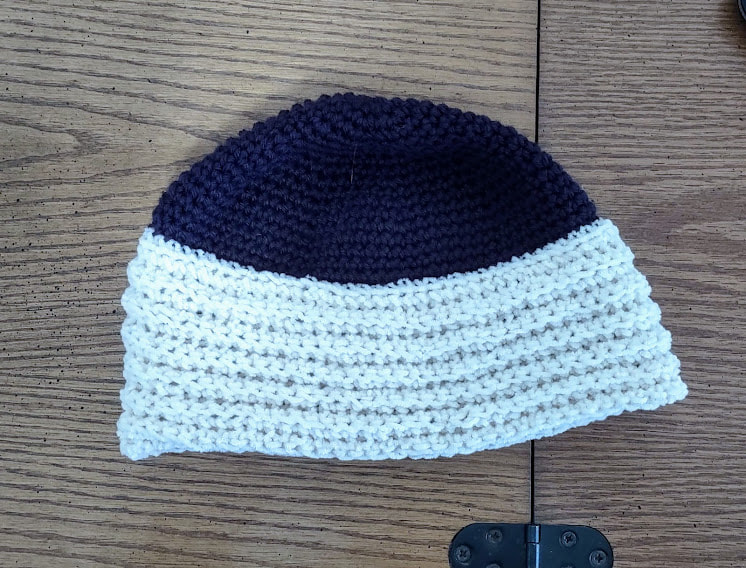 The chenille makes it soft and the wool top should make it warm. It's already been sent off to Crochet Twin Cities for the Crochet for a Cause project.
I'll give this a 4 out of 5 stars only because the format it's written in is a little hard to read. The hat is easy though and it's warm and looks pretty wearable.
0 Comments
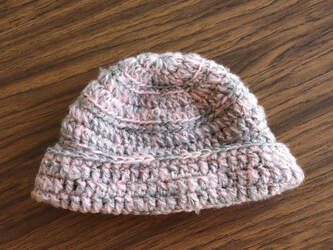
Head Warmer from the January 1976 Workbasket Magazine review: 2.5 stars out of 5 - It has some issues that can be fixed and it results it a servicable hat. Yarns: Unger Fluffy in Pink, Caron Simply Soft in Gray Heather. This pattern has you hold the two strands together. Hook: Size I Gauge: 3 rounds = 2 inches (Though it didn’t specify I’m pretty sure it was a radius measurement and not a diameter measurement) 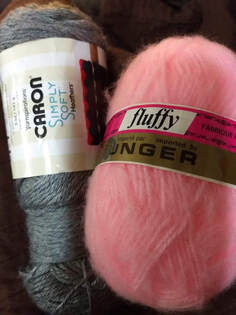 First the good things:
Now the bad things:
This pattern is done in the round with each round finishing with a slip stitch to join. There are only 16 rounds so it’s pretty quick to make. The biggest issue is that they give stitch counts at the end of the instructions for each round and they aren’t always right. If you’re experienced you’ll know that it won’t really matter for a hat of this size and the stitch pattern doesn’t need you to keep a specific number of stitches. Here’s how the stitch count goes by round:
At round 12 you start doing double crochet in the back loop going back and forth but you don’t join the rounds. It very clearly says, “Do not join” for round 12. It does not say that for rounds 13-15 so I did join them. You fold back the last rounds of the hat for the brim. It never says to sew up the unjoined round (or rounds if you assumed 13-15 were the same as 12). You end up with this odd gap: 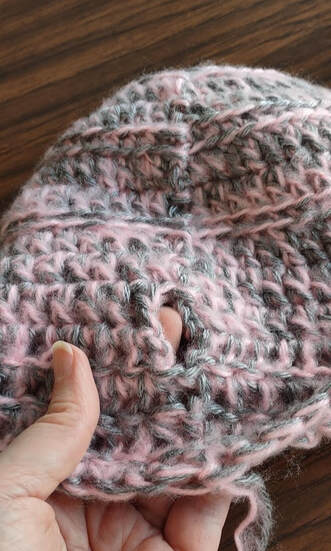 I sewed that gap up after I took the photo. I don’t like making pompons so I skipped that. Here’s the finished hat and me trying it on for size.
This is a pretty small hat and I don’t have a large head so I’d argue that this is more a child or teen sized hat.
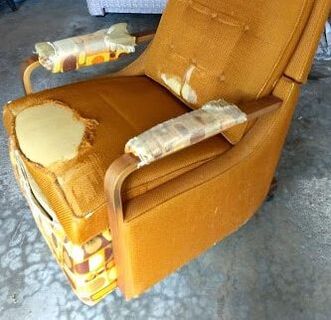
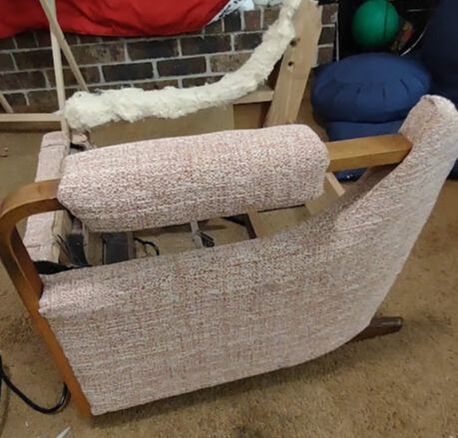
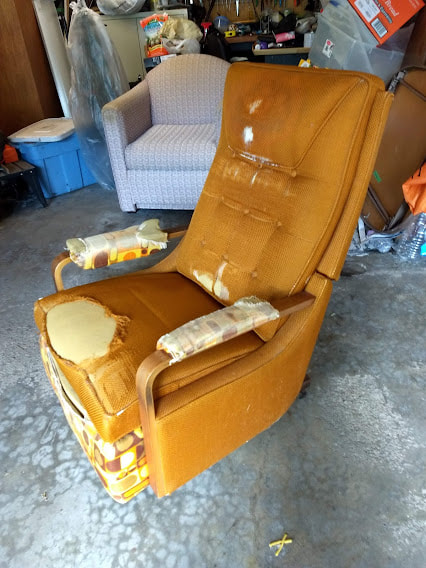
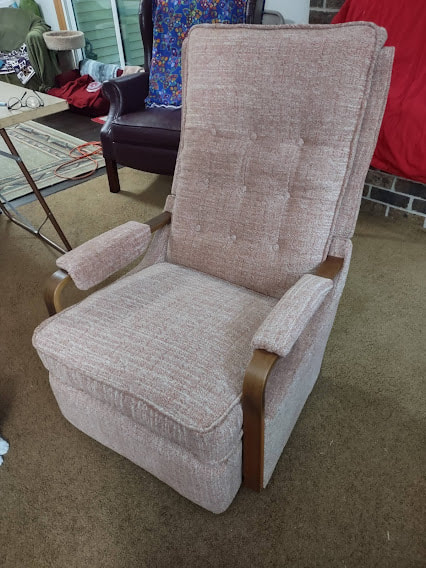
Whew! That was a lot for a hat! It's a pretty quick hat to make and I'd probably make it again ignoring the stitch counts and joining the rows in the brim. I think I'd also go up a hook size to make it a little bigger even if it doesn't match the gauge. I'm trying a simpler format for this blog for 2022. Instead of voting on a pattern for each month like we did in the past, I'm just going to pick a hat pattern from my vintage pattern stash. Here are my two arbitrary rules: 1. Vintage will be considered 40 years old. That means that I will pull patterns that are older than 1982. How is 1982 40 years ago! 2. I'm going to try to pick a pattern from a Workbasket that is the month we're in but some months that may not be possible. I have a lot of other vintage pattern booklets that I can pull from though so I'm sure I'll find a pattern for each month. 3. Hats=Things you wear on your head. This could mean a hood, a bun cover, ear muffs or a hat. I have five 1970s Workbasket magazines that have things you could wear on your head. I chose this one from the January 1976 Workbasket Magazine. 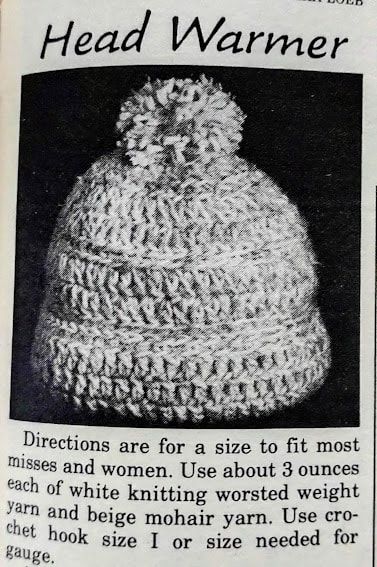 I'll let you know how well the pattern was written, what yarn I used and you'll see a color photo of what the hat I made looks like. In this case, I don't have mohair but I do have some vintage Unger Fluffy that might work in place of that. I have no idea what the other yarn will be. The photo almost looks like they used a variegated yarn so we'll see if I have anything like that and take it from there! We finished the chair in July 2021 which was about one year from when we brought it home. I definitely learned a lot about reupholstering doing this project and was reminded that I don't like working with cording/piping. This fabric was fairly thick too so that didn't make it any easier. I ended up skipping a lot of the piping. Below is a photo of the side that has piping in the original compared to ours that does not have piping on the side panel. I wish I had left it off in some other areas too.
I do love the finished chair though and I use it. It fits my height well. I'm sure a professional could have done a much better job but I love that my husband and I did the work on this. Here they are side by side.
|

Proudly powered by Weebly