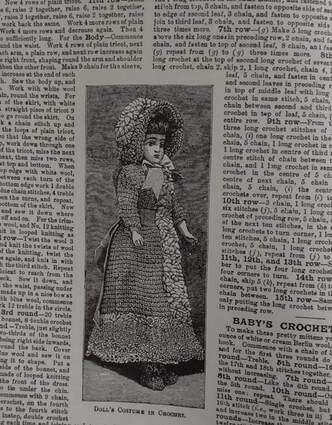
|
I chose to make the "Crochet Square for Quilt With Four Diamonds of Raised Treble Stitches". Weldon's describes it as a "handsome square" and it's worked with something called Strutt's knitting cotton No. 6 and a steel crochet needle No. 15. 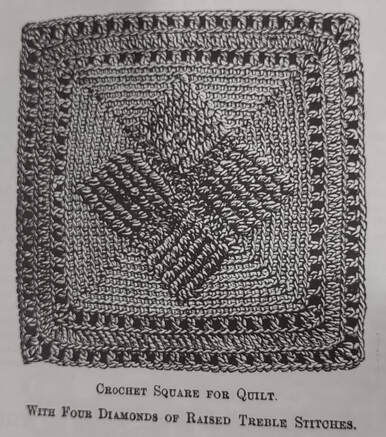 I couldn't find any source that could tell me what the equivalent crochet thread would be. I could find photos of Strutt's No. 4 and No. 8 but it was hard to gauge the size of the thread in the photos. The beginning of this book lists several Victorian cottons and substitutes but not Strutt's. The hook size didn't help much because what I think of as a size 15 steel hook is very small and would be used for a size 100 thread (a very fine thread) and from what I could tell between the two Strutt's sizes I could find the No. 8 wouldn't fall into that range. And then I noticed that the headline on the series said, "The sizes of Crochet Hooks mentioned in the descriptions are regulated by Walker's Bell Gauge." I found the photo below on the website for the Victoria and Albert Museum, London. It isn't a Walker's Bell Gauge but it is a bell gauge. In "Everyone His Own Knitting Needles" by Colleen Formby there is a comparison chart on page 8 that says the slot labeled 15 is usually 1.75mm on most bell gauges. 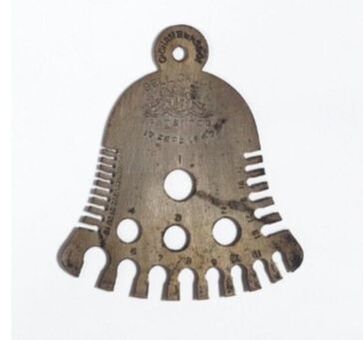 photo from the Victoria and Albert Museum, London So now working backwards from the hook size, crochet thread size 10 seems like a pretty good choice. I went with a 1.65mm hook (aka size 7 steel hook) since that's what I usually use for size 10 thread. 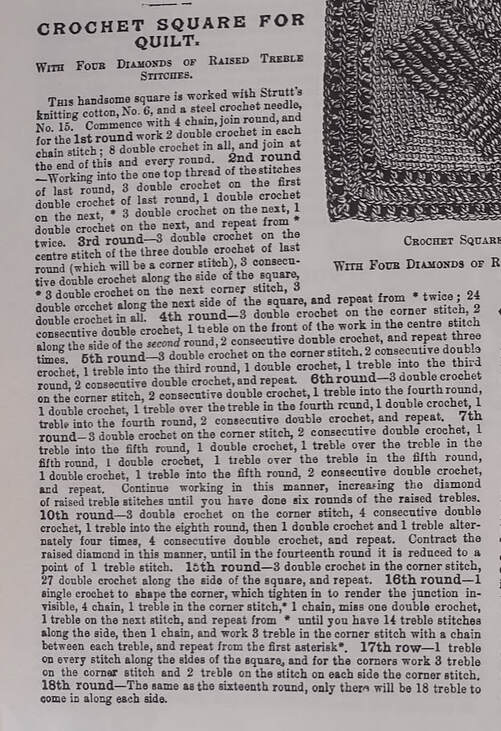 The instructions for this were actually pretty good. I tried starting with 4 chains and working the single crochets into them but ripped it out and went with the magic circle to start. Starting in the 2nd round we are working in into the back loop only for the rest of the square. They say to work into the "one top thread" of the stitches and it seemed like that meant back loop only but having the photo in this case was very helpful. They don't really say to keep doing that but the photo clearly shows the front loops that aren't worked into. Here are my notes that I followed after re-writing it in lines/rounds and switching to US terms. Quilt Square with Four Diamonds of Raised Treble Stitches Join all rounds, crochet into the back loops. Start with 4 chains, joined to make a circle
Here's what I ended up with. Size 10 thread with a 1.65mm hook gives you a square that's about 5 inches. I'm planning on making a few more quilt squares as they come up in future series. Hopefully I'll be able to put them together into something interesting.  Time for the score:
Is the pattern easy to understand? Yes. Aside from not knowing what they thought I should use as thread and a hook, the directions themselves were pretty good. 1.0 If there was a gauge... No gauge give 0.5 Does it look like the illustration? Yes! 1.0 Would someone wear (or use) this? Yes. 1.0 Did I enjoy making it? I did! 1.0 Total is 4.5. Not a bad score for this little square!
0 Comments
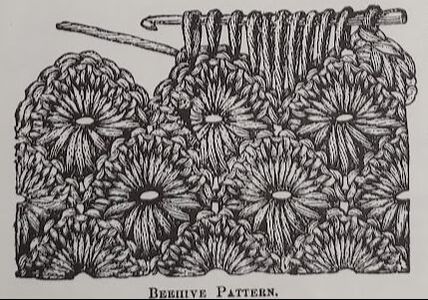
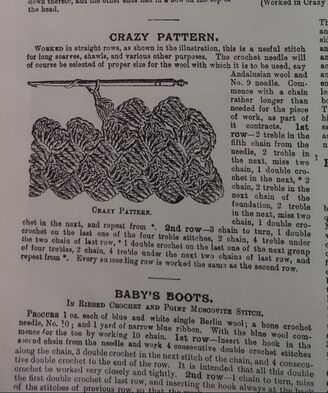
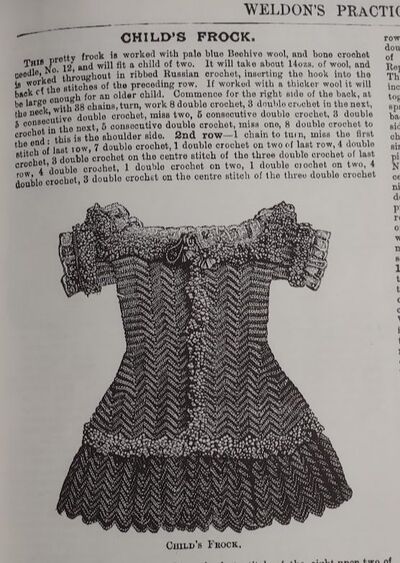
Weldon's Second Series has "47 Useful Articles for Ladies, Gentlemen, and Children". 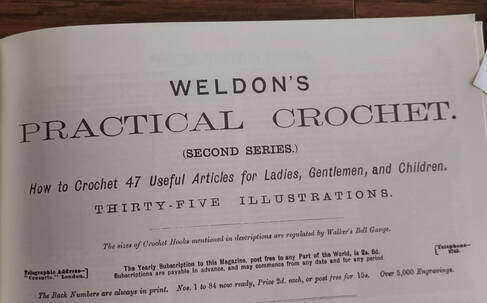 It has clothing for women including several hoods, slippers, shawls and hats. For babies there are multiple slipper/sock/bootie patterns and bibs. For older children there are frocks, hats, slippers and they didn't leave the men out. There are a few hats for them too. There are also several household items in this series like chair covers/antimacassars*, mats, pincushions and four squares "for a quilt". There are even stitch patterns that they call crazy pattern, plum lattice pattern, rice stitch, beehive pattern, herringbone stitch and Point Neige Superbe stitch. *An antimacassar is a protective covering for chair. It was intended to keep the chair from getting soiled by macassar oil that was used in this era as a conditioner and styler by men.
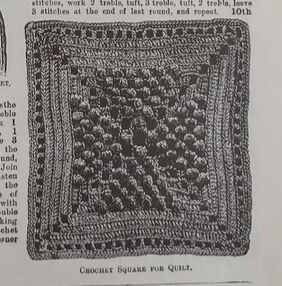 I was intrigued by the squares for a quilt like the one above so I decided I would make one out of this series. They pop up in later series too so I thought if I make a few throughout the year I can put them together somehow at the end of the year. I don't think I'll have enough to make a blanket but I might get a table runner out of them.
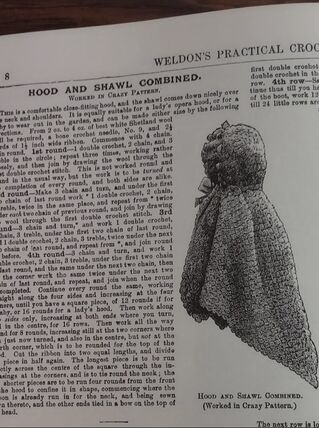
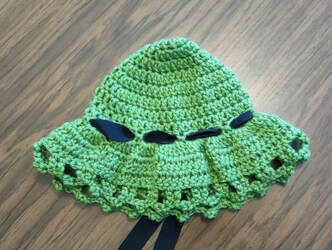
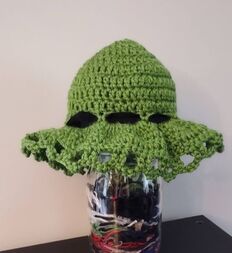
Next week I'll share the results of the Crochet Square for a Quilt shown above. I have a finished baby hat to share. Remember, this hat had no picture to confirm that what I ended up with was what they intended. 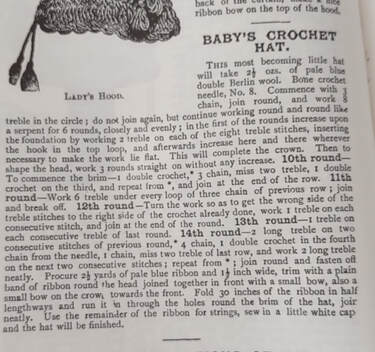 Their suggested materials for this "becoming little hat" include 2 1/2 ounces of pale blue double Berlin Wool, a No. 8 bone crochet needle, 2 1/2 yards of pale blue ribbon that is 1 1/2 inches wide for the trim. According to their glossary, double Berlin wool is a worsted weight yarn that was originally distributed from a Berlin depository and was made for Berlin needlepoint. The recommended hook for this yarn is an H, I or J. There is no gauge given for the pattern. I’ll be using 100 yds of Red Heart Soft in the color Guacamole and an H hook. I have some ¾ inch black ribbon that’s close to half the width they’re suggesting that I'll try. Let's get started! Their directions are in italics and my notes are bolded. Commence with 3 chain, join round. I just did a magic circle here. Work 8 treble (double crochet) in the circle, do not join again but continue working round and round like a serpent for 6 rounds, closely and evenly; I love the serpent description for working in a spiral! In the first of the rounds increase upon the foundation by working 2 treble (double crochet) on each of the 8 treble (double crochet) inserting the hook in the top loop and afterwards increase here and there where ever necessary to make the work lie flat. This will complete the crown. I did a basic increase pattern on this. The first round was increase in every stitch. The second round was double crochet in first stitch, increase in second and so on. Then shape the head, work three rounds straight on without any increase. So far this seems pretty straightforward. 10th round to commence the brim: 1 double crochet (single crochet), *3 chain, miss two treble (double crochet), 1 double crochet (single crochet) on the third, and repeat from * and join at the end of the row. 11th round – work 6 treble (double crochet) under every loop of the three chain of previous row; join and break off. This is the first part I questioned. Do I really need to cut the yarn? Couldn't I just turn the work without cutting it? I cut it but even after finishing it I didn't think it was necessary. 12th round – turn the work so as to get the wrong side of the treble (double crochet) stitches to the right side of the crochet already done, work 1 treble (double crochet) on each consecutive treble (double crochet) of the last round. 13th round – 1 treble (double crochet) on each consecutive treble (double crochet) of the last round 14th round – 2 long treble (double crochet) on two consecutive stitches of the previous round, * 4 chain, 1 double crochet (single crochet) in the forth chain from the needle, 1 chain, miss two treble (double crochet) of the last row, and work 2 long treble (double crochet) on the next two consecutive stitches; repeat from *; join round and fasten off neatly. I'm not sure what a long treble is and they don't define it. They give me a description of a long double crochet in the first pages of this series (aka half double) but not a long treble. I decided I was just going to do a treble (aka double crochet). That gives me an edging like the one below. I think the intention was to leave enough room for the ribbon. 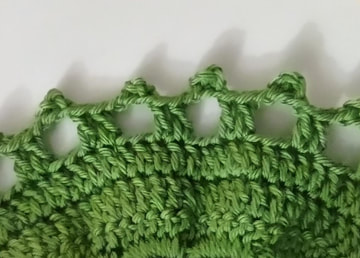 The finishing instructions say to: Trim with a plain band of ribbon round the head joined together in front with a small bow, also a small bow on the crown towards the front. Fold 30 inches of the ribbon in half lengthways and run it in through the holes round the brim of the hat, join neatly. Use the remainder of the ribbon for strings, Sew in a little white cap. I wasn't really sure where to put the ribbon. Running ribbon through the edging shown above is going to make that brim a little droopy. I ended up putting it through the openings made from rounds 10 and 11 at the base of the hat before the brim starts. Here is what my finished version looks like:
I'm not planning on rewriting this one. I think the instructions above are good enough and I didn't like it enough to make it again.
Here's the rating: Is the pattern easy to understand? I think the crochet part is pretty easy to understand. The ribbon finishing was a more difficult to understand. Still, I'll give it a point here. 1.0 Does it look like the photo or drawing? No drawing. 0.5 Would someone wear this? A very small baby could wear it. 1.0 Did I enjoy making it? Yes but I don't think I want to make another one. 1.0 Total score = 3.5 out of 4 The Weldon and Company edition I’m working from was published in 1974. It contains the first through nineteenth series that were originally published around 1895 in London. Fortunately, the editors included explanations of some of the terms for the garments themselves along with stitches and some substitutes for the yarn mentioned in the series.  I'm starting at the beginning with Weldon’s Practical Crochet. (First Series) How to Crochet 36 Useful Articles for Ladies, Gentlemen, and Children. Forty-Five Illustrations. The First Series starts out with “Details of Crochet” where they give a very brief history of the craft as they know it and descriptions and diagrams of some of the stitches including chain, single crochet (slip stitch), double crochet (single crochet) and more. They include directions for increasing and decreasing and special stitches like Tricot Stitch (Tunisian/Afghan stitch) and Krotchee Crochet (Hair-Pin). The 36 Useful Articles include:
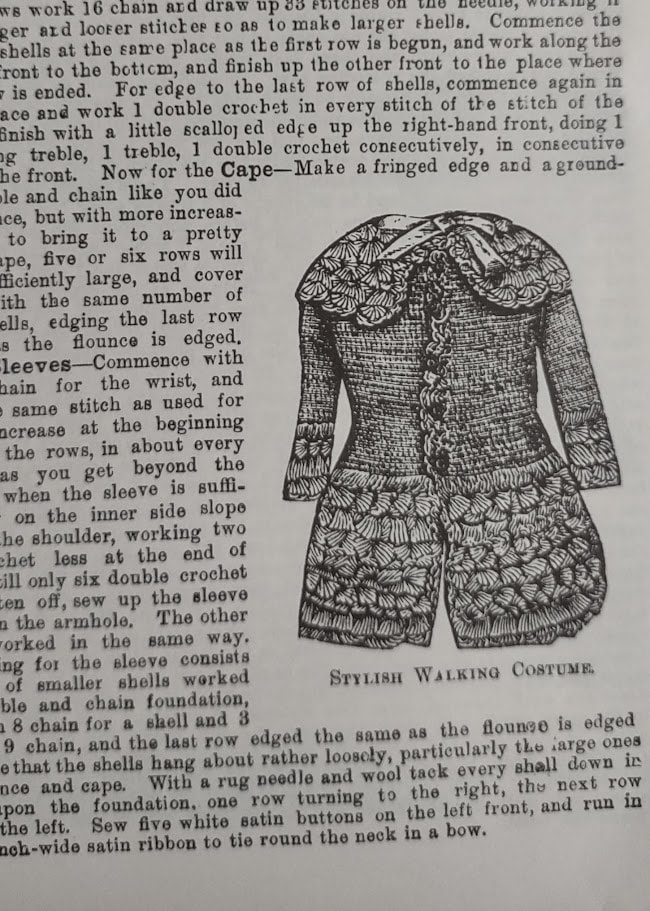
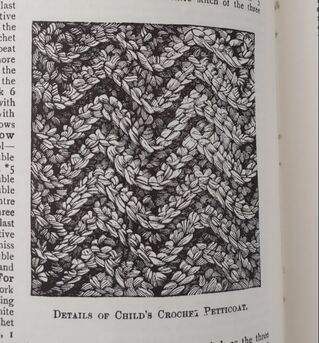
The directions for the basic stitches are shown in the photo below. They seem pretty clear to me but I'm also familiar with the stitches they're using so I can't say this would be easy for someone who hasn't done it before. This is where I could confirm that not only are they using Victorian terms but also what we would now think of as UK terms for the basic stitches. That makes sense since these were published in England.  Here are two interesting projects from the first series that I won't be making because they're pretty involved and I could never get them done in a week. These black and white inserts show so much detail!
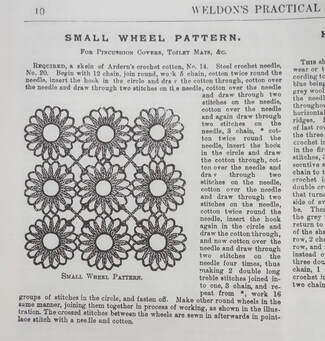
Not every pattern has a photo or drawing but there are photos of stitch patterns and occasionally they'll give you a close up of the stitch pattern instead of the finished item.
For next week, I'll be working on a baby's hat that doesn't have a photo so I won't have any idea what it should look like before it's done.
|
Proudly powered by Weebly