|
Here is my rewritten version of the Gentleman's Cap. This hasn't been completely tested so if there are errors, let me know and I'll update the pattern. 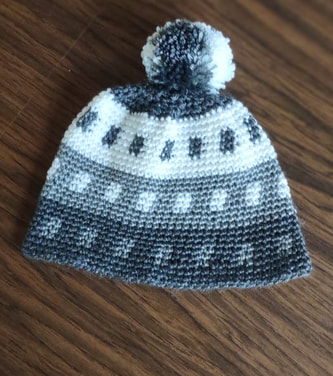 Materials:
Gauge
Stitches and techniques used:
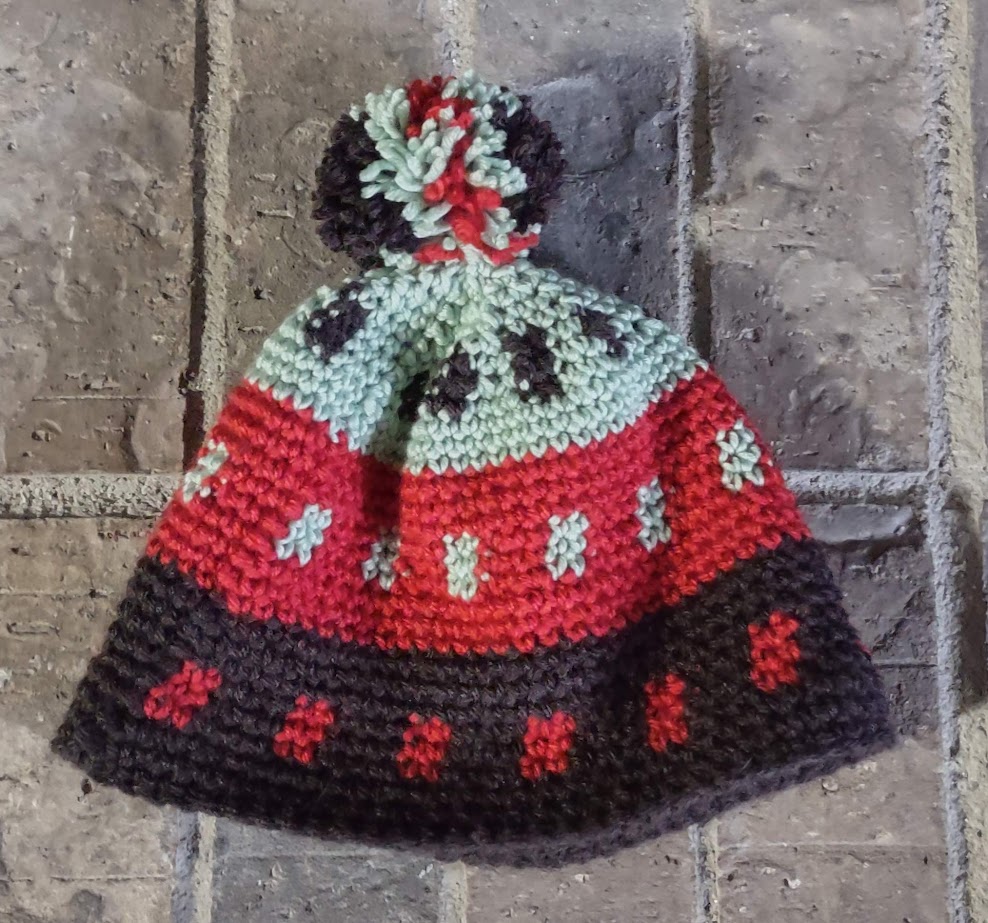
Other pattern notes: You can use whatever colors and order of colors you like. You could make this with dots being smaller scraps of yarn in multiple colors. Or, you could make the whole thing in two colors or 9 colors or whatever makes your heart happy. If you want to make the hat taller you can add an additional 9 rows of the color change pattern (Rnd 10-18) or just add more rows of single crochet at the end. Rnd 1: Starting with color A, make a single crochet foundation row of 70 sc. Check to make sure this is approximately the circumference of your head without stretching it. If the size isn’t right, you can change the number of stitches as long as it’s a multiple of 5. You can also use a smaller or larger hook. Join to the first single crochet without twisting the foundation. (You can use a chain instead but remember to use a multiple of 5 plus 1 for the chain.) Rnd 2: Chain 1, sc in the same sc as you joined, 69 sc, join to first sc in the current round (70 sc) Rnd 3: repeat Rnd 2 Rnd 4: Chain 1, sc in the same sc as you joined, sc 2 Color A, *sc 2 Color B, sc 3 Color A* repeat around to the last two stitches. The last two stitches should be Color B. Switch to color A in the last stitch and join in the first sc of the current round. Rnd 5-6: Repeat Rnd 4 Rnd 7-9: Repeat Rnd 2 in Color A, changing to Color B in the last stitch of round 9. Rnd 10-12: Repeat Rnd 2 in Color B Rnd 13-15: Chain 1, sc in the same sc as you joined, sc 2 Color B, *sc 2 Color C, sc 3 Color B* repeat around to the last two stitches. The last two stitches should be Color C. Switch to color B in the last stitch and join in the first sc of the current round. Rnd 16-18: Repeat Rnd 2 in Color B Rnd 19-21: change to Color C and repeat Rnd 2 Rnd 22-24: Chain 1, sc in the same sc as you joined, sc 2 Color C, *sc 2 Color A, sc 3 Color C* repeat around to the last two stitches. The last two stitches should be Color A. Switch to color C in the last stitch and join in the first sc of the current round.(70) Rnd 25: In Color C, chain 1, *sc 3, decrease 1* around, join in first sc of current round (56) Rnd 26-28: Repeat Rnd 2 in color C, changing to Color A in the last stitch Rnd 29: Chain 1, *sc 2, decrease 1* around, join in first sc of current round (42) Rnd 30: Chain 1, *sc 1, decrease 1* around, join in first sc of current round (28) Rnd 31: Chain 1, *sc 5, decrease 1* around, join in first sc of current round (24) Rnd 32: Chain 1, *sc 1, decrease 1* around, join in first sc of current round (16) Rnd 33: Chain 1, decrease around, join in first sc of current round (8) Sew top closed and add a pom pom. Let me know if you make one!
0 Comments
Making the Gentleman's Cap was not completely pain free. In some cases my experience helped and in some cases the wording that they used made it harder to understand. As I said last week, there are no pictures or even drawings in this book to compare my work to. Let's start out with the stitch. This pattern is done entirely in what they call double crochet. Since this book was described on the cover as "From the Latest London Edition" I am assuming that they're using what we generally refer to now as UK terms and we would refer to that stitch as a single crochet. It wasn't too difficult to confirm this because they tell you (sort of) how to make these two stitches. The first one is how they make a muffatee (a wrist warmer). The second one seems to be just a stitch description.
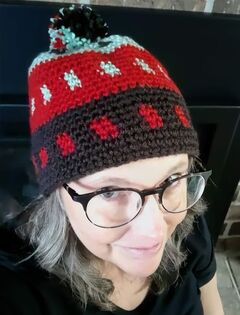
The fiber they suggest using is German lambs' wool or 3 ply fleece in dark brown, scarlet and light green. I used Vanna's Choice 100% acrylic yarn in Espresso, Scarlet and Martha Stewart yarn in Eucalyptus. All are worsted weight yarns leaning towards the heavier side of worsted. The hook they suggest is a coarse ivory hook. I'm including their directions and I'll tell you how I interpreted it.  "Make a chain rather longer than the circumference of the cap required". What does "rather longer" mean? This one took a couple of attempts. To start, I read the whole pattern and realized that the color pattern is a 5 stitch pattern so I used a multiple of 5 +1. The first attempt was 76 chains since that seemed longer than the circumference of my head. After getting about 6 rounds in I realized this was going to be pretty big so I started over with 71 chains. For me, rather longer = about 5 more chains than the circumference of my head. I joined the ends together, chained 1 and did three rows of brown single crochets. It doesn't say whether you should join the rounds or work them in a spiral so I went with joining to the first single crochet in the round, making a chain 1, and starting the next round. "Prepare for working with the scarlet wool by fastening it on a few stitches before you want to use it in the following manner" This is from the second paragraph above. Then they use a lot of words to tell you to crochet over the unused yarn every other stitch. I probably would gone over the unused yarn in every stitch but this is fine.  "Crotchet 3 brown and 2 scarlet stitches alternately for 3 rounds." I wasn't sure that meant they wanted me to do 3 brown and 2 scarlet in one row and then alternate to 3 scarlet and 2 brown or just do 3 brown and 2 scarlet in each row. I tried the first way and then realized they were looking for spots in the next sentence (good thing I read it so carefully the first time) so I ripped that out and did three rows of 3 stitches in brown and 2 in scarlet so they lined up and would look like spots. Then I did the next three rounds in brown. Now you can see the pattern! 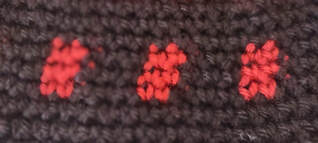 "Fasten on the scarlet again for another strip and make the spots green". I fastened on the scarlet and immediately started doing the color changes which was, of course, wrong. To make it look like spots I need the three rows of red first just like the section below. When they said, "strip" they meant the entire 9 row pattern. I ripped that first row of scarlet and green out and did 3 rows of scarlet, then 3 rows of color change and then 3 more rows of scarlet. This is where I suddenly noticed that they didn't tell you how to change colors and when to add that new color to the stitch. They assume you don't know how to carry yarn but do know how to change colors. "Continue thus to vary the colors until the cap is about 6 inches long". I decided the next row would be green with brown spots and got close to 6 inches after the first three rows of green. "Then begin to decrease...by passing the needle through 2 stitches at once after every 6 stitches". I know multiple ways to decrease but I don't think you can pass the needle through 2 stitches at once except maybe in a post stitch? The only way I could think of that this made sense was what we now call an invisible decrease where you're picking up the front loop in each of the next two stitches. You aren't really doing them "at once" but it's closer than a more typical decrease so I did invisible decreases. It ends with "and so on until you have very few stitches left. Fasten off with a cross stitch needle and sew on a tassel". Since I was so close to the top, I just did two additional rows in the green to finish it off and add a pom pom. While this wasn't pain-free it wasn't terrible and the hat turned out looking like a hat.
Next week, I'll post their pattern rewritten in more modern terms along with a few adjustments that should make it a little easier. As we go through the year of Victorian patterns I may attempt to do this if I think the pattern would benefit from it and it's something people might want to make. If I don't do it for a pattern and it's something you would like to see, let me know and I might add it to the list. Here's the rating: Is the pattern easy to understand? I'm giving them credit for a least describing the stitch. It didn't start well with "rather longer" as a description for the starting chain. Overall it wasn't too difficult so I'll give it a 0.5 Does it look like the photo or drawing? There wasn't a drawing or a photo. I don't necessarily want to drop the rating for not having a photo so I'll give it a 0.5 if there isn't a photo. Would someone wear this? Yes! 1.0 Did I enjoy making it? Yes. 1.0 This gets a 3 out of 4. 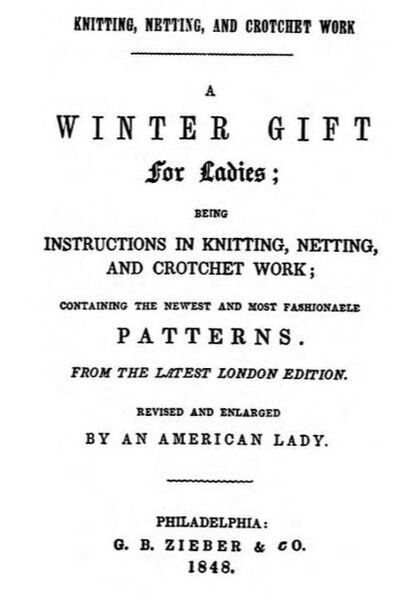 One of my main sources for vintage patterns is the Antique Pattern Library and I found a few options there to supplement the Weldon’s series. One is a pdf of a booklet called “An American Lady, Winter Gifts for Ladies” from 1848. It’s 65 pages and includes knitting, “crotchet” and netting patterns. There are no photos of any of the patterns. I had to laugh when I read this interesting introduction,
“To the Ladies of America. It is customary amongst the German ladies to have at hand some light piece of work, with which they can at any time be employed. When passing the evening in one another’s society, even when passing a morning visit, or after dinner at a dinner party, or while sipping coffee, or taking ices at the public gardents (sic), the consider their knitting or netting needles an indispensable accompaniment. And there appears to be a charm in the occupation that promotes rather than impedes conversation. Our American ladies will doubtless find the custom worthy of imitation. Many an hour which would pass tediously if they were forced to find topics of conversation, may be whiled pleasantly and profitably away, by the assistance of some agreeable employment, which interests without engrossing the attention. The facility of carrying about almost all species of knitting and netting render them peculiarly well adapted to this purpose. In the following little work, all the different species of knitting, netting and crotchet, are so carefully explained, that a person totally unacquainted with their mysteries, may become proficient wit very slight pains. The most useful kinds of knitting, as well as the more fanciful, have been carefully inserted, and many new stithes (sic) are now offered to the ladies of America, with which we flatter ourselves, they have never before been acquainted. ” Here are my thoughts on that introduction:
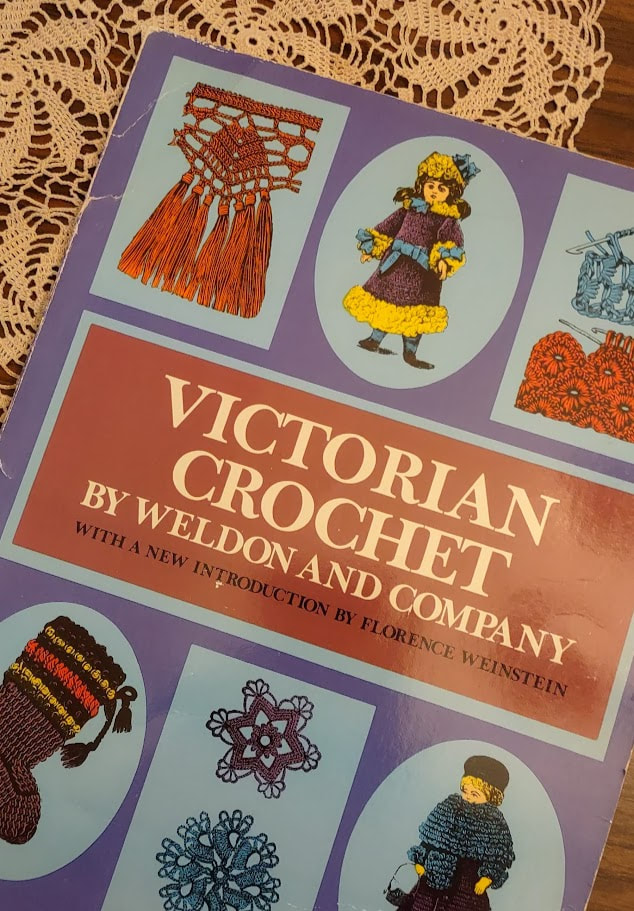
On to the actual patterns. The booklet has 65 pages. The knitting and netting patterns start on page 12 and there are about 60 of them. Many of them are edgings and bags. Crocheting patterns and directions start on page 54 of the booklet and there are four patterns. After these four patterns they go back to knitting patterns for the rest of the booklet. The four crochet patterns are:
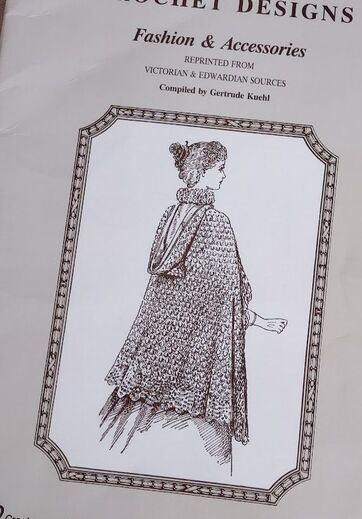
Aside from the hat, none of them list a yarn or a hook. The cap suggests a German lambs’-wool or 3-ply fleecy and a coarse ivory needle. For next week, I’m going to try the hat with a worsted weight yarn and a I hook. Tune in then to find out if there were only “slight pains” to make this. My original plan for 2024 was to do vintage patterns by the decade starting with the earliest ones I had in my collection. I planned to start with a book called, “Crochet Designs, Fashion & Accessories, reprinted from Victorian and Edwardian Sources”. It was compiled by Gertrude Kuehl for the Knitting and Crochet Guild of London in 1990. It has patterns that run from 1830s to 1919. After that I would move on to the 1940s and see how far we got with the decades in order. Then, my friend, Julie shared a book with me called “Weldon’s Practical Crochet” that has their first 19 series of newsletters with 30-50 patterns in each! Weldon’s patterns were published mainly in the Victorian era and now I had a lot of them. A new plan was formed; 2024 will be mostly Victorian age (1837-1901). I can’t promise I won’t veer into more modern patterns but the Victorian era will be the initial focus. This should be an interesting process. Yarns were different, stitches had different names and directions were often vague, some don't even have photos. It should be fun! Next week I'm starting with a booklet I found on the Antique Pattern Library website from 1848. Then I'll move on to these two physical books I have:
|
Proudly powered by Weebly