|
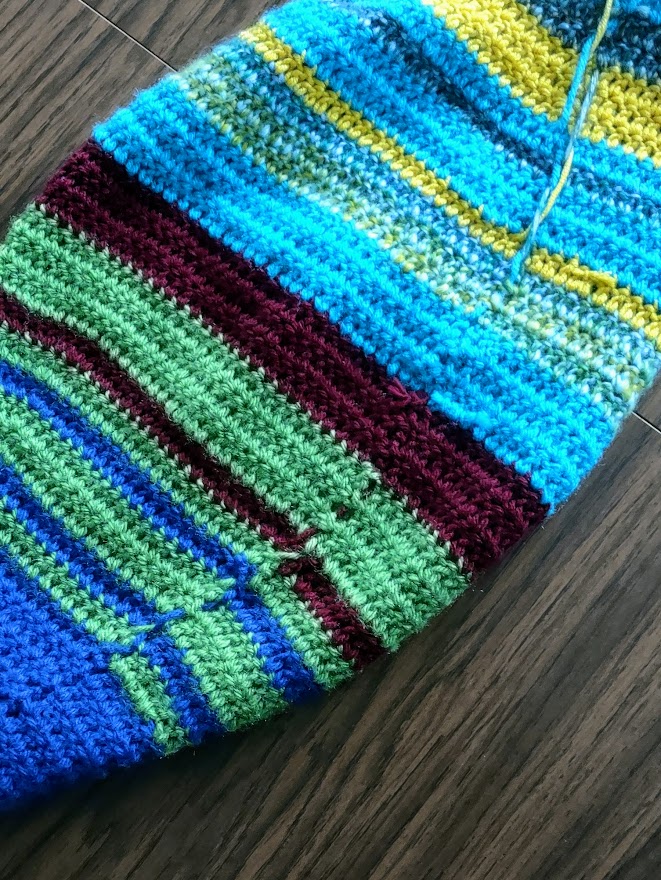
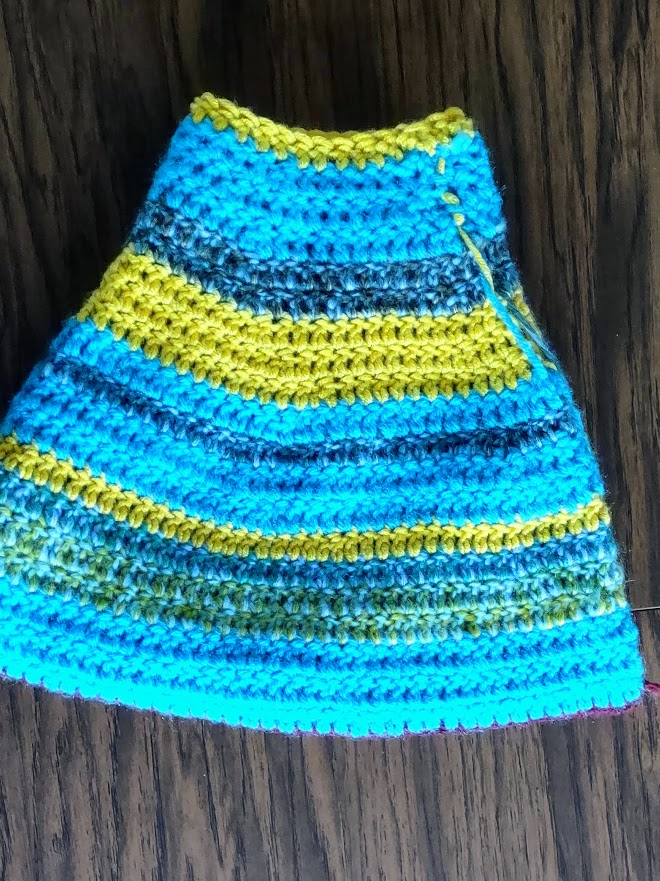
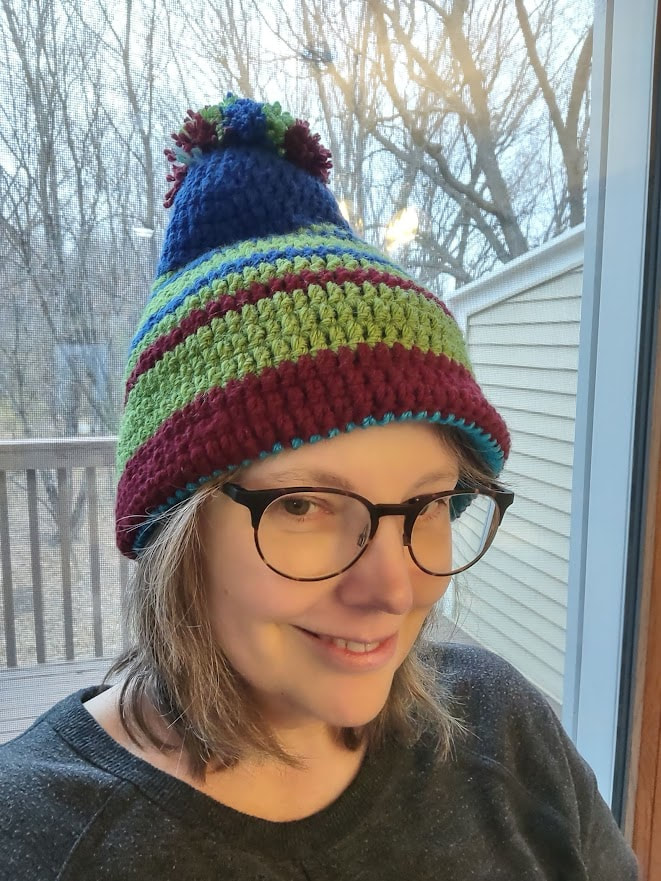
This week's hat is dedicated to Corinna who suggested this pattern book. It has a section with "A Covey of Caps" that were excellent vintage options for this blog. I chose to do the Reversible Ski Hat because it seemed like it would be a great way to use up some scraps and I was intrigued by the reversible part. 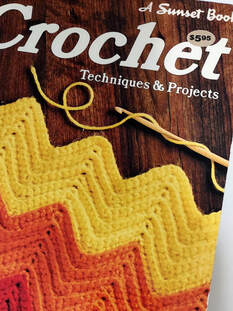 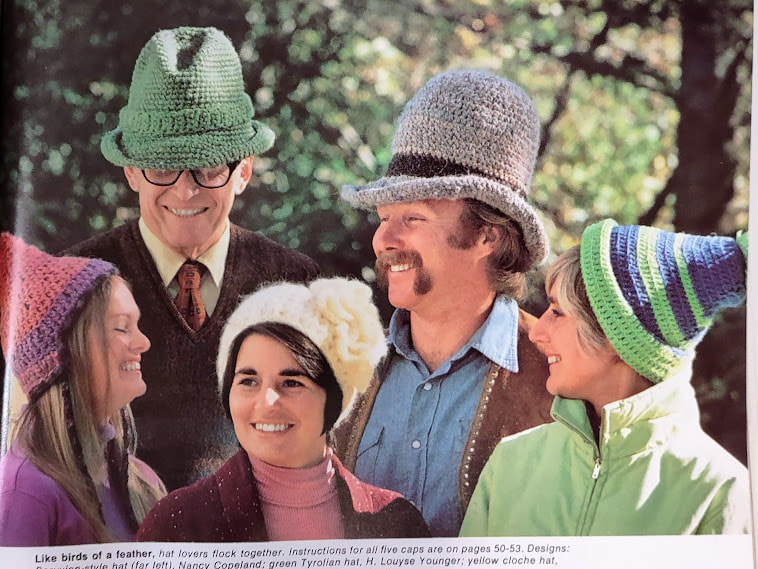 From left to right; Peruvian-style Hat, Green Tyrolian Hat, Yellow Cloches Cap, Cowboy Hat, Reversible Ski Hat. This hat uses worsted weight and an E hook. An E hook with worsted weight yarn is typically what I would use for amigurumi so I expected this to turn out pretty dense and structured. This hat is done entirely in double crochet in the round with the rounds joined with a slip stitch. It has a chart to get the colors the way they look in the photo but I ignored that and just tried to use up my scraps. 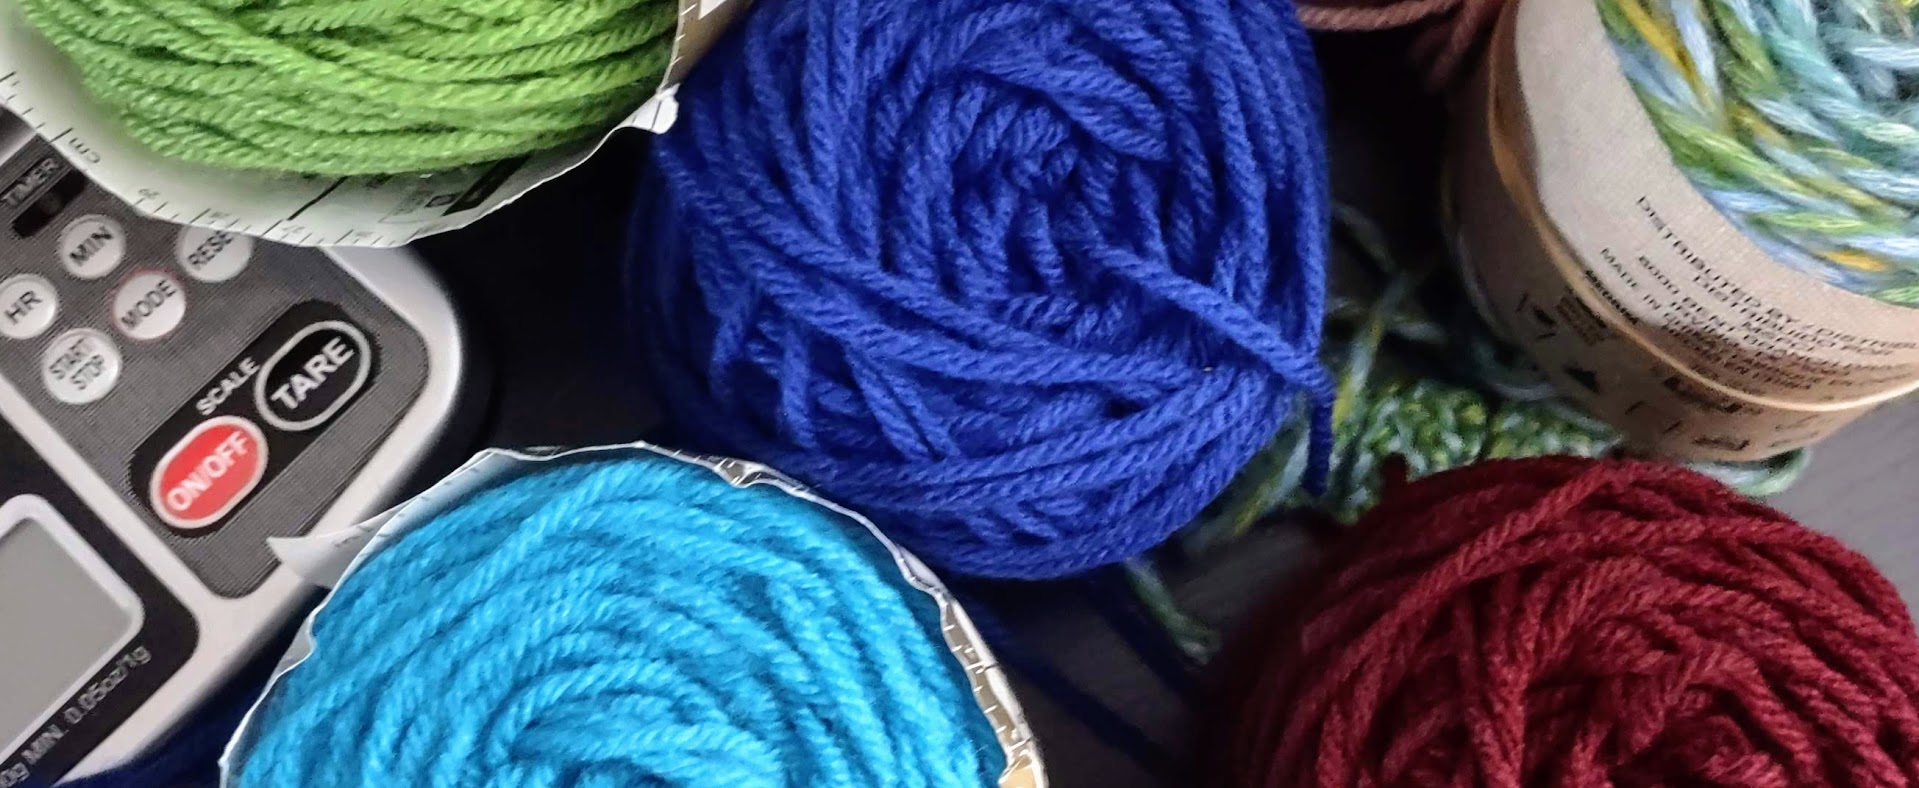 Green, Blue, Brick Red, and multi colored yarn scraps used for this hat. Not pictured is the gold I added in partway through. The directions were pretty good right up to the assembly part. The photo below shows what you end up with when you finish the crocheting part of the hat. 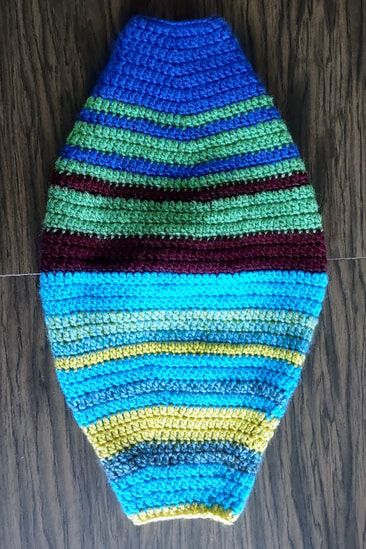 I considered just folding one side up into the other one and then seam together around the short end. That's the easy way to do this. Their way is a little more complex and the only benefit to their version is that the hat would hold together a little bit better. Here are their instructions: 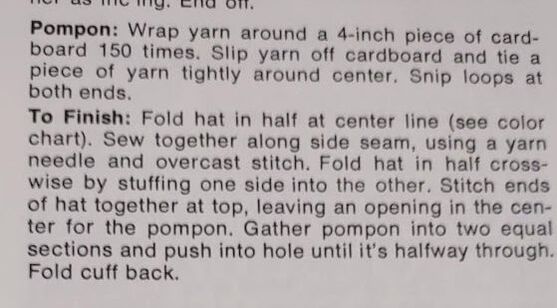 I was skeptical that this would work and I was partly right. I tested it by loosely doing the overcast seam and then "stuffing one side into the other" and it came out inside out. Maybe I just didn't do it right but it seemed like the only way to do it. Here's what I ended up doing: Turn the hat inside out and fold in half at the center line and do an overcast stitch along the side where your rows were joined.
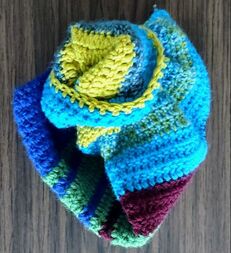
Once it was seamed, I turned it inside out starting with the small end and ended up with the photo on the right:
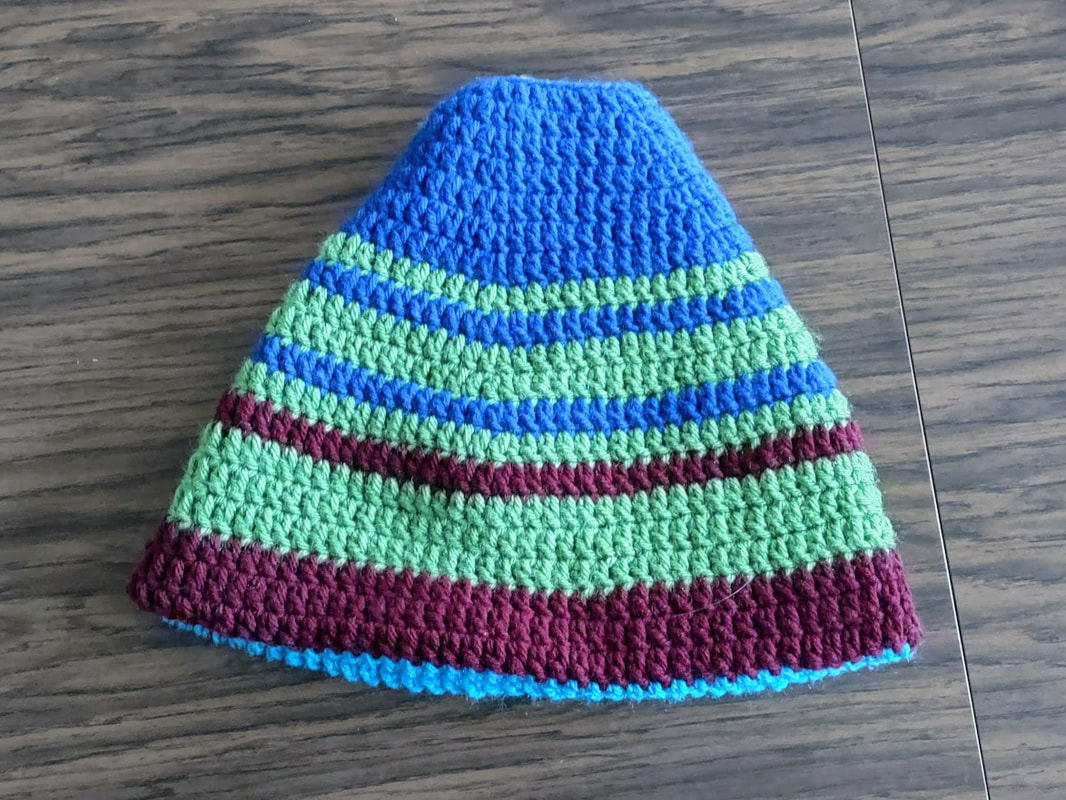
I used a pom-pom maker and did each side in matching colors so it would match the hat. The pom-pom sticks out half way on each side. I sewed the small end together a little bit and then stuck the pom-pom in the opening and used the tie from the pom-pom to sew it together the rest of the way.  This hat stands up all on it's own! It's very structured. Getting that pom-pom in right was a little bit fiddly but I got it to work. This is two layers of worsted weight yarn crocheted with a fairly small hook for that weight. It's thick and can stand up all on it's own. It's so thick that I couldn't fold up the brim like the woman in the photo is wearing it without it getting weird.
I got it to work and it technically fits but I'm giving it a 3.5. This isn't a hat I would wear and the instructions could have been better for the assembly. The half pom inside the hat feels a little odd too. I'm sure this is warm but it gives off Who-ville vibes. Maybe that's appropriate for the season?
This is a great idea for a hat and with a few adjustments it might be more flexible. I think you could drop the yarn size down to sport, keep the E hook and get rid of the pom-pom. You'd have to do more stitches and rows to get the size right but you'd have a cozy reversible hat that should have a little more give in it.
0 Comments
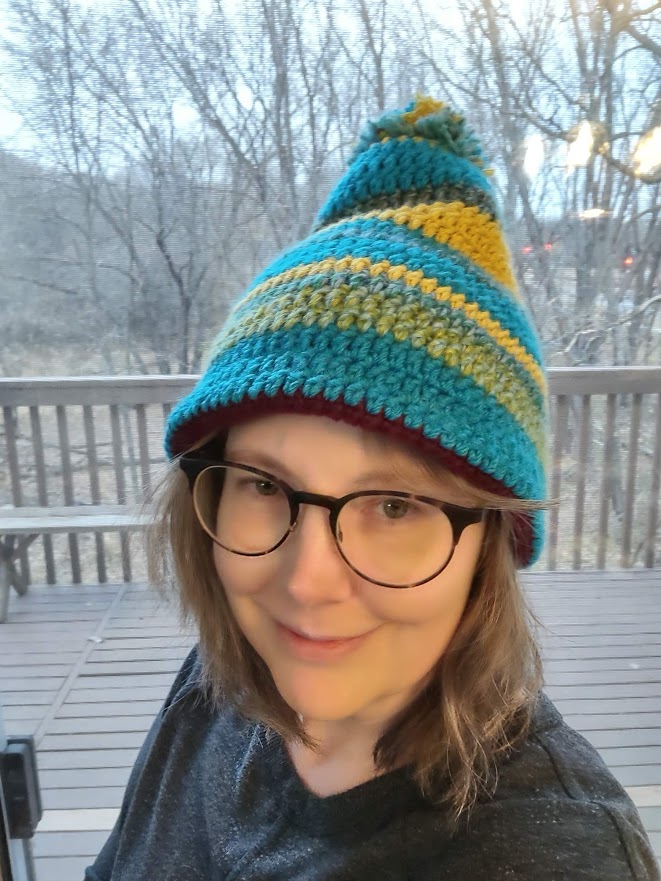
This week I have a striped beret from the Heads to Toes booklet. I don't really like pom-poms and I wasn't sure about the stripes but I had yarn that came close to the photo so thought I'd give it a try. 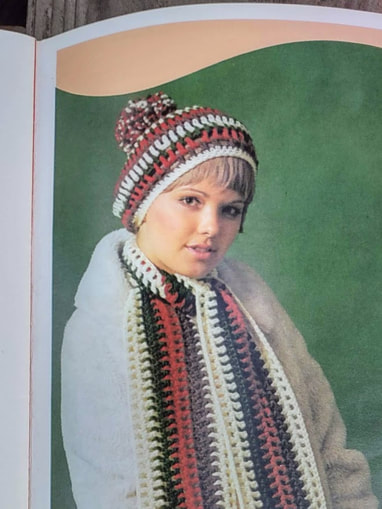 This hat uses worsted weight yarn and the pattern gives the amount for the hat and scarf together (4 ounces each of four colors) so I had to guess on the amounts for the hat. I figured that I'd need about an ounce of each color, maybe a little more on the cream stripes. It uses an H hook so I thought this would go fairly quickly and I was right. The directions are pretty well written, especially on the rows that have increases and decreases. It's worked top down, changing colors almost every row. There are a few sections where it tells you to increase the same way you were for the next two rows but it's basic circle increases so it wasn't hard to understand. This took me about two hours to make and it turned out much better than I expected. We were headed out to the Minnesota Landscape Arboretum the next day so I sewed the ends in on the way there and then wore it that day. It was a beautiful fall day with temps in the 60s and the hat did a great job of keeping the wind from blowing my hair all over the place without being so warm I was sweating. I even got a compliment from the cashier in the café. I'm considering making a second one in a colors that match my fall jacket a little bit better and giving this one away. Maybe to someone who likes the Minnesota Wild since the colors sort of match those team colors. 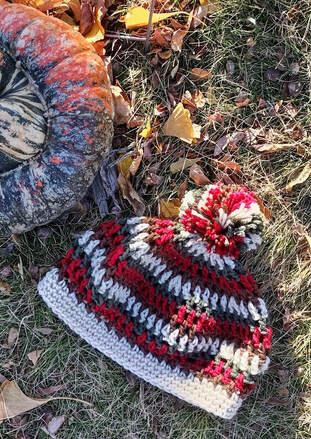 Here it is on me at the Arb. The first photo is in the nut tree area and the second is by the grasses. This one definitely gets a 5 out of 5.
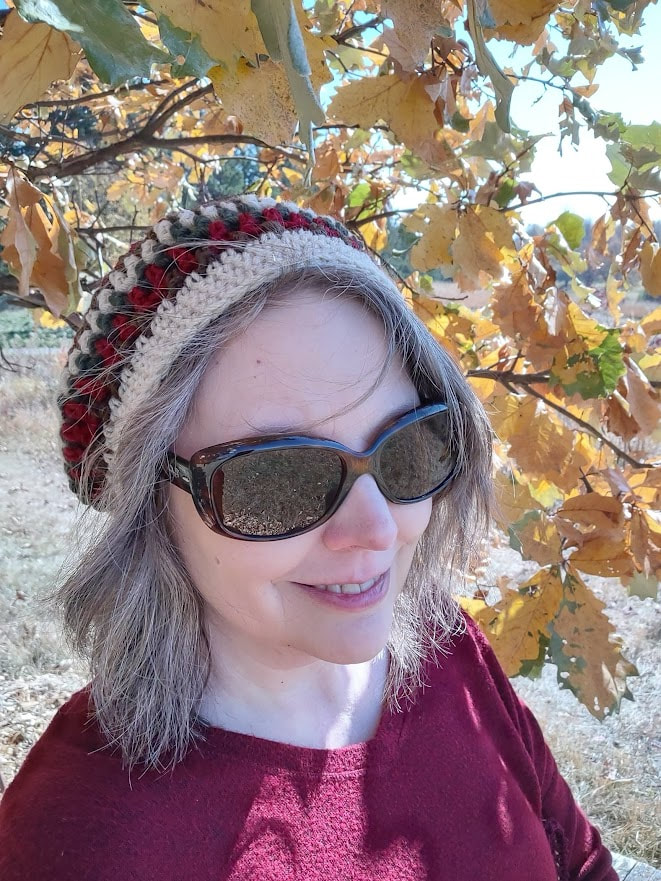
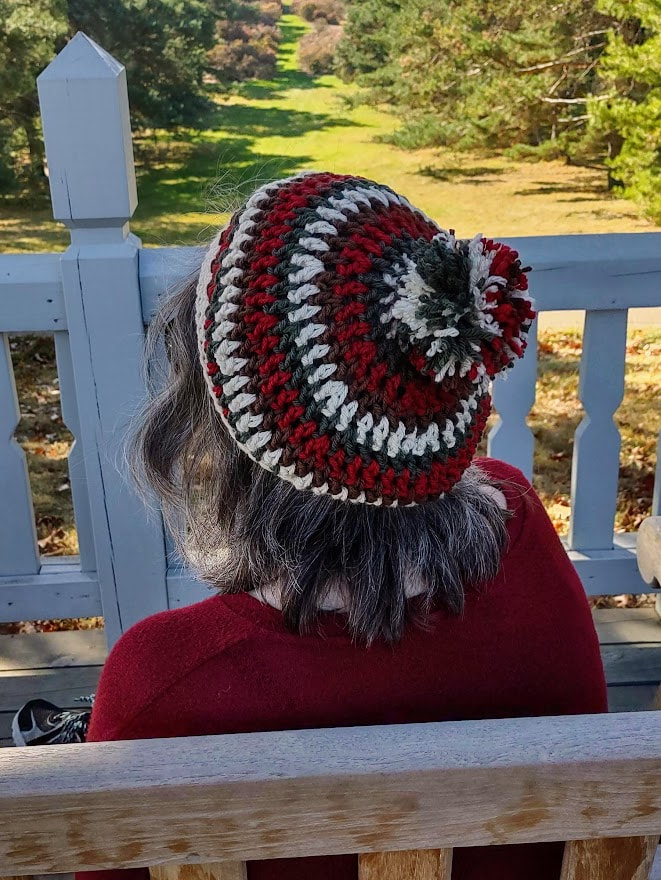
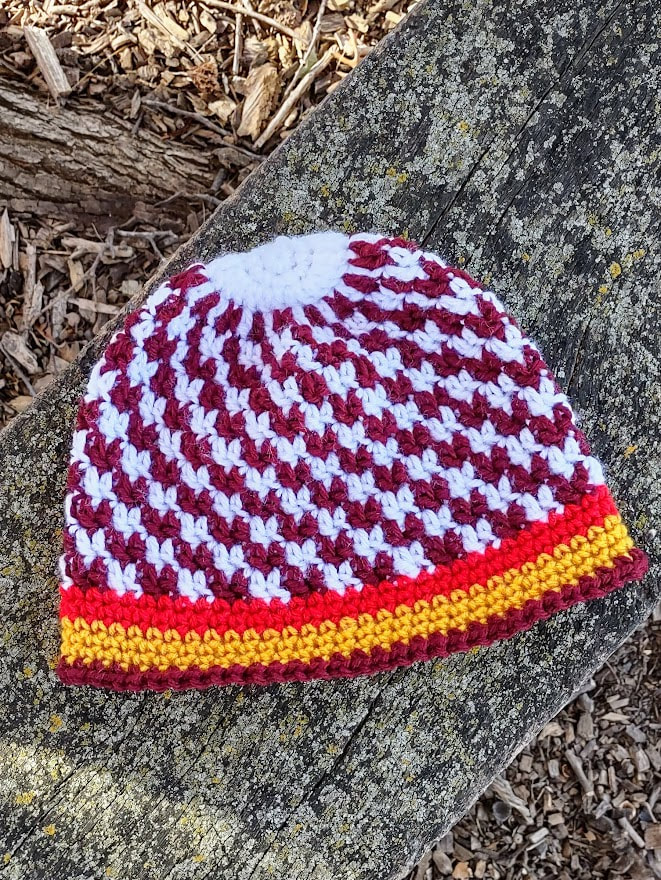
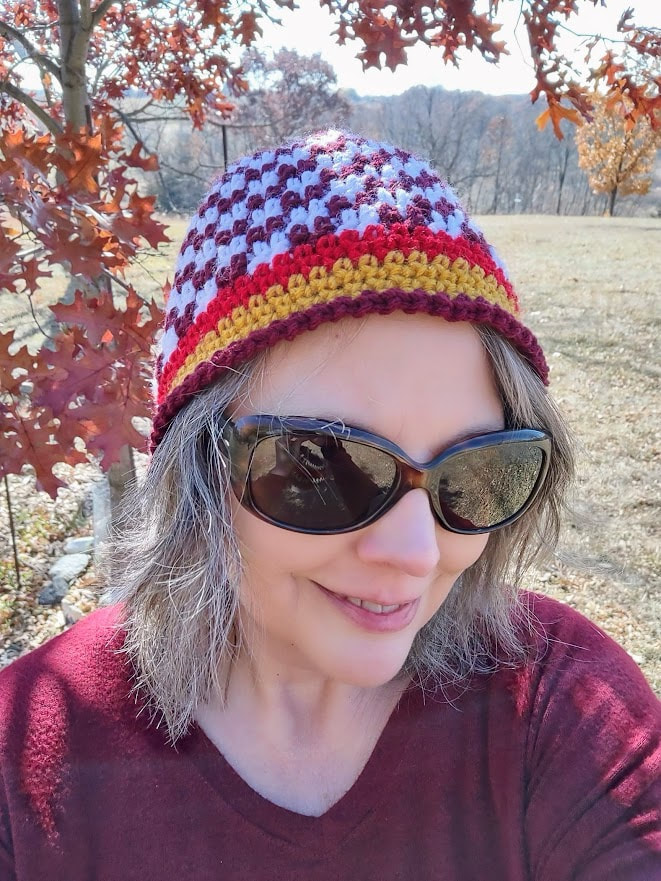
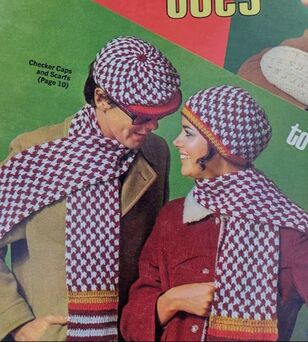
This week it's the Checkered Cap for Girls. I considered making the Boy version but it wanted buckram to make the visor more solid and that seemed like more work than I wanted to do.  Because this booklet was issued by a yarn brand company, they give very specific yarns for each pattern. None of those are available today. They all seem to be worsted or aran weight though and I found colors to match their colors in my stash. This pattern uses a size H hook and gives a gauge. I sort of checked the gauge and it seemed close enough. With the H hook, this went pretty quickly even with the constant color changes. The pattern has excellent instructions on how to change colors in the pattern and gave instructions for every row instead of saying something like, "continue in pattern." Overall, this was a well written pattern that worked up quickly and looks pretty good. As I was making it, I felt like I was making a hat in my high school colors (maroon and white) until I got to the brim with the added red and gold. This would be an easy hat to do in team colors.
I took this with when we went to the Arboretum so I could get some photos with a background other than my deck. I'm giving this a 5 out of 5. It was easy to make, the instructions were good, it's cute and it fits!
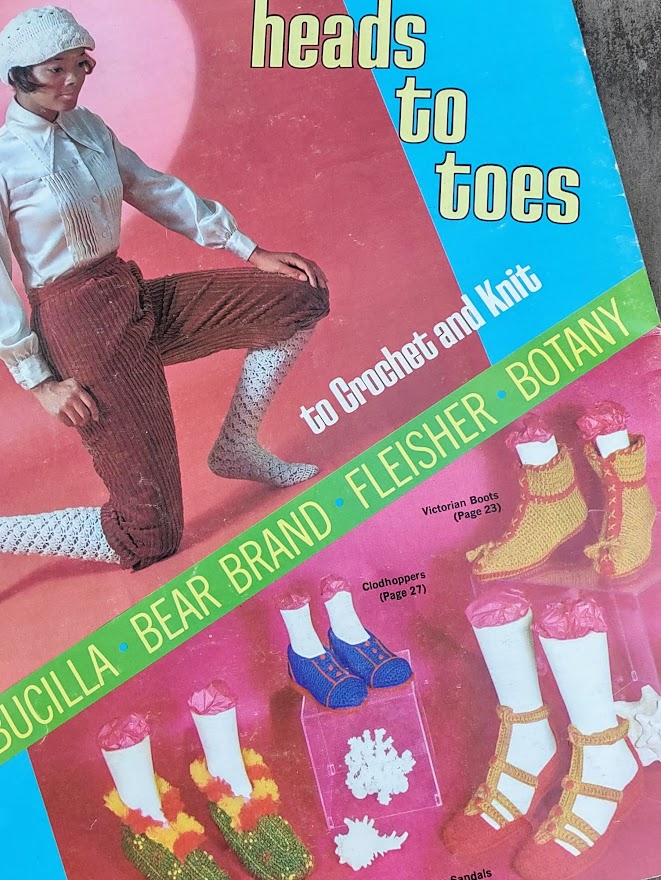
Next week's hat is done already and is one of my favorites! November will have two hats from this booklet called Heads to Toes. This booklet has both knitted and crocheted hats and um...things for your feet.
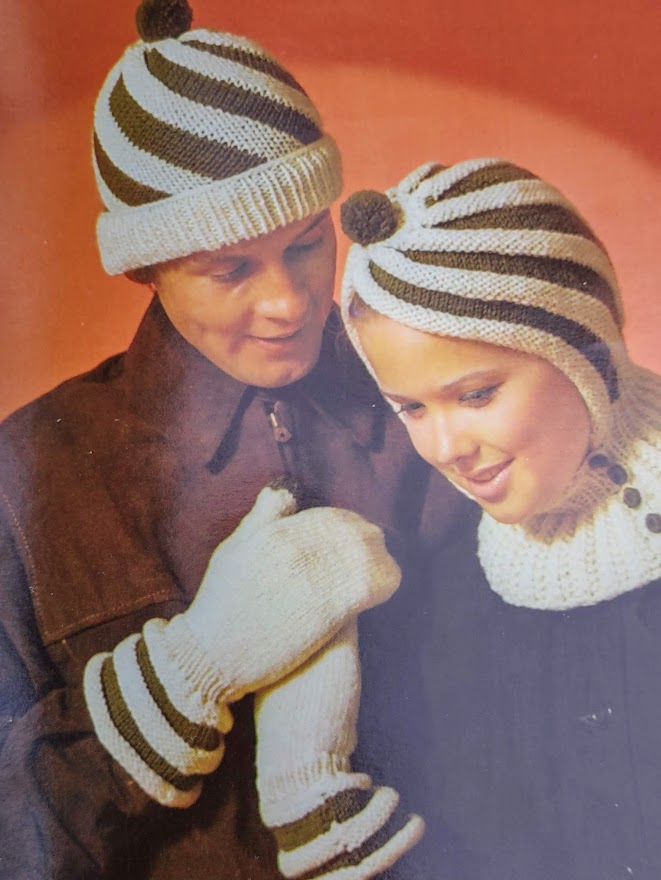
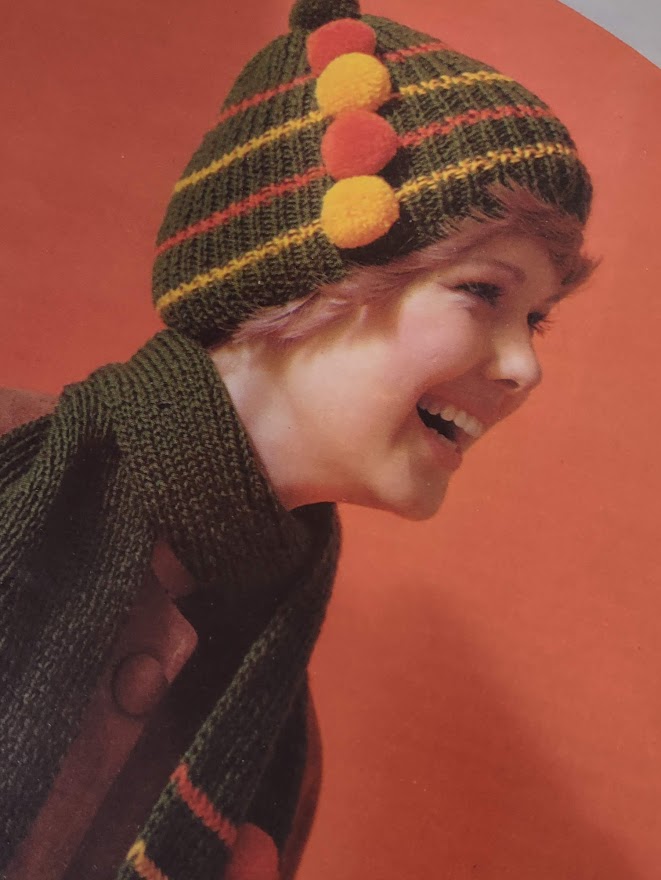
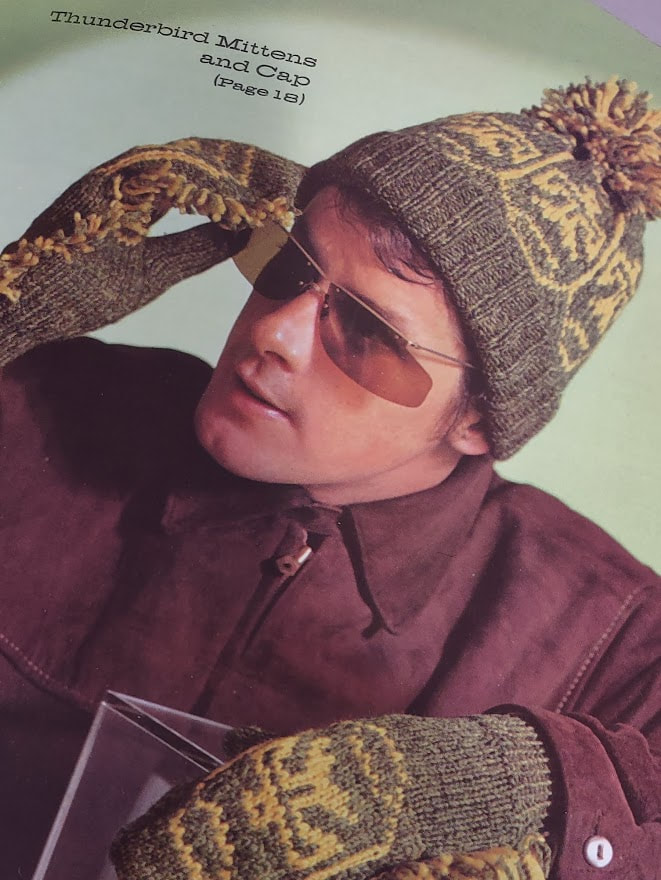
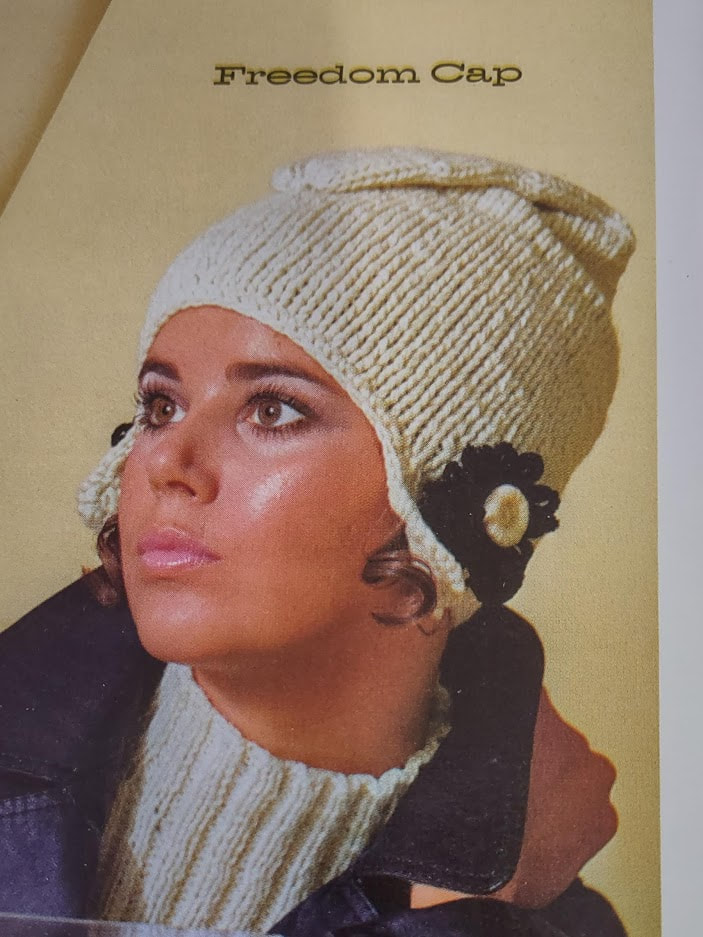
The "Toes" patterns include; Indian Moccasins, Clodhoppers, Victorian Boots and Roman Sandals. I'm intrigued by the Victorian boots but the colors they used are pretty terrible. They're the item under the word "Botany" in the photo above. One of the ways you can tell this is from the 70s is that some of the patterns and the names they chose for them are not appropriate today and of course they are all crocheted. We have a Babushka scarf and an entire outfit that is dressed up to look Native American made of a Serapi, Head Band and Pouch (aka poncho, headband and purse). That leaves me with four patterns from this booklet that I can make. Three of the remaining four have brims and want you to crochet some buckram between the layers and I'm just not willing to put that much work into a hat. The checkered hat on the cover will be the first one I make. Some of the knitted hats are fun too. I really like the Swirl Hats. They're unusual but kind of cool. The cowl on the one the woman is wearing looks practical and cozy. The Thunderbird Mittens have that odd fringe that seems like it would get snagged on everything but the hat is pretty nice. The Pom-pon Hat has a lot of pom-pons on it so I guess that name makes sense. I'm not sure I would wear that but it might fit someone else's personality perfectly. I don't know what's going on with the Freedom Hat. Is it called that because there's so much free space in that flap that's folded over her head? (After I posted this a reader gave me a link to this information about Phrygian hats which was very interesting and completely explains why that hat is called a Freedom hat. )
Next week I'll have the finished Checkered Hat to show you!
|
Proudly powered by Weebly