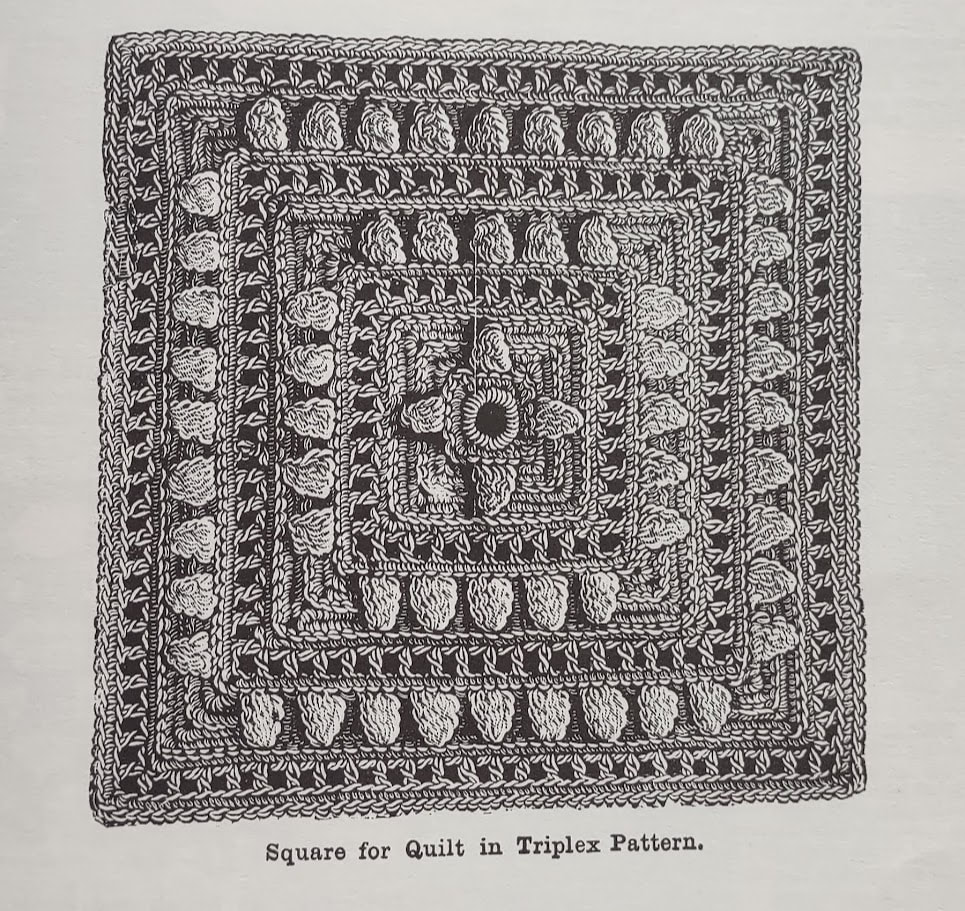
 This series is all about motifs/squares, borders and edgings. There are 20 patterns and 20 photos in this series. Eleven of them are squares, hexagons or octagons and the rest are edgings or tassels. Let's start with the quilt squares. This first one could be the center of blanket if done in worsted weight and extra borders added around.  Some of these are more open than I would think a blanket should be but they are very pretty.
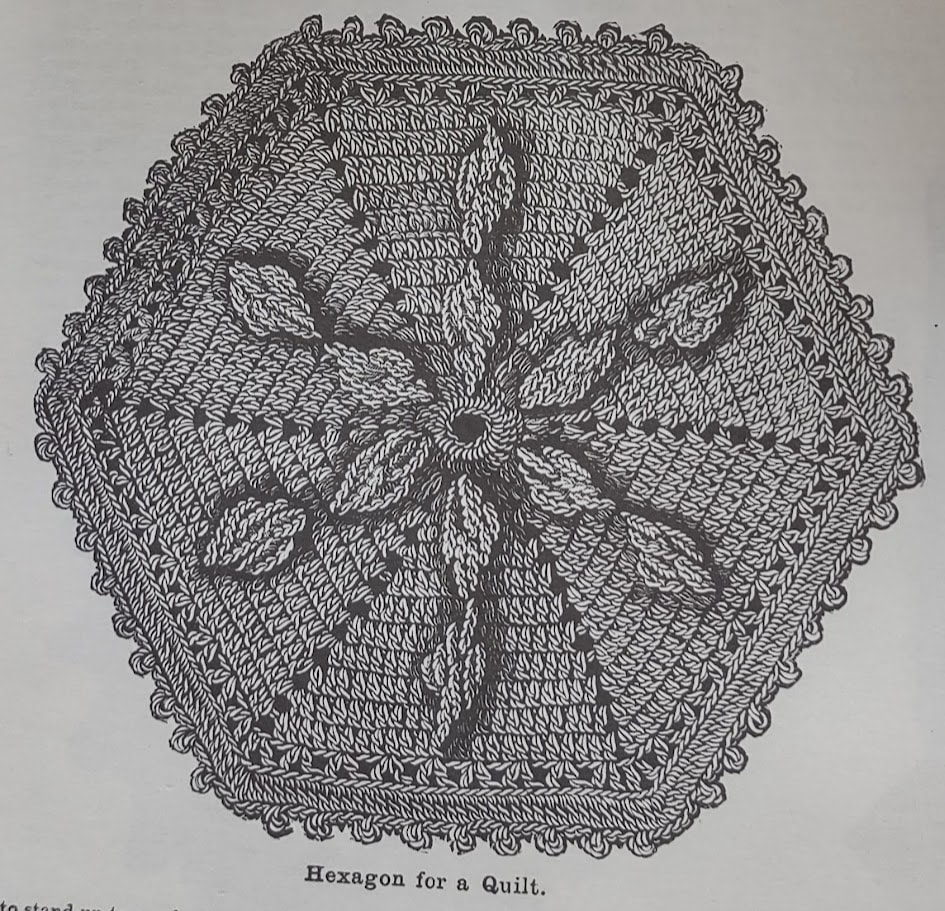
There are also hexagons if you want something a little different.
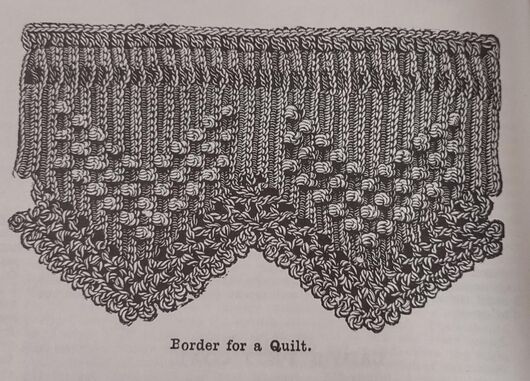
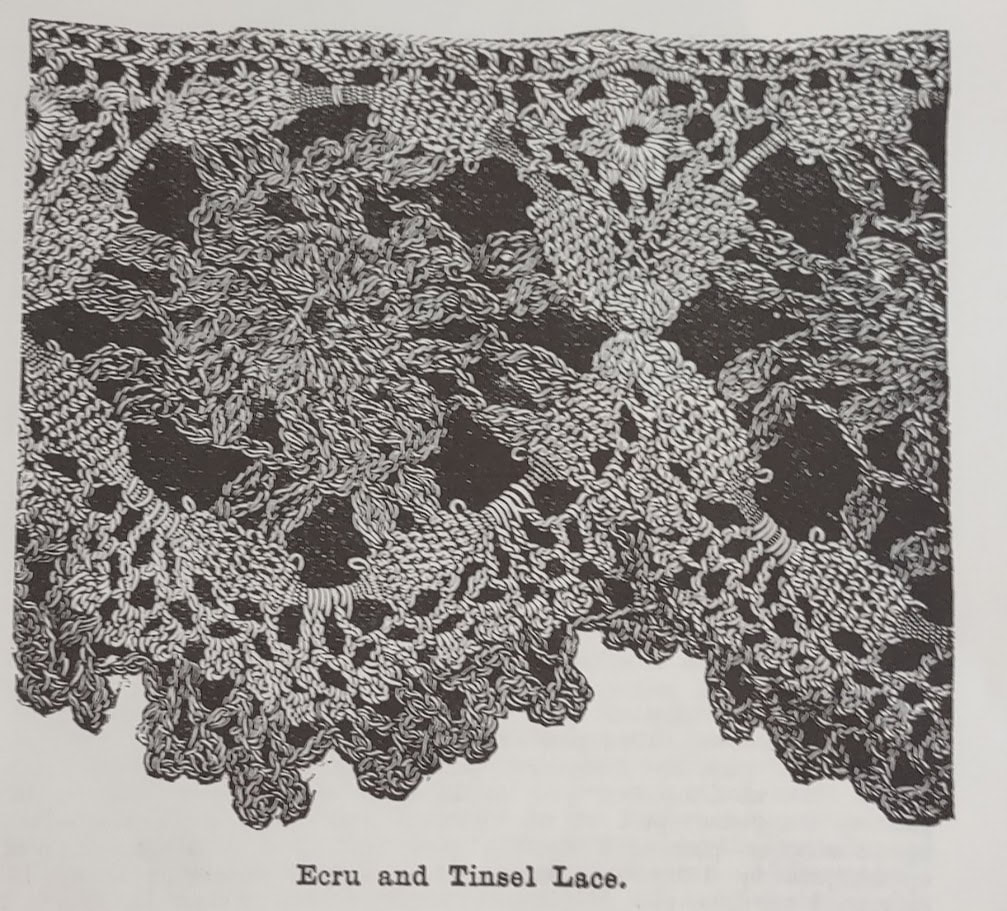
How about some edgings to go with the blankets? These are very intricate edgings. I think the Vandyke border is the simplest.
I considered this Stripe in Picot pattern below for my project but ultimately settled on the Square in Rib and Shell pattern. The Stripe in Picot pattern will be my back up plan if the square doesn't go well. 
0 Comments
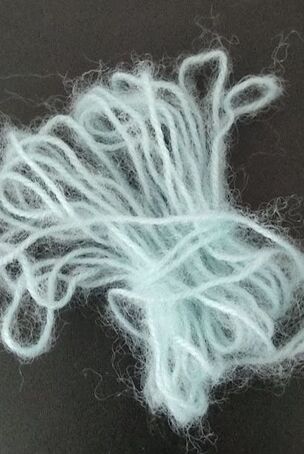
After trying and attempting two other patterns from this series I decided to try the Crochet Shawl in Half Crazy Stitch. The Crazy Stitch has been in a lot of patterns during the series and I wanted to see how it worked. It looks a little like a corner to corner stitch but done in rows.  The pattern says, "This shawl is extremely pretty worked with Shetland wool and a No 10 bone crochet needle after the manner of the shawl from which our engraving is taken; or Pompadour wool can be employed if a handsome wrap is desired regardless of expense; while Andalusian wool is very suitable and will afford greater warmth." Andalusian and Pompadour were probably sports weight yarns and a No 10 hook would have been about 3.5mm or a size E. I chose to use worsted weight acrylic yarn and a 5.0mm hook. I knew I didn't have enough for a shawl so I thought I'd try for a scarf. The directions say to start with whatever length is required. The stitch is done in multiples of four though so if you just start with a random number you may end up pulling a few out at the end. This is the basic stitch pattern: Row 1: 1 single crochet in the second chain from the hook, chain 3, 2 double crochet in the same stitch of the foundation as the single crochet is worked into, *miss three chains, 1 single crochet in the next chain, chain 3, 2 double crochet in the same place and repeat from the * Row 2: 1 chain to turn, 1 single crochet on the first single crochet of the previous row, chain 3, 2 double crochet in the same place, * 1 single crochet on the next single crochet of preceding row, chain 3, 2 dc in the same place and repeat from *, ending with 1 single crochet on the last single crochet of the last row. Repeat Row 2 until you get the size you want (or until you run out of yarn). I thought I had two skeins of the color I grabbed but it turned out one was "Wine Heather" and one was "Red Heather." I got through about four rows before I ran out of yarn but I do like this stitch pattern. The stitch is more like partial shell stitches than corner to corner. It creates little pockets that would keep warmth in very well so I can see why it's used in a lot of patterns. I decided that the border wouldn't look that great in the heavy yarn anyway but I think this would be better with some kind of border. Here's what the half crazy stitch looked like before I rewound it.  Now for scoring:
Is the pattern easy to understand? I didn't go on to the border but the directions for the half crazy stitch were pretty easy to follow. 1.0 Does it look like the photo? I think it does, aside from the missing border 1.0 Would someone wear this? Not what I finished but if I'd followed the directions, yes 1.0 Did I enjoy making this? Yes. This stitch has a lot of potential uses. It would make a super cozy blanket. 1.0 This gets a 4.0!  This series has 22 illustrations for 16 patterns. Twelve of those are garments, two are quilt squares, one is a couvrepied (literally a foot blanket) and one is a doily. Let's start with the useful garments for babies and children. Tricot stitch (Tunisian) is becoming a pretty common stitch for many of the patterns including the bonnet, the boots and the slippers below. The Infant's cape pattern says that would be easily enlarged to a suit a lady. The series includes an enlarged engraving of a section of the cape. 
Lady's useful garments from this series are a regular petticoat, a "warm, fleecy, petticoat", a Shetland Hood, a shooting cap, a shawl, a cuff and some edgings for shawls and a chemise. There is also shooting cap (maybe it would go well with the bag for knitting needles in an earlier series?).
Here are the blanket patterns. While these are all made in thread or fingering weight yarn, I think they could be made in a heavier weight and take much less time.
 I was going to try the shooting cap but by the second round I was lost. Second choice was the Ablemarle square pattern. That was also confusing so I moved on to crochet shawl above in the half crazy stitch. Seemed fitting after trying two patterns that drove me half crazy.
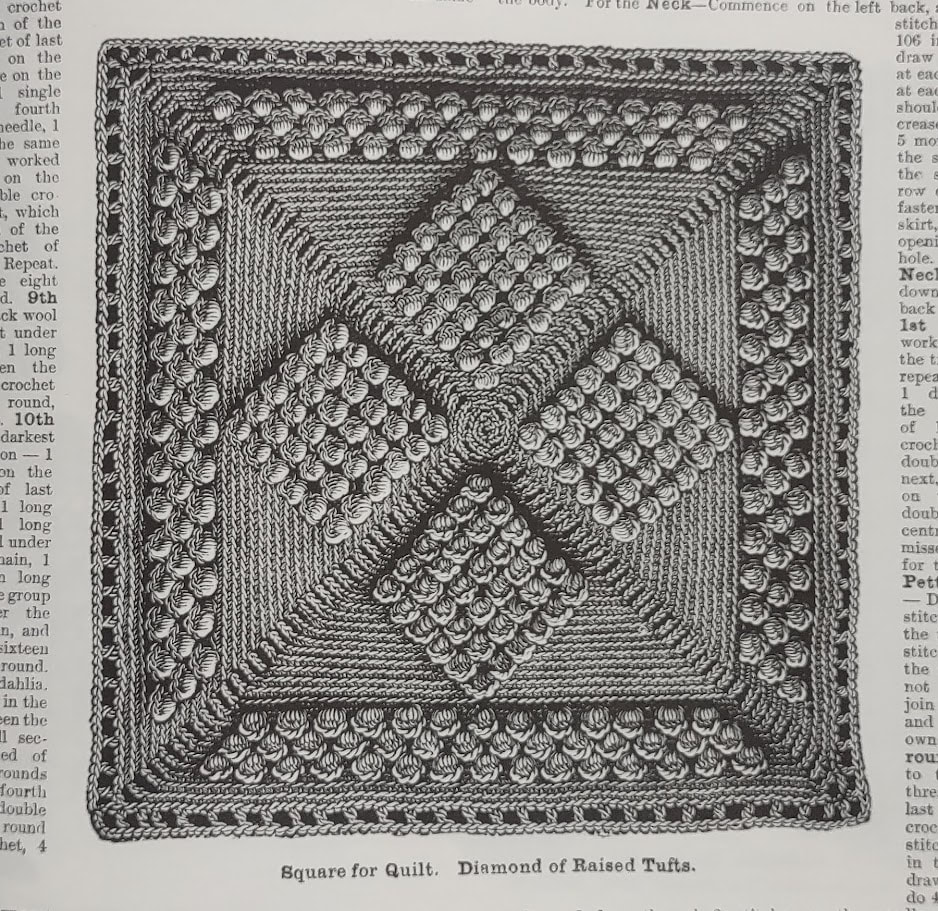
I set out to make this raised square pattern for a quilt but it did not go well. I knew it would be a little more complicated than the other square I made but I had no idea the pattern would make it even harder.  The pattern tells you what stitches go into the square but doesn't necessarily give you a start to finish round. For example round three says, "1 double crochet on each of the three double crochets along the side, 3 double crochet on the centre stitch of the three double crochet for the corners." This is fine because it's a fairly simple row but they kept it up as it got more complicated. Round 4 had you turn the work and make the tufts on the wrong side but there wasn't any instructions on when to turn back. I restarted this project three times and then gave up. The was the end of my last attempt.  I wanted to have a project for this week so I turned back to the Second Series and tried out a tricot (aka Tunisian) stitch called the Josephine Stitch. There was no photo for the stitch but it is described as, "a pretty variety of tricot stitch, and being light and lacey comes in very handy for shawls, scarfs, antimacassars &c." I'm not sure antimacassars would be very protective of the furniture if they're lacy but it sounded interesting and I haven't tried a tricot stitch from Weldon's yet. The directions says you can use any wool you want to and assumes you'll pick the appropriate hook. I used a skein of Knit Picks Swish DK in Pale Lemon and 5.5mm Tunisian hook. The directions were pretty easy to follow and did make a lacy strip of...something.  Here is the finished stitch pattern that I intended to make as a scarf but it's only about 4.5 feet long which seems a little short on me. Still it's a fun pattern and would look cute in a swim cover up or a lacy shawl.  I'm not going to rate the unfinished project but I'll give the Josephine stitch a 3.5 out of 4.
It was easy to understand. Someone would wear it and I enjoyed making it. The only thing that dropped it down that half point was that there was no drawing to compare to.  The Eleventh Series has 18 patterns and 21 illustrations. One edging pattern doesn't have an illustration but some of the others have 2 and even 3 illustrations. There are some interesting projects this time. I liked the Sylvester Cape shown below and marked that as a possible Fair project. The Toboggan Cap is cute with the little poms.  This Bulgarian Head-Dress stood out. This pattern had three illustrations and the pattern says that it "is a novel and exceedingly pretty style for the opera or theatre."  I thought this Tea Cozy looked fun. They suggest doing it in eight shades of Crimson and along with black to give it a gradient look.  This is at least the fifth "Tam O'Shanter" I've seen. This one is for a child of 5-10 years.  There are more cute kid's clothes in this series; a Pelisse, a dress and a petticoat.
 Since I didn't do the square for a quilt from the 10th Series I thought I'd do the one from this series. This one looks much more complicated than the St. Andrew's Cross from last time. It's called Raised Square Pattern for a Quilt. Find out how that turns out next week!  When I first looked at these I thought they might be half mittens with the top open. Something about the flat top and the thumb placement I think. They are not half mittens.  The pattern says to procure 1.5 oz of brown Berlin fingering and a No 12 crochet needle. I found a few mini skeins of brown fingering weight yarn in two shades that equaled 1.75 oz and a 2.75 mm hook (The equivalent size according to the Bell gauge). The mittens are entirely made up of single crochet and slip stitches in the back loop. It makes a nice stretchy fabric that probably does an excellent job of holding heat in. This was pretty simple and everything was going ok until I got the part that said, "repeat these two rows till 51 rows are done, or till the mitten is the right size to fit round the hand". I don't have large wrists but it took 72 rows to get it to fit around my wrist. Are they sure these are for a "Gentleman" and not a small child? I pulled out another mini skein in brown mini skein; I could see this was going to take more than the 1.75 oz I had ready. Then I got to the thumb. The thumb was a little weird. It's done in a short row technique but it also seemed a little small. I started sewing up the first one and noticed that the thumb placement was a little off. In the illustration it was almost all the way down to the wrist band but my version was oddly placed. I took out the thumb and redid the count so it was lower and since I'd pulled it out, I added a few extra rows. In the photo below you can see how far up the thumb is. In their illustration the thumb goes all the way up to the top of the mitten. Is your thumb long enough to be even with your fingers? This is also the point where I realized how short the hand part was. The hand portion of these is about 5 1/2 inches and my fingers stick out a little.  I ended up adding three extra rows in the thumb and putting a little cap on the top after I sewed it together. I should have done the same thing for the top of the mitten but I just seamed it with a row of single crochets per the instructions. My alterations made them fit but just barely. Instead of seaming the top to make it look like their illustration, I seamed it so the mittens are the same and it doesn't matter which hand is which.
If I were to make these again (I won't) I think I'd go up a yarn and hook size. Using sport weight yarn would help with the sizing issue. The thumb will still need to be placed a little lower on the seam but it would at least solve one problem.
On to the scoring: Is the pattern easy to understand? Yes... it's wrong but easy to understand. 0.75 Does it look like the illustration? Sort of. 0.50 Would someone wear this? For it to be comfortable they'll need hands slightly smaller than mine but I suppose it's wearable. 0.75 Did I enjoy making it? Yes. I chose a yarn and hook that worked pretty well for working in the back loop of slip stitches. It can get kind of tight sometimes and this worked well. I did get a little annoyed at the weird thumb placement but I figured it out. There were a lot of moments that I just laughed because it was so strange. 1.0 Total Score 3.0  The Tenth Series brings us 17 patterns and 20 illustrations. Three of the patterns have multiple views including close ups of pattern stitches or parts of the pattern. There are many different types of patterns as the title suggests. Let's take a look at some of them.  The doll's walking costume above is one of the more detailed and comprehensive ones I've seen. The pattern includes instructions for crocheting a pelisse, cape, hat, muff, shoes, and bag. Plus directions for making a pair of knitted drawers and a knitted petticoat are given. It takes up three pages of the series. Items for kids include a "vest", A Baby's Petticoat (adding this to a possible County Fair list), a petticoat done in Tunisian and a pilch.
There are a couple of shoulder warmers:
For blanket and quilt options we have a Cot Quilt done in Tunisian Squares with cross-stitching on top, another square for a quilt called the St. Andrew's Cross and a Diamond Lattice pattern that looks very cozy. 
There is also trimming for a chemise, a "Handsome Wide Border" and two "D'Oyley's" that are edgings done around a piece of fabric.
I thought about making the St. Andrew's Cross above but ultimately decided on a pair of Gentleman's Mittens. These mittens look like they're open at the top but it might just be an odd illustration. Find out next week how that went. Also, Happy Birthday to the person who gave me this fun book! This week we have the Pretty Pattern with no illustration. I'm putting a photo of the instructions below and if you read through them you'll quickly realize what kind of pattern this is. Hint: "The work is crocheted in squares which are afterwards joined together."  If you read through the color scheme you'll notice that while they are giving you an option to use "odds and ends" they also want you to use some of the same colors in the middle and on the outside to give it a cohesive look. Their color scheme from inside out goes like this: white, yellow, "other color that may be at command", black. The edging is done in amber, green and crimson. I decided to do just one square with the edging in some scraps that were in gradient shades that I had left over from a shawl. I used an F hook which is close to the same size as a No. 9 bone needle they suggest.  The square under the yarn is an illustration of a "Square Medallion for an Antimacassar" By now you may have figured out that this is just a granny square. The square itself was easy enough to make but the edging was a little harder to read. I think I got it but I didn't like how it looked on the square. If I'd done a dozen squares and added the edging it probably would have looked better. The first photo below has the edging all the way through the last of the 3 rounds with the lighter color being the "ball edging" round. In the second photo, I've pulled out the third round of the edging and blocked it without it. The edging doesn't quite line up with the other stitches and again, if I'd done more squares and sewn them together it might have looked fine.
Scoring:
Is the pattern easy to understand? Yes. I thought they did a good job on the granny square part though there are places where they could have used "repeat x times" and it would have been easy to read than listing out every stitch. .90 Does it look like the illustration? .50 (Standard answer for patterns without one) Would someone wear or use this? Yes. It is a pretty little square. 1.0 Did I enjoy making it? Yes. The colors I used made it more fun but it would be pretty in their color scheme too. 1.0 Total Score: 3.4 Next week I have the tenth series patterns and illustrations to share.  There are 28 projects and 22 illustrations in the Ninth Series. The subtitle is a fairly good description of the contents. Three patterns are hats or hoods/bonnets. There is only one shawl. Six patterns are antimacassars and another two are pieces of an antimacassar. There are five jacket patterns, five edgings and another five miscellaneous items. The two hats for children (French Hat for a Baby Boy and Infant's Hood) are illustrated and they're pretty fancy. The "Hood for a Lady" didn't have an illustration.
Some of the antimacassars in this series looked like they would be lovely. For the two done in Tunisian stitch (Tricot) with cross-stitch they say to just use the illustrations for the cross-stitch pattern. I think the geometric one at the bottom would be doable but I'd need to enlarge the one on the right to figure out that pattern.
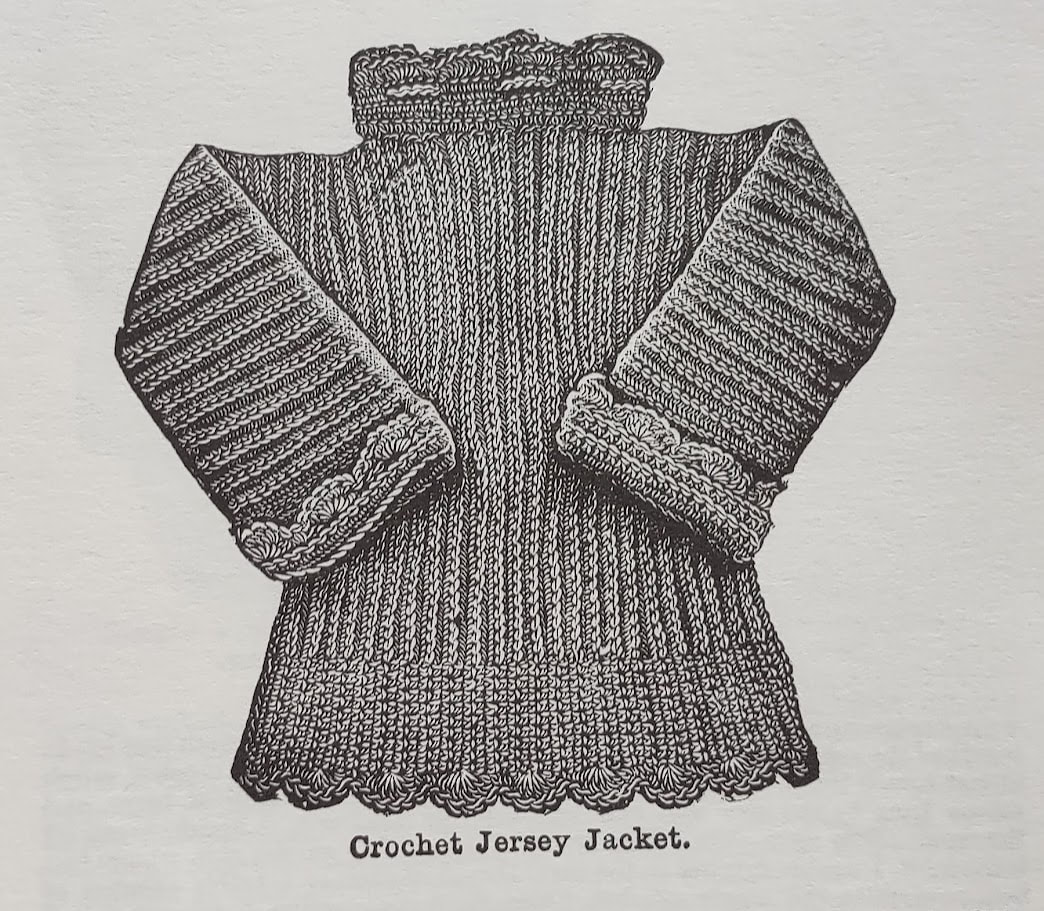
 Here are some of the illustrations for the clothing items. I think the Dorothy Frock is adorable. It says it's worked in a "pretty, twisted stitch" and the skirt is done in the crazy stitch. I've seen the crazy stitch in earlier series and it looks similar to corner to corner but done across in rows instead of diagonally. The Gladys Jacket uses the loop stitch that I've been seeing a lot of in the previous series. That little Shetland Jacket might be a future County Fair project for me.
One of the more interesting household items is the Toilet Tidy. Everyone needs a Toilet Tidy to hang on the "knob of a toilet glass", right? They make it with peacock blue yarn and place a tin inside to help it keep it's shape.
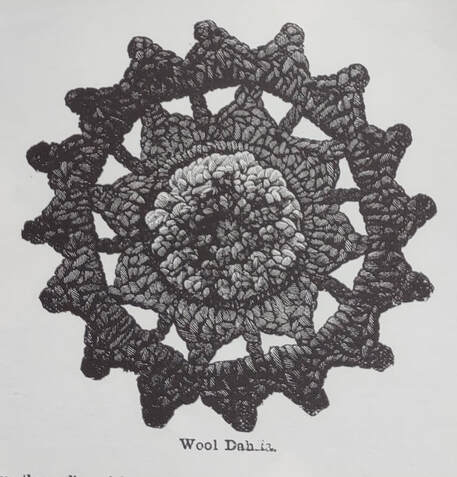
I considered making the Wool Aster for next week but the Wool Dahlia didn't go as well as I thought it would so instead I'm making one of the patterns with no illustrations. It's titled, "Pretty Pattern for Using up Odds and Ends of Wool". Find out how pretty it is next week. My Eighth Series project is the crochet medallion. Looking back, I should have taken a closer look at the illustration before I chose it. Here's the illustration:  Some things in the illustration match the pattern and some don't. The edging on the left side of the illustration has something very odd going on with the last row. That definitely wasn't in the pattern. See the odd spacing of the groups of three double crochets in a middle row? That was in the directions. The pattern suggests a thread that is probably the equivalent of size 10 thread and an appropriately sized hook. I used size 3 to make this a little bit bigger so it's more of a doily than a medallion. Here are the directions I wrote out with the US terms and my notes and changes and notes added in red as I went through this. Chain 8, join (I did a magic circle)
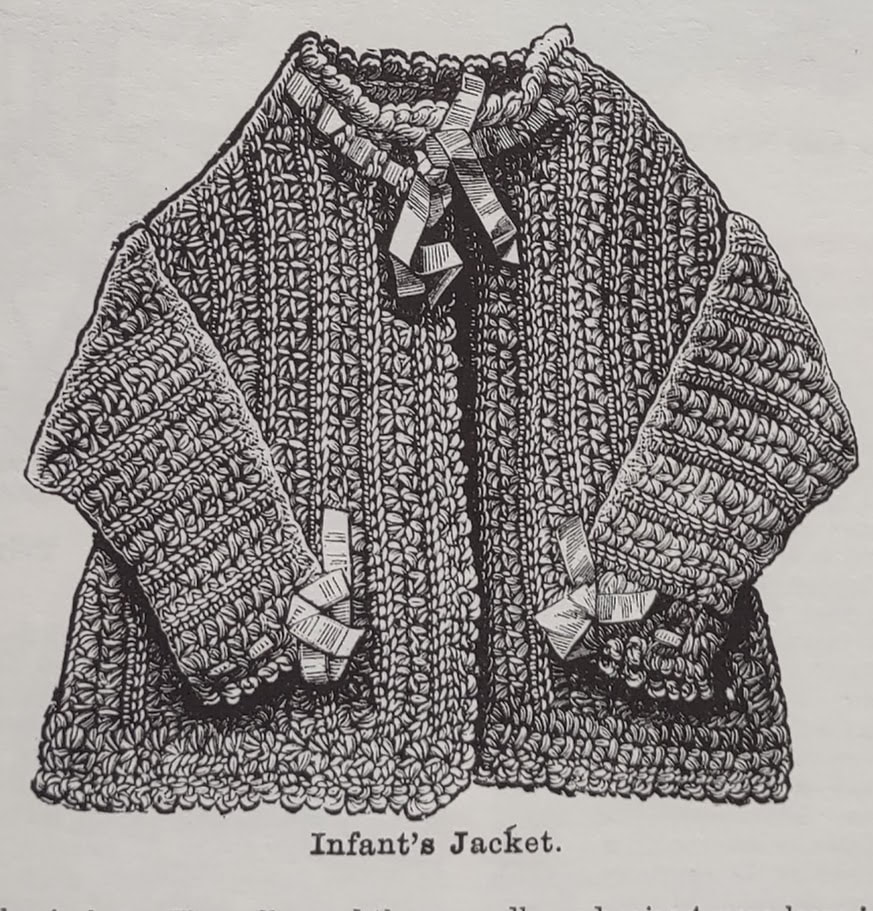
This was definitely not well written. The illustration didn't match and had some very weird edging. Here's what my symmetrical finished version looks like. I blocked to 10 x 10 inches. I like mine better than their illustration.  Rating: Is the pattern easy to understand? No 0 Does it look like the illustration? I'm not sure if it was supposed to. 0 Would someone use this? 1.0 Did I enjoy making it? Yes, it was so laughably weird that I did enjoy it and since I used size 3 thread it made it easier to see and redo things that weren't working. 1.0 2 out of 4  Weldon's Eighth Series is full of "Useful Articles" and claims there are 31 illustrations. The original version may have had 31 illustrations but I came up with 25 when I counted them. There are 24 patterns in this series so there is an illustration for every pattern and two illustrations for one of them. Nine of the patterns were for children or babies. The illustrations for some drawers, a little Jersey Jacket, an infant's Jacket and a muff and boa for a child are below. They also had two versions of baby boots, a petticoat and a frock.
For adults we have "Simple V-shaped Pelerine", a semi-circular shawl (below), and the Opera Hood (above right). There is also a ladies petticoat, another shawl and some gloves for a "gentleman'.
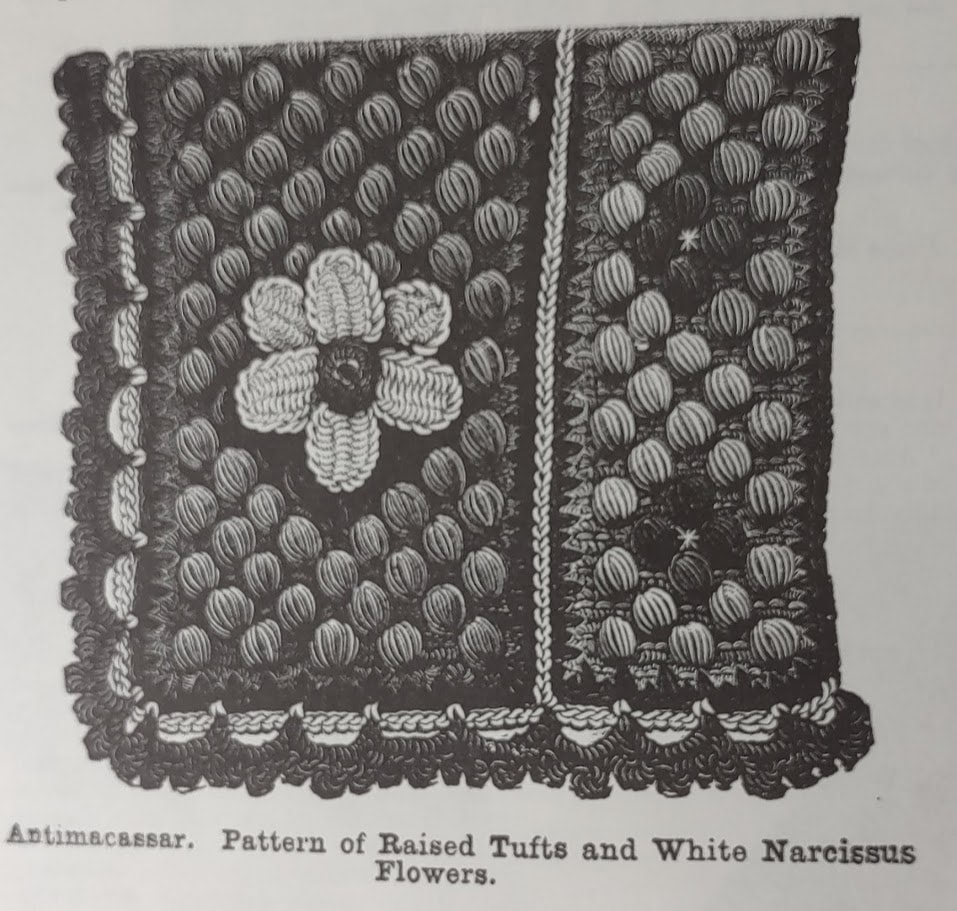
Some of the non-wearable items included the Square for a Quilt below which I considered making, a pretty Antimacassar with flowers, a complicated lace pattern and a fluted border.
There was also a crochet "medallion" and that will be my project for next week. If it turns out well it may go to the county fair in the doily category. My Seventh Series project is the Wool Dahlia. Weldon's says, "A very pretty antimacassar may be made with twelve of these joined together." I thought this would be a fairly simple pattern to follow since I had the photo to refer to.
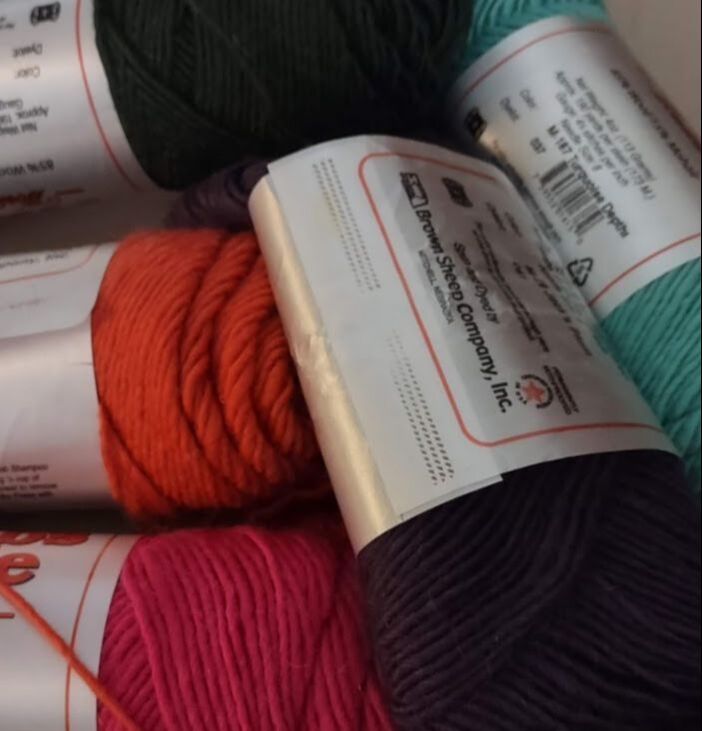
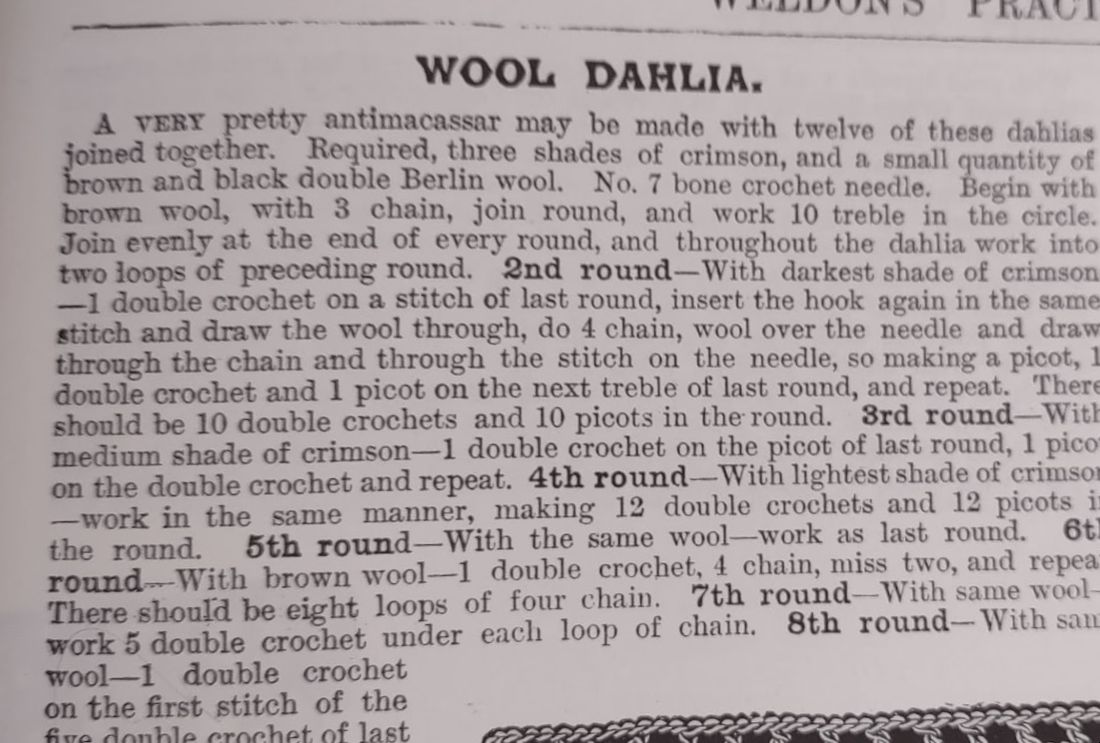 The pattern uses double berlin wool (worsted weight) and they suggest three shades of crimson and a small amount of black and brown. They use a No 7 bone crochet needle which translates to a 4.25 mm based on the Bell Gauge. I didn't have three shades of crimson so used Brown Sheep's Lamb's Pride Wool in turquoise, lotus pink, deep coral, plum, and olive along with a 4.0 mm/G hook. The first round was easy since it was just 10 double crochets in a circle. Then it got confusing. Round two says (terms changed to US): 1 single crochet on a stitch of the last round (easy), insert the hook again in the same stitch and draw the wool through, do 4 chains (all ok), wool over the needle and draw through the chain (wait, which chain? I just made four. It must be the first one to make a picot.) I did all of this but it didn't really have the 3D effect the illustration has and this continued with the following rows. Somehow the picots got confused in the fourth row (the pink one) but I just went with it. 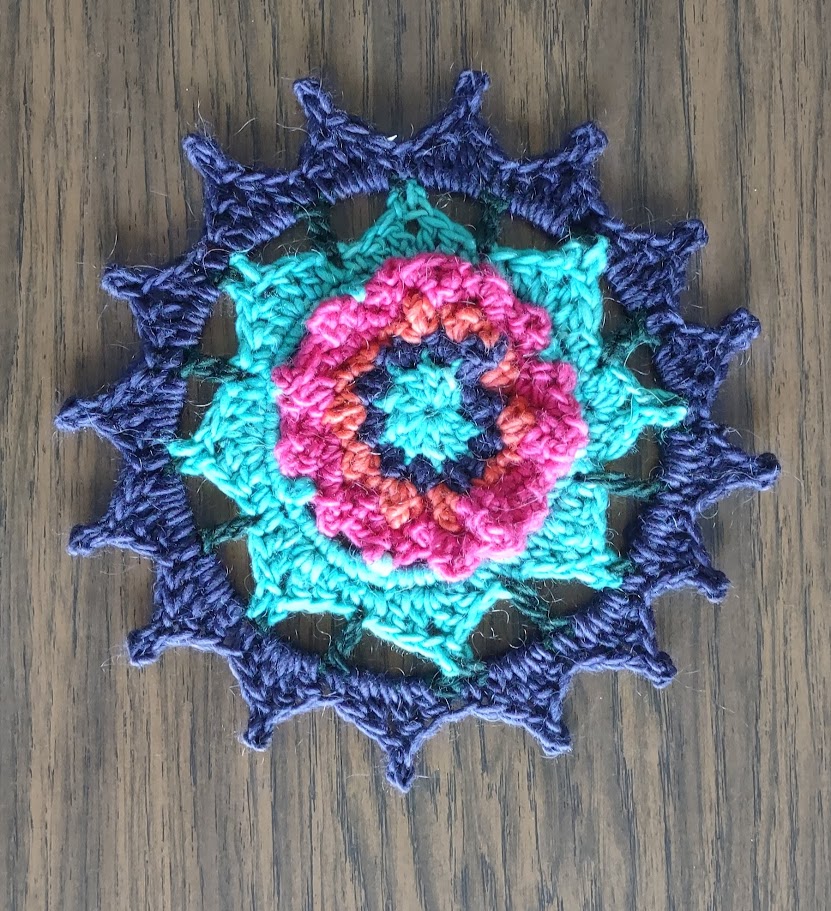 The last few rows went fine but I don't love how this turned out. It's partially my color choices but also the weird picots didn't give it the bubbly look in the illustration. Either some little popcorn stitches or loop stitches might have looked better.
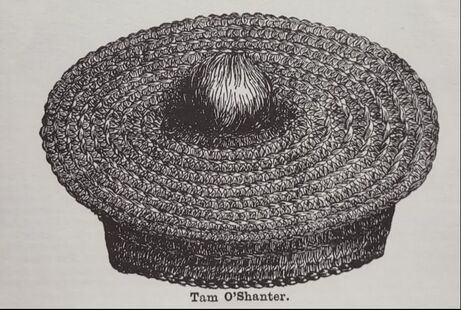
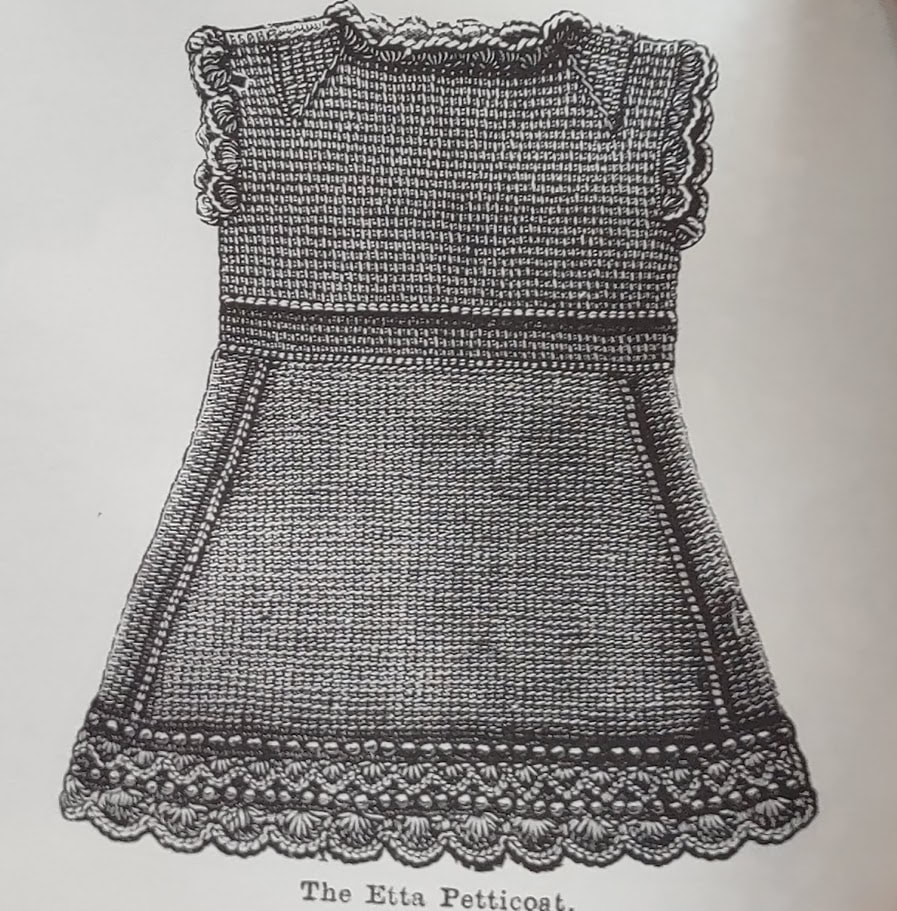
Rating: Is the pattern easy to understand? Nope Does it look like the photo? Half of it does so I'll give it 0.5 Would someone wear or use this? Maybe. 0.5 Did I enjoy making it? I enjoyed this less than I expected. I usually like making flowers and sometimes I enjoy figuring out the confusing directions but I just didn't like doing the first half. 0.5 Final score 1.5 out of 4  Weldon's Seventh Series is full of even more "useful articles for personal and home decoration". Let's find out what that includes! There are 26 items and 20 (not 30) illustrations this time. Five are antimacassars and three more stitch patterns that they say are good for antimacassars. Antimacassars must have been very useful!  Amazon Stripe Antimacassar and an Infant's Petticoat 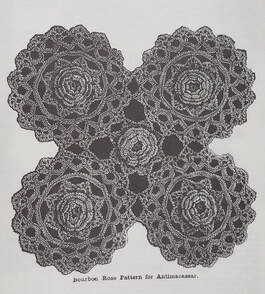 Bourbon Rose Pattern for Antimacassar For clothing and wearable accessories there is a Tam O'Shanter (of course) and a Smoking Cap (with no illustration), trimming for a chemise, an infant's petticoat (pictured above) and the Etta Petticoat for a two-year old.
There's this cute (and useful) set of a Princess Pelisse, a cape and a hat. 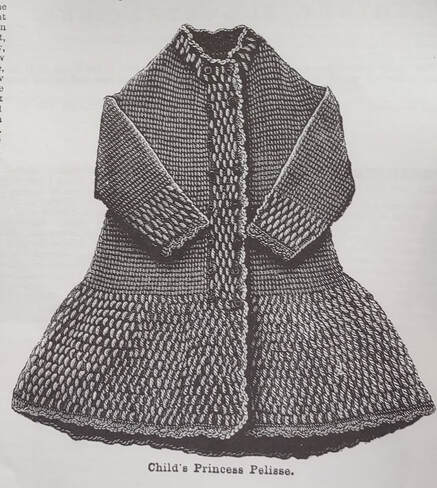 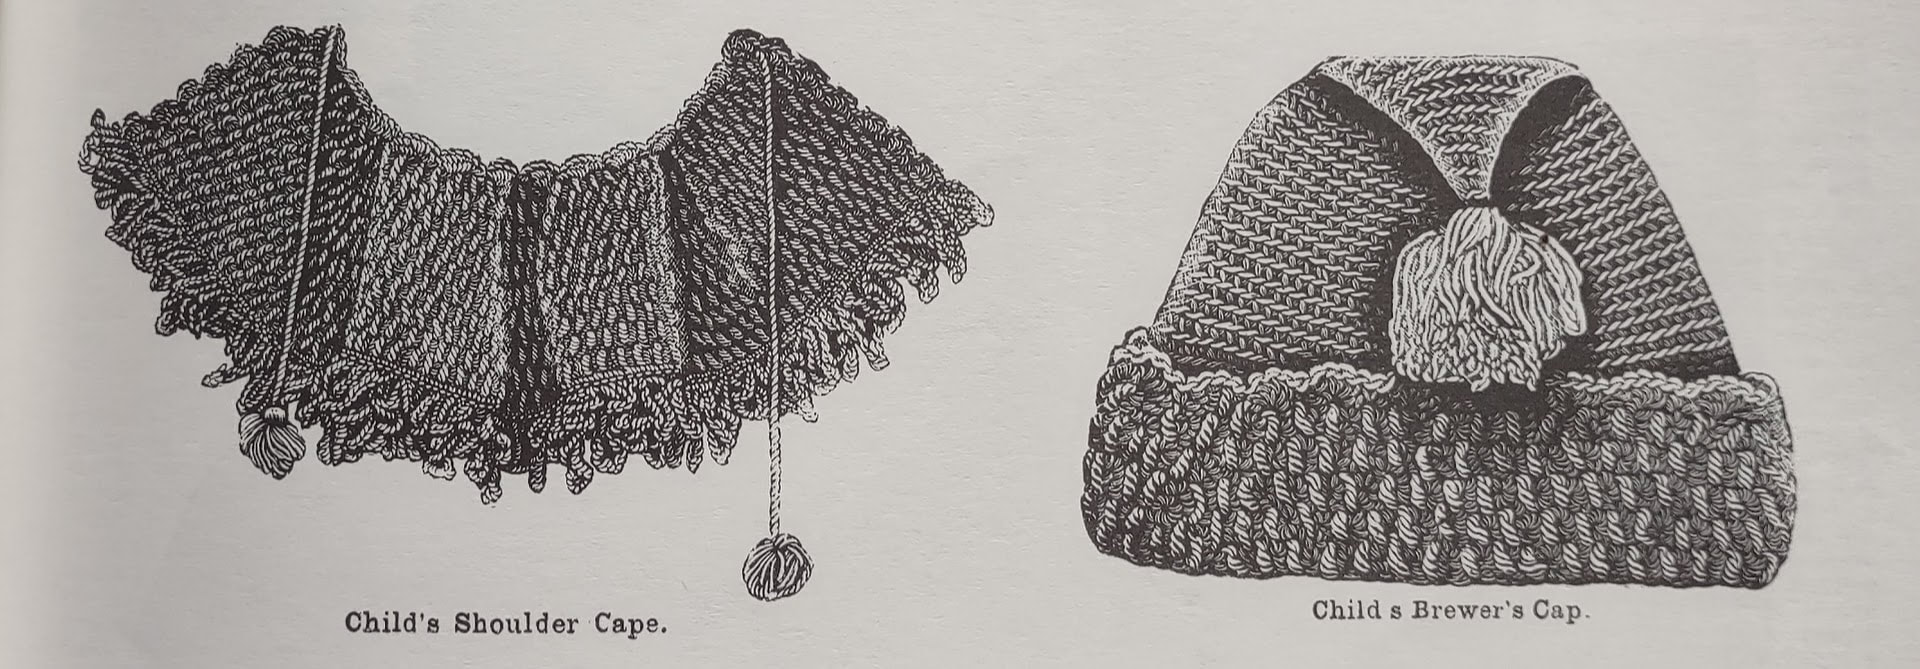 Other useful clothing and accessories include baby gloves, chemise trimming, a boa and a muffler, a gentleman's vest and a lady's petticoat. They also have another "quilt" square along with a hexagon and a border.
 I thought about making the "Roman Stripe, A Lovely Pattern for a Chair-Back" mostly because of the introduction to it. Many of the patterns jump right into the instructions but when we get a little intro to it, it makes it a little more fun. Maybe they put a little extra into the description because there isn't a photo. The Roman Stripe introduction says, "worked throughout in plain double crochet, and the beauty of the pattern consists in the arrangement of the various colours, which are artistic, and therefore will harmonise with the surroundings in almost any room with the proviso that should blue predominate therin a pretty shade of pale China Blue be substituted for the apple green here mentioned." The pattern appears to be like tapestry crochet. They are alternating colors in every stitch and cutting the ends after every row and restarting a new row with the same side facing the whole time. The yarn at the beginning and ends of the rows will be the fringe. I wasn't quite up the challenge though and decided to make a Wool Dahlia for next week's blog. They say you can put 12 of them together to make an antimacassar. I'm just going to make one dahlia. I decided to make the Jar for Pence (not that Pence!) for this week's project. It looked pretty adorable in the illustration. 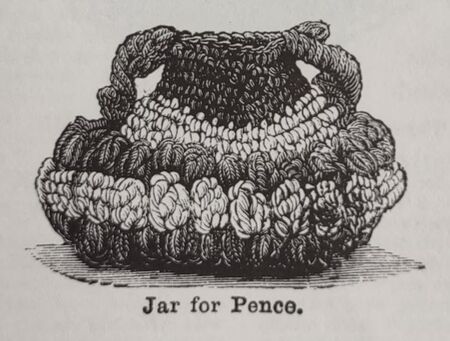 The pattern says I need one skein of pale blue and a small amount of white fingering weight wool and a No. 10 bone needle. I used some Teksrena Wool that a friend gave me in turquoise and light gray. The current equivalent to the No. 10 hook is a size E or 3.5mm. I didn't rewrite the pattern because it seemed pretty straightforward when I read through it. I think that this was one of the quickest projects I've made so far from the Weldon's book. 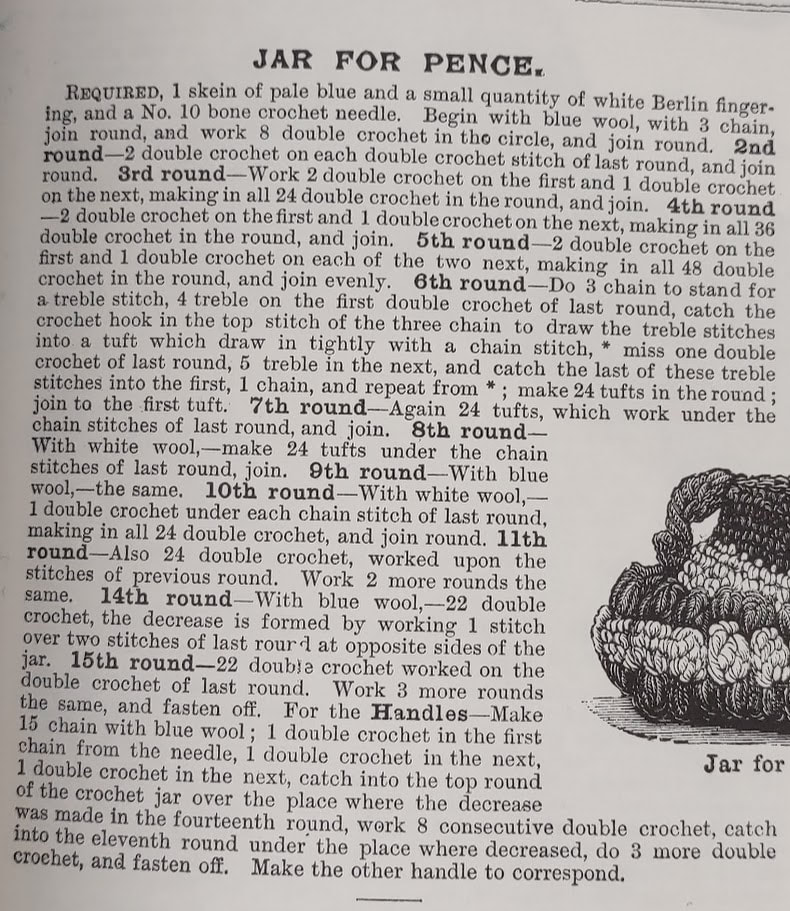 Jar instructions in UK terms. To start, I tried to follow their directions of working eight single crochets into a joined chain of three but it was hard to get eight of them into that tiny circle so I did a magic circle instead. The base is basically a circle and goes through round five before it switches to double crochet. In row six you start making popcorn stitches. They don't call them that and they have a slightly different way of making them. Instead of dropping the last stitch and putting the hook through the top of the first stitch in the group they have you somehow "catch the crochet hook in the top stitch of the first." That has the benefit of not dropping a stitch but I couldn't make it work so I did the popcorn stitches my way. After I adjusted for that the rest of it went pretty fast. I would have just made the handles separately and sewn them on but they crocheted them on as they went. I thought that was a clever way of attaching them. The jar is about 3 inches tall and 4.5 inches across. I used only 12 grams of yarn to make this so it would be a good scrap project. 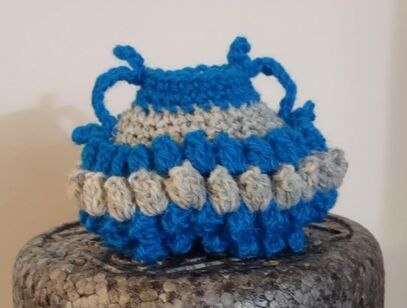 Time for scoring:
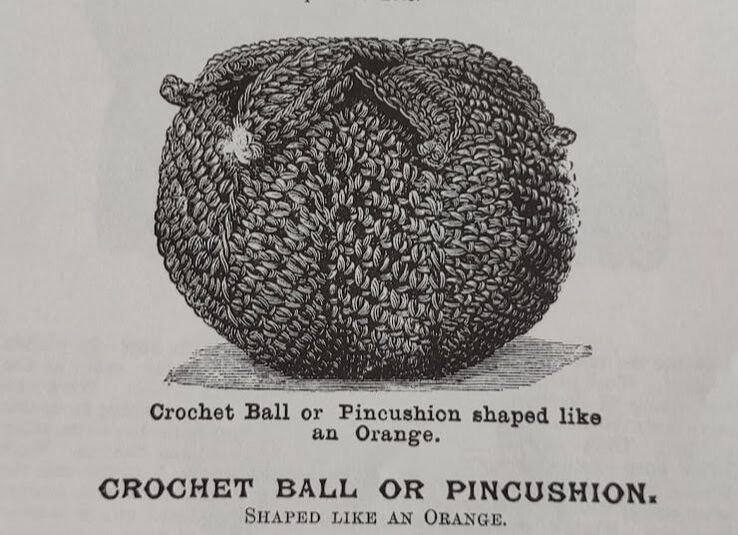
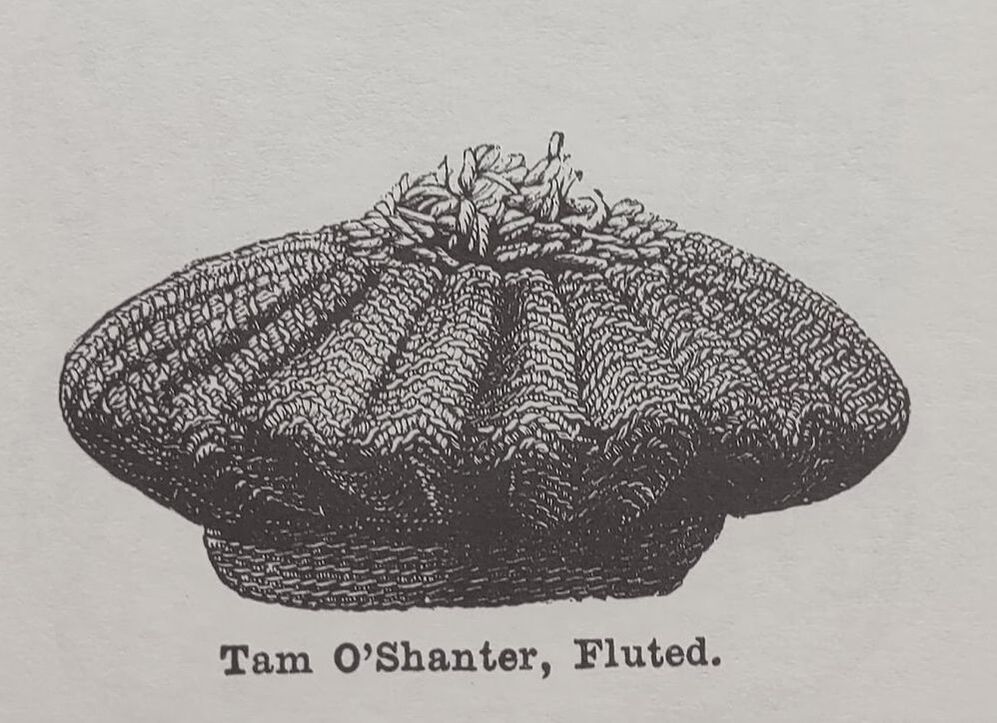
Is the pattern easy to understand? Yes. 1.0 Does it look like the illustration? Yes 1.0 Would someone wear or use this? Yes, we have coins in it right now. 1.0 Did I enjoy making this? Yes! 1.0 This project gets a 4 out of 4!  This series of useful articles says it has thirty illustrations but I only counted 25 for the 23 patterns. Lest you think they're slacking off on the number of patterns some of the ones in this issue are definitely more complex. It starts you out with a little jar, a collar and a triangle shaped scarf and moves right into this lovely frock for a child of two years. This is done in Tunisian with fingering weight wool. 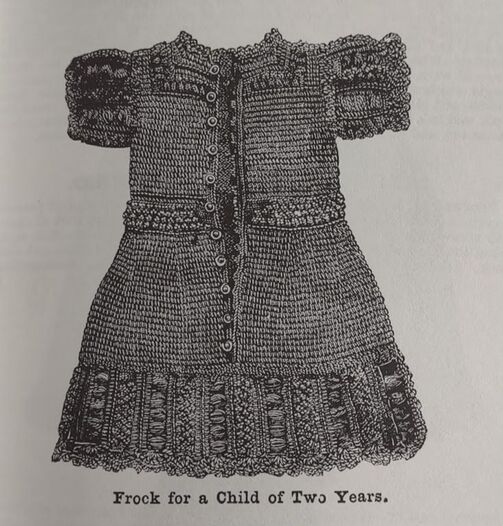 If your child is just a little to old for that one, you could try the frock for a three year old. This is also done in fingering weight wool and uses several different hook sizes. 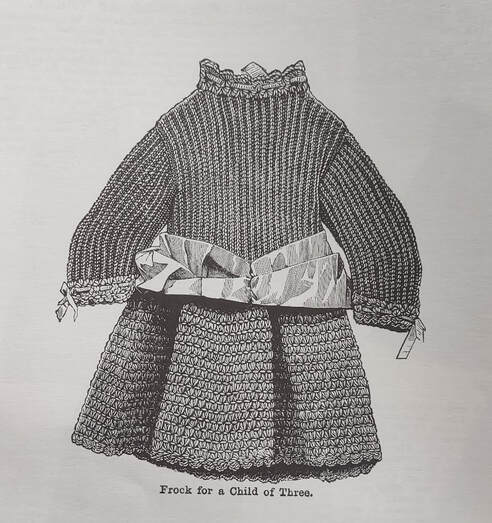 For something less complicated, this skirt is done in Tunisian with pink and white worsted weight wool. 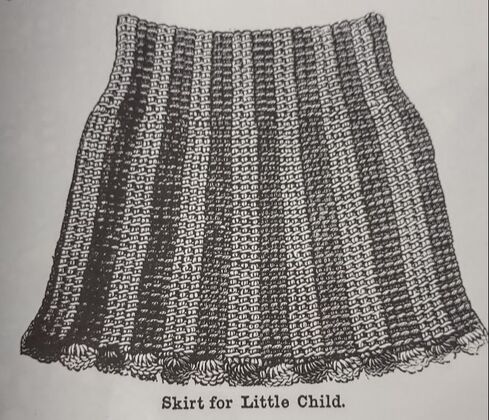 Maybe you'd prefer something for yourself? How about this "Cross-over"? It's described as being "suitable for outdoor wear under a jacket or a fur cloak or may be worn in the house." They suggest white and peacock blue fingering weight wool along with six pearl buttons. 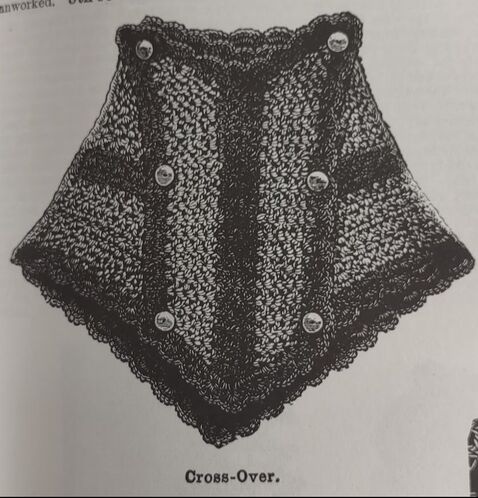 There were some simpler and smaller objects. I thought this crochet ball was fun. The description says, "These balls are greatly liked by children, and dessert dish full arranged as oranges makes an attractive and profitable addition to a stall at a bazaar." They do it in a fingering weight wool but I think it could be done in any weight of yarn. It seems like there is a Tam in almost every series. This time we get a fluted one done in fingering weight wool.
I considered both of these for next weeks project but ultimately decide on the jar. There is a photo and I'll share it next week.
The Fifth Series is all edgings and insertions. Before I decided on the Polo Edging, I tried a few others and had a trouble following many of them. I wanted to share one where I could at least get past the first row. 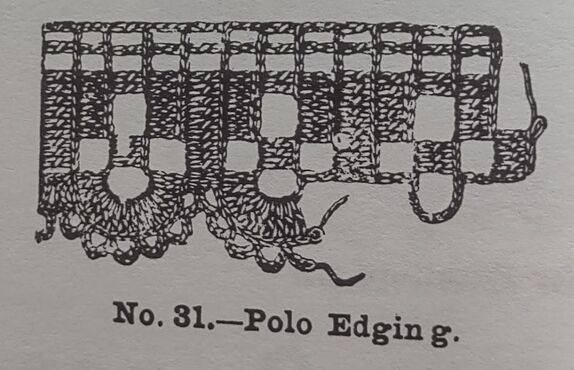 The Polo Edging is five rows and it's sort of worked on it's side with the two row scallop edging added on when it's done. I didn't re-write this one since there weren't that many rows but there were times I wished I had written it out. The printing errors kept throwing me off. Aside from that problem that this was a pretty simple edging to make. Many of the others had instructions that were two to three times longer. I have some patience but not enough to dig through instructions for something I won't use or won't be able to find someone to give it to. 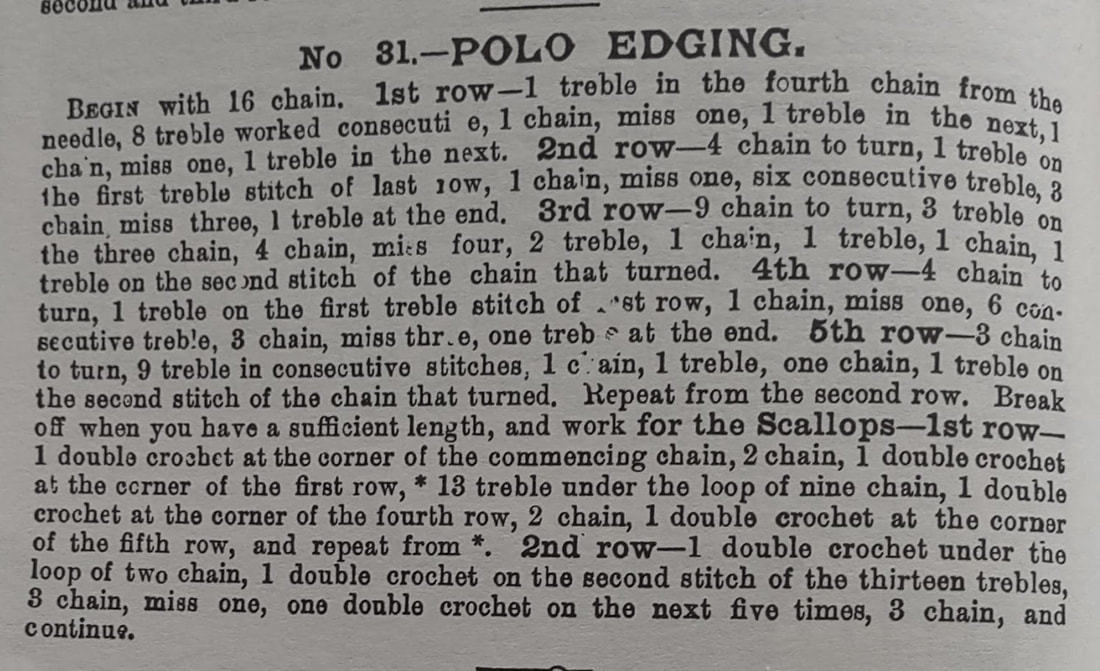 The pattern doesn't suggest a specific thread or a hook size. I used a 1.65 mm steel crochet hook and Knit-Cro-Sheen which is a size 10 thread to make the little sample below. The blocking board squares are all one inch so it's easy to tell that it's about 2.5 inches long. If you wanted different size you could block it bigger or use smaller thread for something more delicate.  On to the scoring:
Is the pattern easy to understand? Yes. 1.0 Does it look like the illustration? Yes. 1.0 Would someone wear/use this? Maybe? I'm sure it's very "useful". 0.75 Did I enjoy making it? Mostly. Not so much that I wanted to keep going after the small section I did though. 0.75 Total is 3.5 out of 4. Next week we'll move on from edgings to useful articles for personal and home decoration.  This week's series is full of useful edgings and insertions. They have numbered them so it's easy to see that there are 46 of them. They range from highly detailed to much more simple edgings. This week I'm sharing a sampling of them. The series starts out with this one called a Mussel-Shell Border. Like many of them it starts by saying "begin with a foundation of chain the length required". This looks like you would need a multiple of something and they don't mention what that might be. This particular edging is 12 rows. 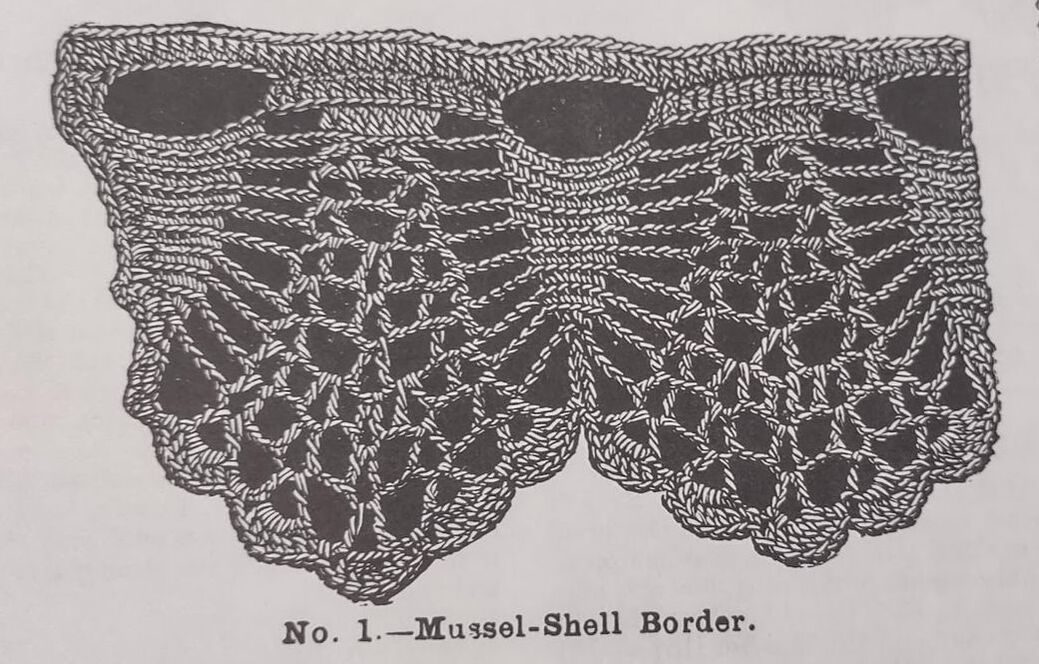 Some of the edgings have you start with 'mignardese braid'. This seems to refer to a braided edging that you can buy. Both No 4 and No 5 below start with some kind of fancy braid and then work into it to. This seems like an excellent way to avoid making a foundation row if that's something you don't enjoy. No. 6, Spider-Web Edging, is described as a "strong, pretty edging for underlinen". 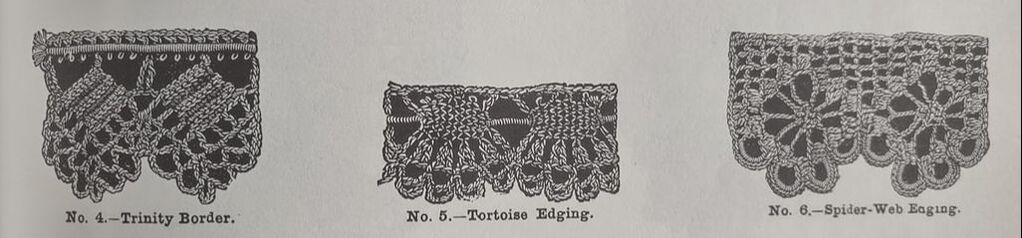 The Jubilee border below is done sideways or "the short way". They add the last bit of edging at the end. The Waterfall Border looks pretty but it seems a little more complicated. 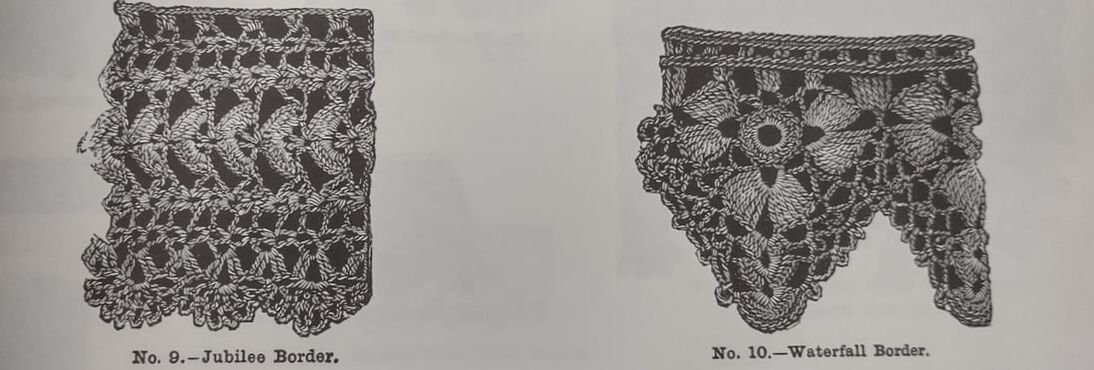 The middle of the series has two pages of illustrations of the different edgings. Here's one page of them. This one includes a fancy fringe for a quilt or a toilet cover (bottom right). 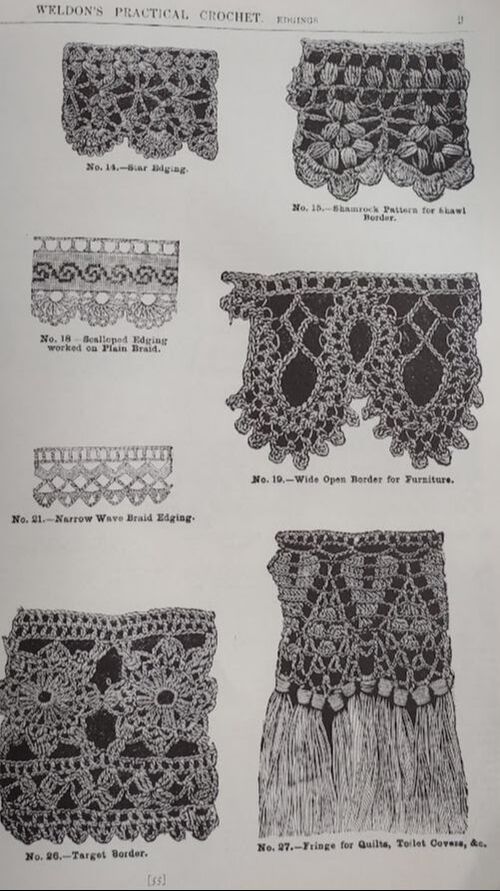 These seem a little simpler and most are done with a braid to start.  I wasn't sure I wanted to try one of the edgings because I didn't have anything to use it for at the moment but I did end up picking one and doing a small sample of it for next week. It is called Polo Edging and I'll have that next week!
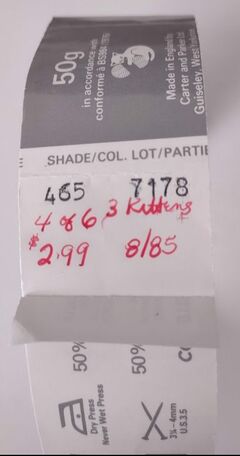
This week I pulled some stitch patterns from the fourth and second series. I attempted to follow the directions for the Lewis Point stitch pattern from the fourth series and the Beehive stitch pattern and the Rice stitch pattern from the second series. Let's see how that went. For all of these I used a 4.5mm hook and worsted weight yarn from my scrap bag. I'm pretty sure it was all Red Heart Super Saver. 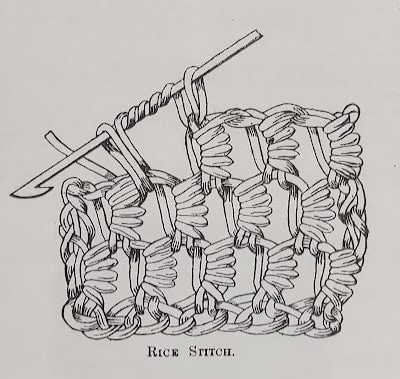 The Rice Stitch pattern seemed like it would be a quick and easy stitch pattern to work up and it actually was. It's not that easy to get the hook through all of the loops on it but it makes an interesting pattern. Start with a chain for whatever length you need. Wrap the yarn around the hook five times and insert into the fourth chain from the hook, yarn over and draw the yarn through all of the loops on the hook, chain one, skip the next chain in the foundation and repeat the stitch. Rows after that are started with a chain three and the rice stitch is worked under the chain stitch of the previous row. This looks similar to a Bullion Stitch.  The next one I tried was the Beehive pattern. Here's the illustration. 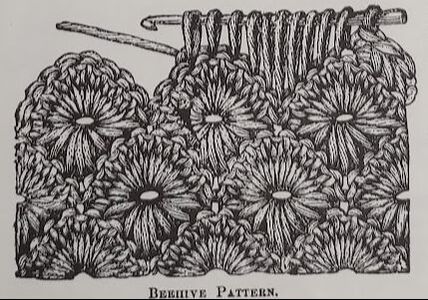 My version is pretty close. The back of mine looked more like their illustration so that's what I'm showing in the photo. This one is a little longer to write out so I'm not going to do that today but if you're interested in having that pattern written out, let me know and I'll work on that for a future post. 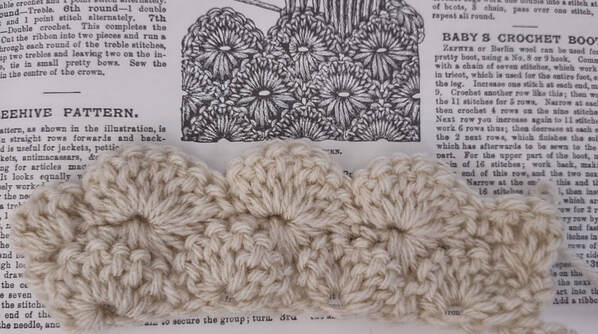 And last we have the Lewis Point pattern. 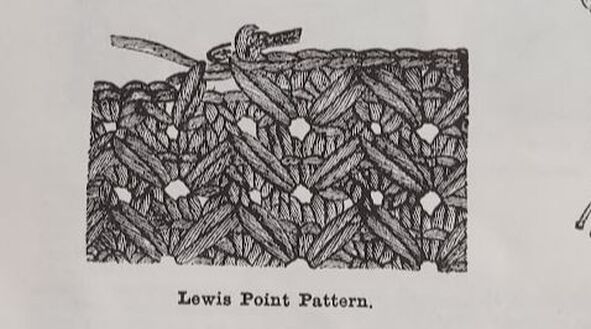 This one didn't go so well. I had trouble getting things to line up with their directions and I only had one stitch at the end when they said I should have two. I did it in two different colors so you can see where the points are a little easier. The whole thing leans even though I have 12 stitches per row. (I chained 13 and started my first single crochet in the second stitch from the hook). I have no idea what I did wrong. I tried different numbers of stitches between the points. After trying this a number of times this was the best I could come up with. 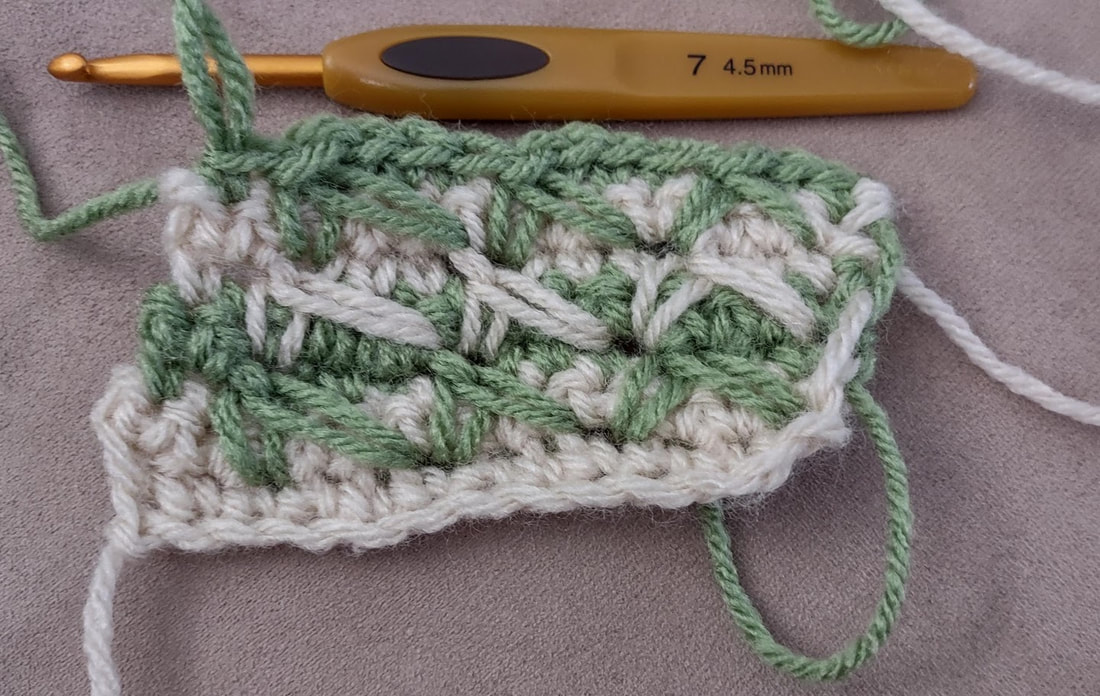 There's no rating this time since it's three stitch patterns and not a finished item. I did enjoy the first two stitch patterns but the third one was frustrating. It seems like it could be an interesting pattern if I could get it to work. Here's a photo of the Lewis Point directions if you want to try it. Don't forget this is UK terms and let me know how it goes. 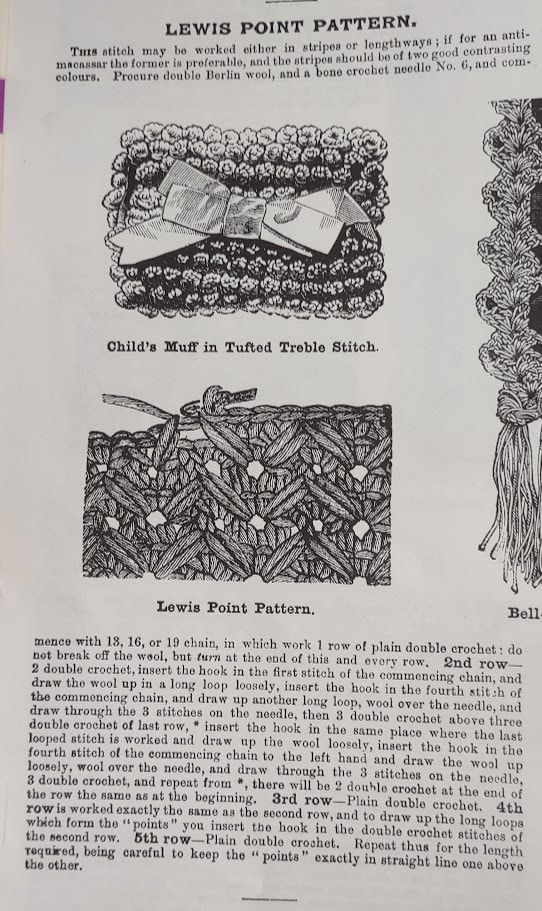  28 Articles and 38 Illustrations! They must be making up for the previous lack of illustrations. This variation surprised me so I counted the number of articles including stitch patterns and the number of illustrations and I came up with very different numbers. I got 36 patterns and three of those are stitch patterns. There are only 30 illustrations. This is the first time I've checked their count of patterns but maybe they think only 28 of the patterns are "Useful Articles". That leaves eight that aren't useful. Maybe they aren't counting the stitch patterns? Maybe it's backwards and should be 38 articles and 30 illustrations. That would be closer. I guess we'll just say even Weldon's made mistakes. The first pattern in this series takes up almost two pages. It's an Outdoor Pelisse for a Young Child that is 24 inches in length. They say, "Every stitch of the working is here given, so that not the slightest difficulty can be experienced." I'm not going to test that. It is worked in tricot, aka Tunisian and the trimming is "looped knitting in imitation of astrachan." According to Wikipedia, astrachan or the alternative astrakhan is "closely-curled black or gray fleece of very young karakul lambs from Astrakhan" (a place in Russia). 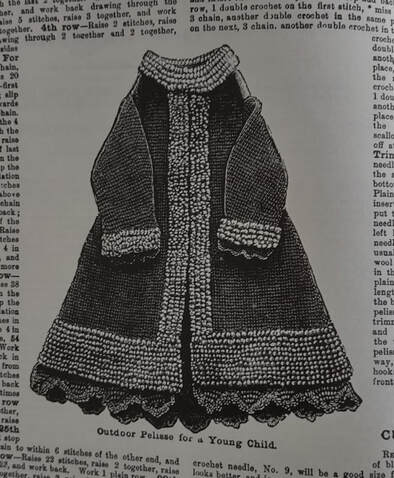 Here are few more of their useful articles. The Hand-bag is made from macrame twine. The boots are made in white and scarlet fingering yarn and the blanket is done in "fancy tricot" with contrasting colors. They suggest fawn and blue. 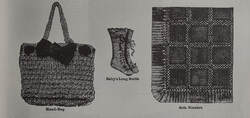 There were two things that weren't quite projects but I thought were interesting. One was a watch guard made with purse silk and black beads. The other was a sleeve holder. 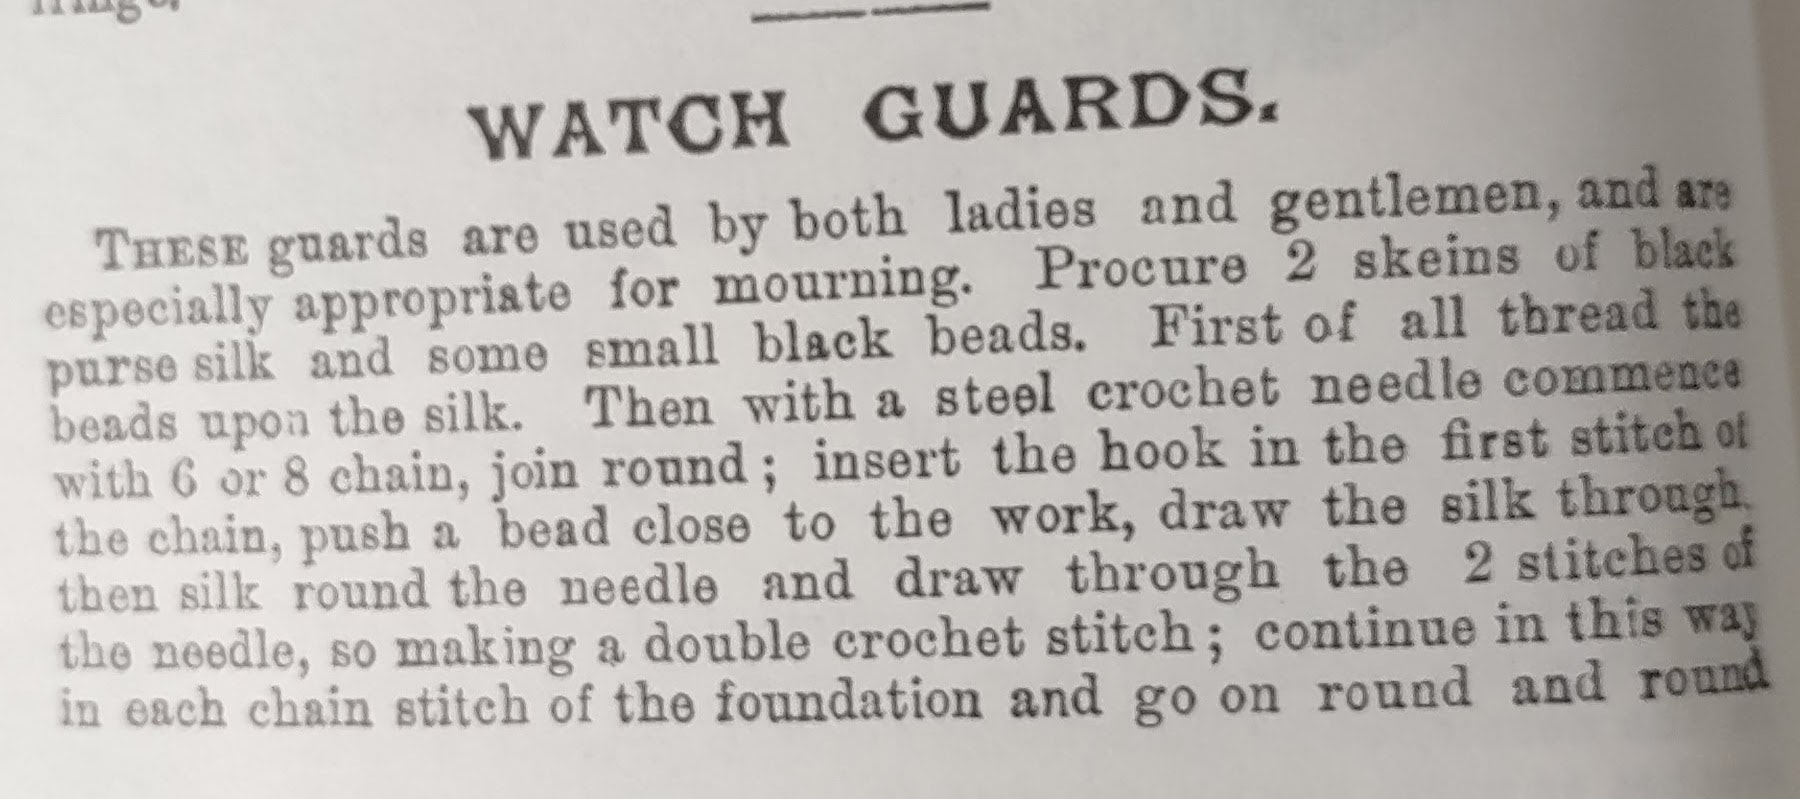 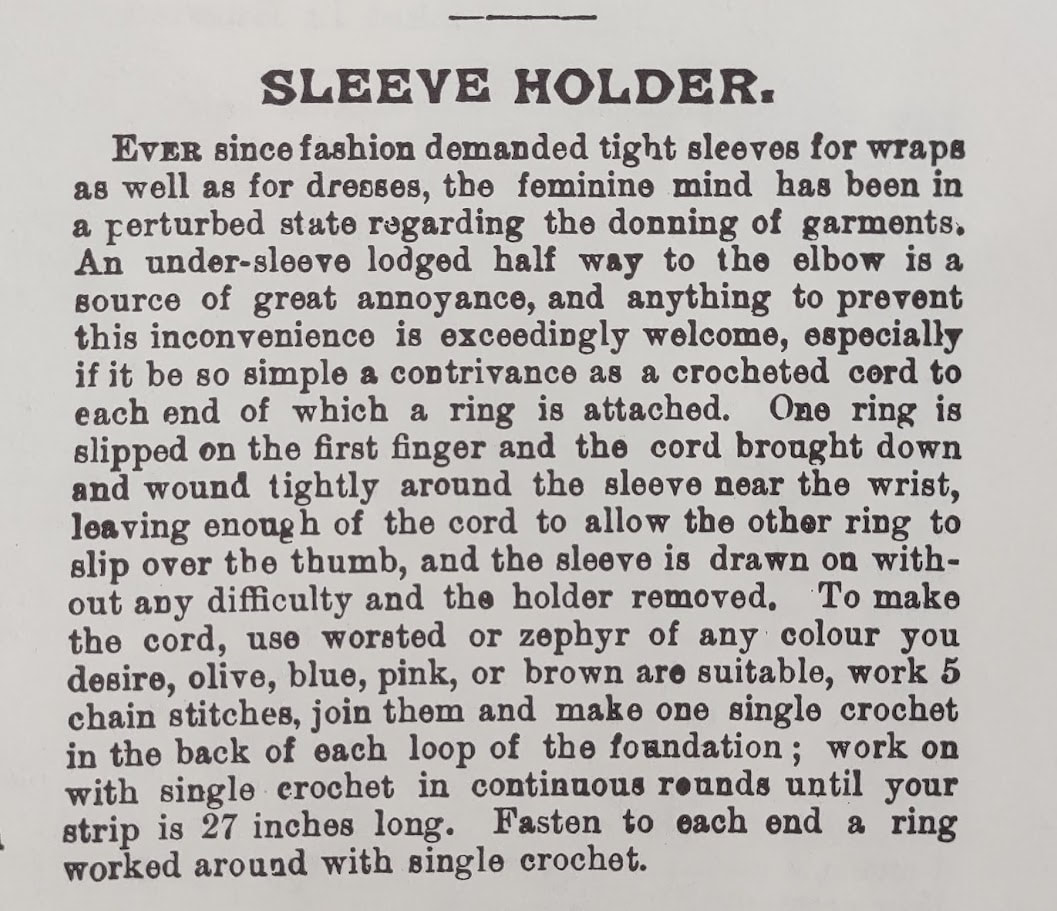 The obvious thing for me to try is a hat right? There is this Venetian Cap in this edition: 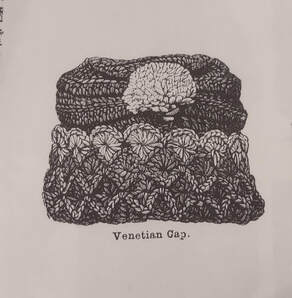 I decided not to make it but if you want to see one completed, Just Vintage Crochet on YouTube made one. I had a hard time picking something out of this series. Everything was either time consuming, done with fingering weight or was something like an insertion that didn't seem practical. After paging through this series multiple times I decided that I'm doing a stitch pattern from this series and two more from a previous series. The one from this series is called Lewis Point. The others are the Rice Stitch and the Beehive Stitch from the second series. Next week we'll see if mine looks as nice as their illustration! 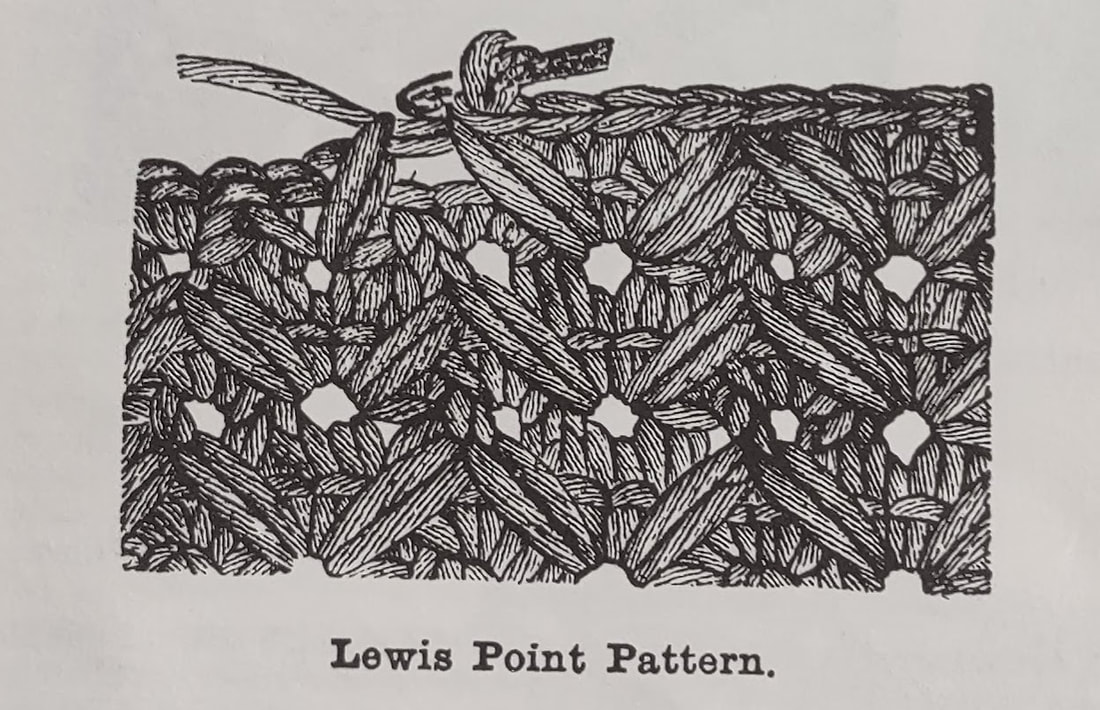 For the Third Series project I chose the Cloud. The Cloud is described as a "light and elegant wrap" and there is no illustration of the finished item. They ask you to procure 8 oz of white 3-thread Lady Betty Wool and a No 9 bone needle. The glossary in the front says that a modern substitute for that is worsted or mohair yarn and the recommended aluminum needle is an H-J or 5-6mm hook. On the Bell Gauge a 9 is equivalent to an F and that seems pretty small for worsted weight yarn so I went with an I. I had four 50 gram skeins of Unger Fluffy, a worsted weight yarn with a definite halo but not quite mohair-like, so I used that to start the wrap. 200grams is about 7 ounces so I thought it would be close enough. The directions are fairly simple for the main part of the wrap. It is all done in back loop and it's three rows of single crochet and one row of what we would call a star or daisy stitch. It's worked from one side to the end and then you join to the starting chain and work the other side. 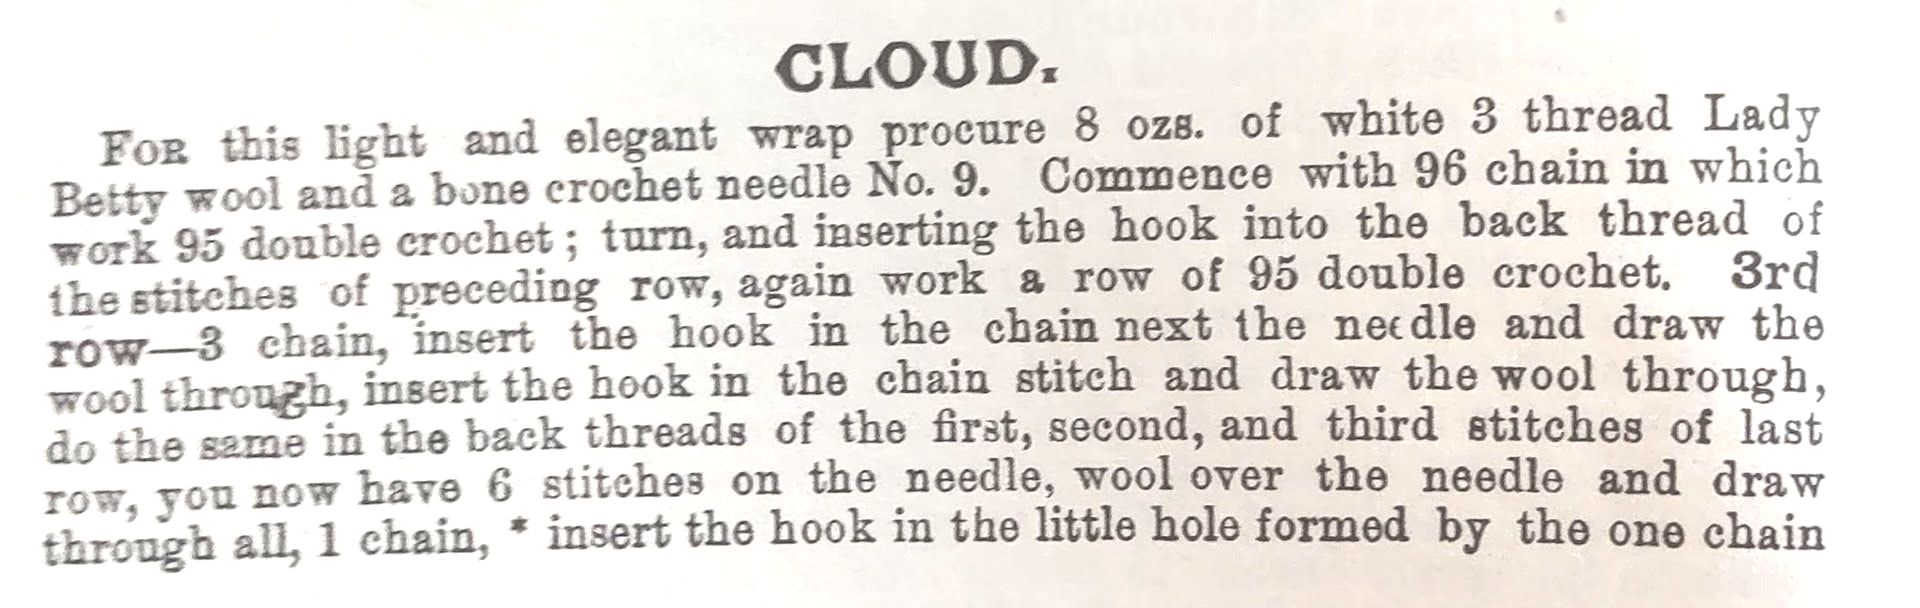 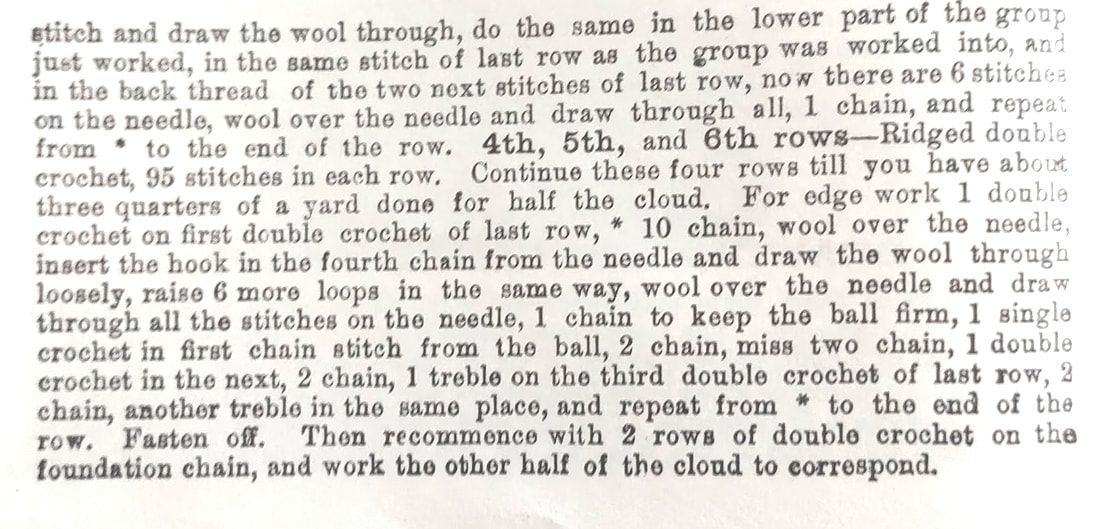 After I finished the first two skeins of Unger Fluffy I had only 15 inches completed and the pattern asked for 27 inches so I knew I wasn't going to have enough yarn. I worked the other side and then waited for the Textile Center Garage Sale hoping I'd find some to finish it. The garage sale had Unger Fluffy but only in brown and i didn't think that was a good option for a cloud. Instead, I picked up 5 skeins of Dolce by Wendy in a light turquoise color donated by someone who wrote the date they bought it, the location, the amount purchased and the cost on the band. I ended up picking up several groups of this particular person's yarn donation and used one of them for a baby layette.
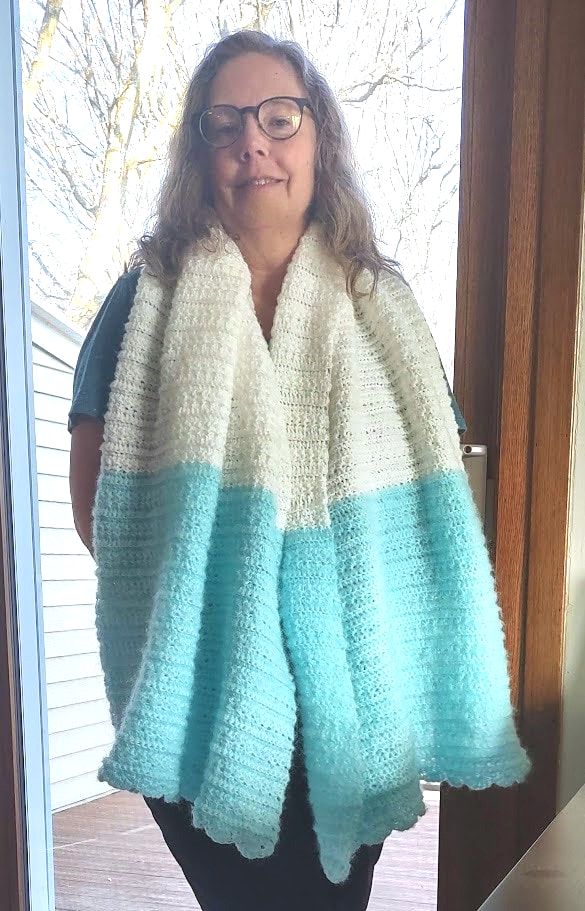
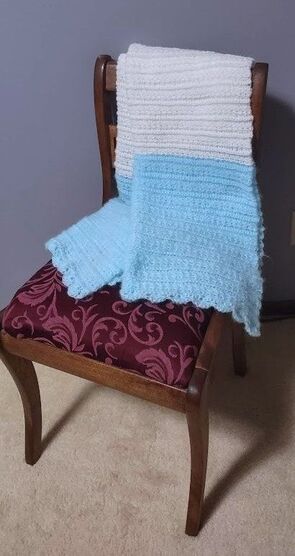
I now had an additional 8.8 ounces to finish the wrap so I did two skeins on each side thinking it wouldn't take more than one for the edging. Dolce is a very fuzzy yarn and difficult to pull out so I tried to figure out the edging with different yarn first. I had a lot of trouble figuring out where some of the stitches were supposed to go. I was fine for this part (stitches changed to US terms) "work one single crochet on the first single crochet of the last row, *10 chain, wool over the needle, insert the hook in the fourth chain from the needle and draw the wool through loosely, raise 6 more loops in the same way, wool over the needle and draw through all the stitches on the needle, 1 chain to keep the ball firm." After that I just couldn't quite figure out what to do. At this point you've used all of the chain stitches you made but you need to slip stitch in the first chain stitch from the ball, make 2 chains, miss two chains, 1 single crochet in the next, 2 chain, 1 double on the third single crochet from the last row. I tried turning and doing the slip stitch and single crochet in the same 10 chains but that didn't work well. I tried shortening the "ball" and doing the slip stitch, chain 2, single crochet in the last chain left. I thought that would work so I tried it and it used almost a skein to finish the row which meant that I wouldn't have enough to do the second side. This is where an illustration would have been helpful. I ended up pulling this version out which took some time since those extra fuzzy fibers like to stick to each other. 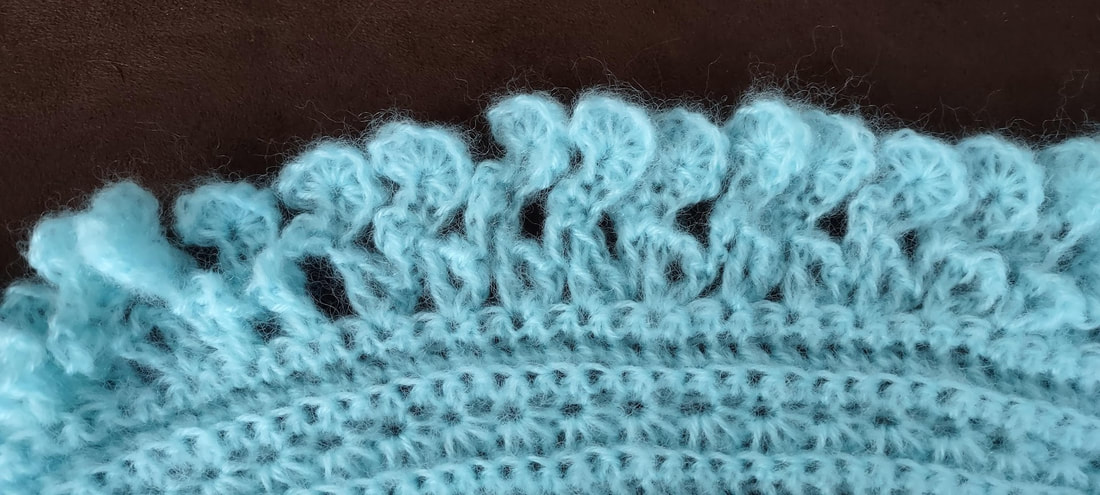 After looking at some of the other edgings in the book I decided I would just use a simple shell stitch for edging. I had 4 grams of yarn left when I was done with the new edging. The finished wrap was supposed to be 54 inches and mine is 66 inches by 20 inches. I could have stopped when I got to the right size but I thought I'd finish the two skeins of Dolce on each side to use it up. I'm not sure I would call this light and airy but I also used almost twice the yarn they asked for. It was 15.7 ounces at the end vs the 8 ounces they said I would need. Here is the finished wrap:
The color in the first photo is more accurate. It's more turquoise than sky blue. While the border was a little frustrating this wasn't difficult to make. It did take a lot longer than most of my projects and I was happy to be done with the fluffy yarn.
Was the pattern easy to understand? Yes, except for the border. I thought their description of how to do the special stitch aka star stitch in this was pretty good. 0.75 Does it look like the illustration? No photo so it gets a 0.5 Would someone wear or use this? Yes. 1.0 Did I enjoy making it? Yes, until I had to pull out the Dolce on the border. I think if I'd chosen easier yarn to work with I would have enjoyed it more. I'm not going to mark it down for that since the yarn was my choice and I knew what I was getting into. 1.0 Total Score = 3.25 out of 4.0 |


Proudly powered by Weebly