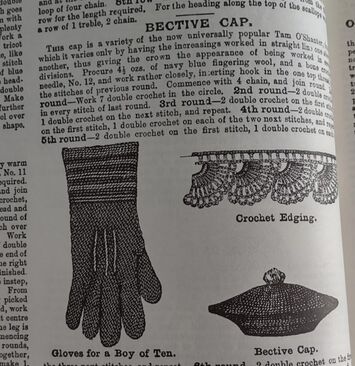
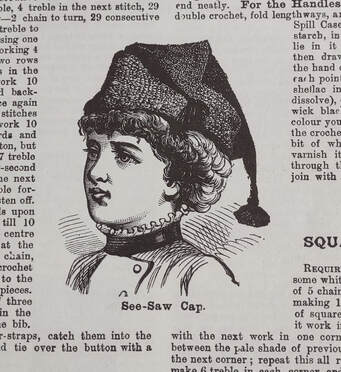
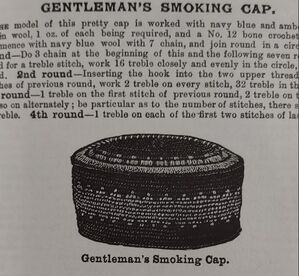
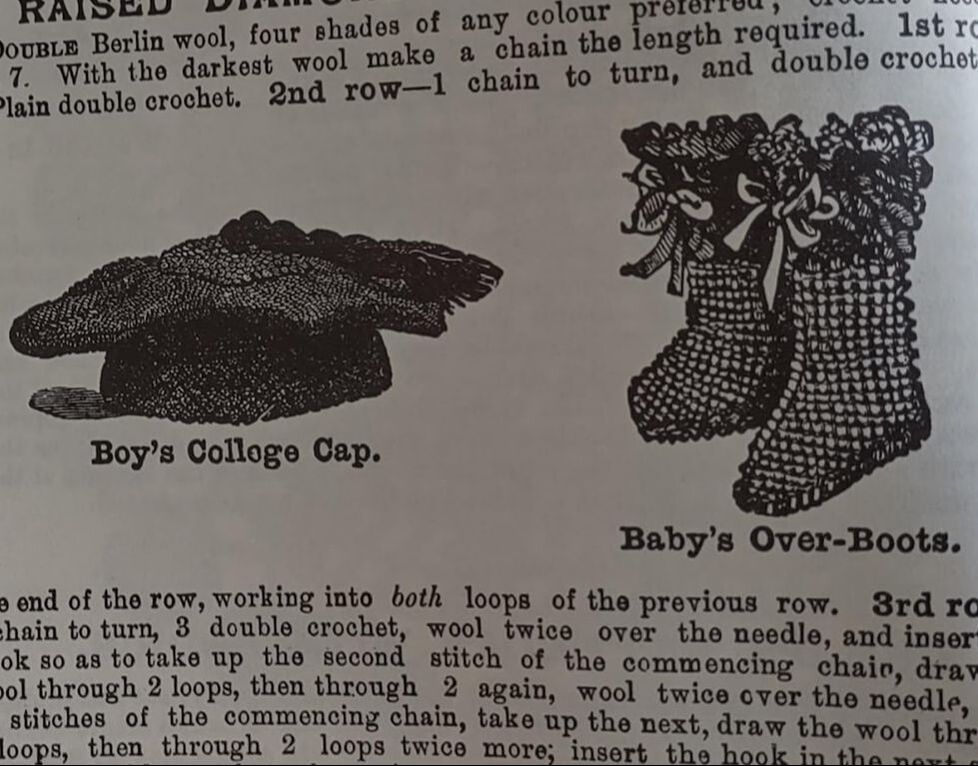
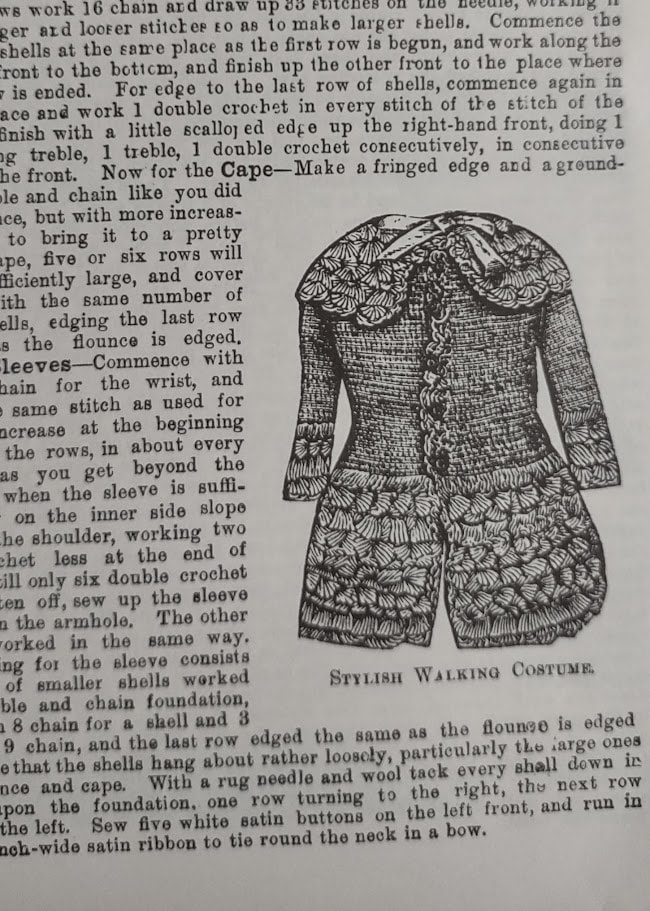
 This time we have 47 items and only 38 illustrations. Some of the patterns without photos include more common things they would make like baby boots, a shawl and some mats. Others seem a little more complicated but there is probably a general shape that they're familiar with like the Petticoat for a Child of Two and a Child's Petticoat with Bodice. Here are some of the patterns that I think are fun. There are several hats in this series including a Pretty Hat for a Baby Boy, a Bonnet for a Baby and the ones show below; the Bective Cap, the See-Saw Cap, the Gentleman's Smoking Cap and the Boy's College Cap. I considered making the Smoking Cap but I thought it might turn out to be more of a basket than a useful hat.
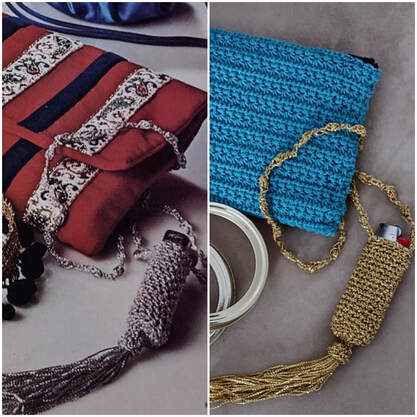
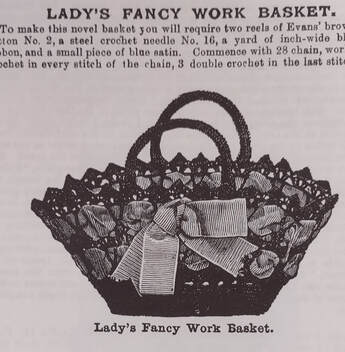
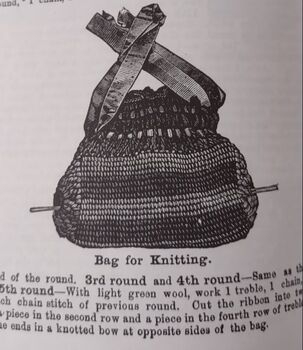
Speaking of baskets there are a few baskets/bags in this series. The Spill Case is described as a "pretty novelty to work for bazaars or presents." There's a Fancy Work Basket done in thread with large ribbons. But, my favorite is the Bag for Knitting. It says it's perfect for knitters because it will hold any size needle. It has openings on the side to accommodate the needles and, I assume, so you can easily pull out your needles for personal defense. I'm assuming that they suggest using cherry colored wool because it will hide the blood stains more easily. 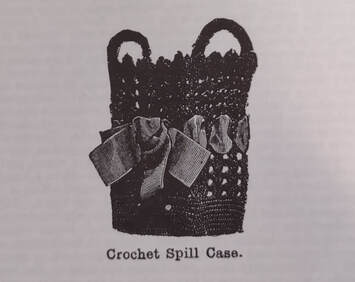
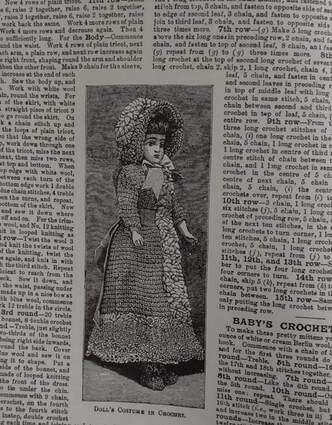
This Tippet Worked in Point Muscovite was an interesting combination of a shoulder cape with a muff attached by ribbons. 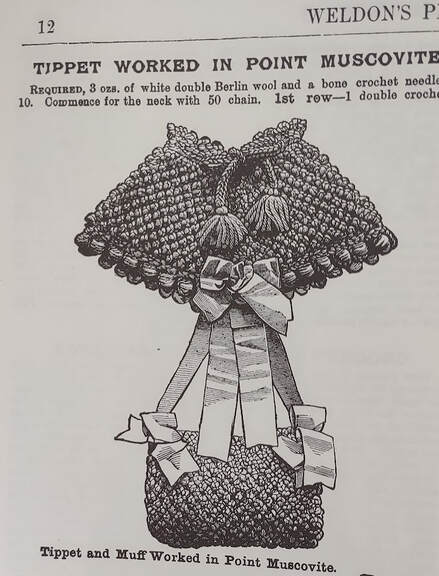 For next week's project, I'm going to attempt one of the patterns with no photo again. It's called "Cloud" and is described as a light and elegant wrap. This is one of the bigger things I'll make from the Weldon's Series. The finished size is about 1 1/2 yards plus an edging. We'll see if it's really is light and elegant!
0 Comments
I chose to make the "Crochet Square for Quilt With Four Diamonds of Raised Treble Stitches". Weldon's describes it as a "handsome square" and it's worked with something called Strutt's knitting cotton No. 6 and a steel crochet needle No. 15. 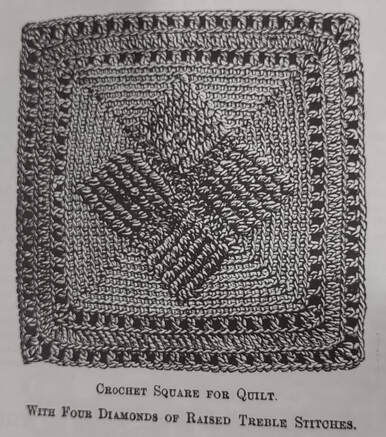 I couldn't find any source that could tell me what the equivalent crochet thread would be. I could find photos of Strutt's No. 4 and No. 8 but it was hard to gauge the size of the thread in the photos. The beginning of this book lists several Victorian cottons and substitutes but not Strutt's. The hook size didn't help much because what I think of as a size 15 steel hook is very small and would be used for a size 100 thread (a very fine thread) and from what I could tell between the two Strutt's sizes I could find the No. 8 wouldn't fall into that range. And then I noticed that the headline on the series said, "The sizes of Crochet Hooks mentioned in the descriptions are regulated by Walker's Bell Gauge." I found the photo below on the website for the Victoria and Albert Museum, London. It isn't a Walker's Bell Gauge but it is a bell gauge. In "Everyone His Own Knitting Needles" by Colleen Formby there is a comparison chart on page 8 that says the slot labeled 15 is usually 1.75mm on most bell gauges. 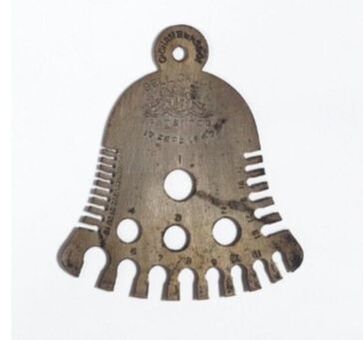 photo from the Victoria and Albert Museum, London So now working backwards from the hook size, crochet thread size 10 seems like a pretty good choice. I went with a 1.65mm hook (aka size 7 steel hook) since that's what I usually use for size 10 thread. 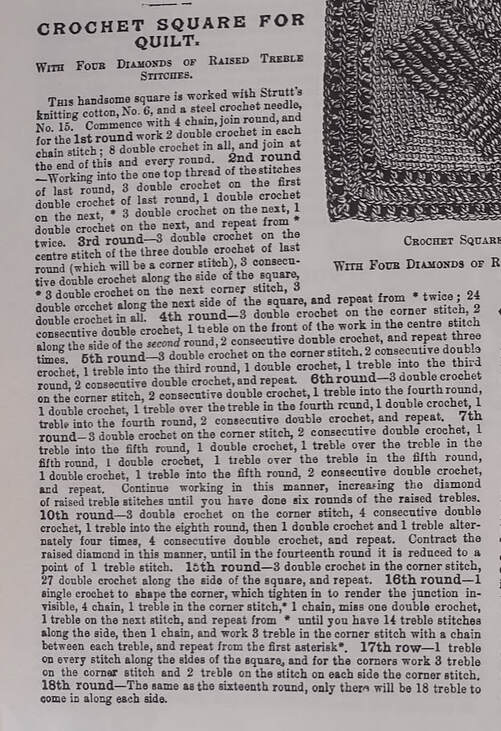 The instructions for this were actually pretty good. I tried starting with 4 chains and working the single crochets into them but ripped it out and went with the magic circle to start. Starting in the 2nd round we are working in into the back loop only for the rest of the square. They say to work into the "one top thread" of the stitches and it seemed like that meant back loop only but having the photo in this case was very helpful. They don't really say to keep doing that but the photo clearly shows the front loops that aren't worked into. Here are my notes that I followed after re-writing it in lines/rounds and switching to US terms. Quilt Square with Four Diamonds of Raised Treble Stitches Join all rounds, crochet into the back loops. Start with 4 chains, joined to make a circle
Here's what I ended up with. Size 10 thread with a 1.65mm hook gives you a square that's about 5 inches. I'm planning on making a few more quilt squares as they come up in future series. Hopefully I'll be able to put them together into something interesting.  Time for the score:
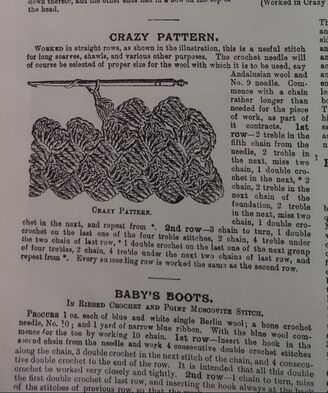
Is the pattern easy to understand? Yes. Aside from not knowing what they thought I should use as thread and a hook, the directions themselves were pretty good. 1.0 If there was a gauge... No gauge give 0.5 Does it look like the illustration? Yes! 1.0 Would someone wear (or use) this? Yes. 1.0 Did I enjoy making it? I did! 1.0 Total is 4.5. Not a bad score for this little square! Weldon's Second Series has "47 Useful Articles for Ladies, Gentlemen, and Children". 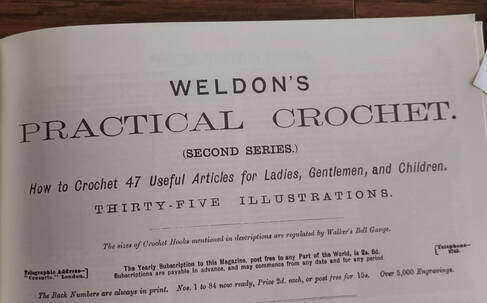 It has clothing for women including several hoods, slippers, shawls and hats. For babies there are multiple slipper/sock/bootie patterns and bibs. For older children there are frocks, hats, slippers and they didn't leave the men out. There are a few hats for them too. There are also several household items in this series like chair covers/antimacassars*, mats, pincushions and four squares "for a quilt". There are even stitch patterns that they call crazy pattern, plum lattice pattern, rice stitch, beehive pattern, herringbone stitch and Point Neige Superbe stitch. *An antimacassar is a protective covering for chair. It was intended to keep the chair from getting soiled by macassar oil that was used in this era as a conditioner and styler by men.
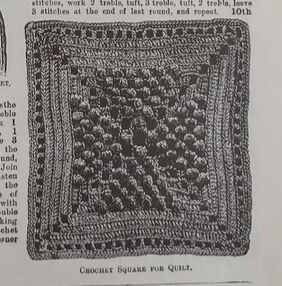 I was intrigued by the squares for a quilt like the one above so I decided I would make one out of this series. They pop up in later series too so I thought if I make a few throughout the year I can put them together somehow at the end of the year. I don't think I'll have enough to make a blanket but I might get a table runner out of them.
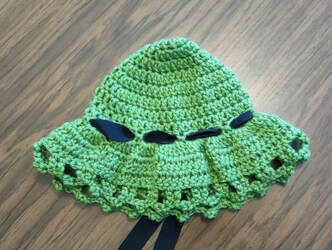
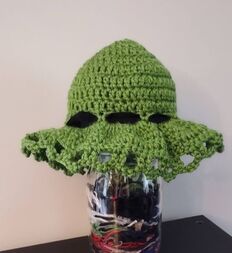
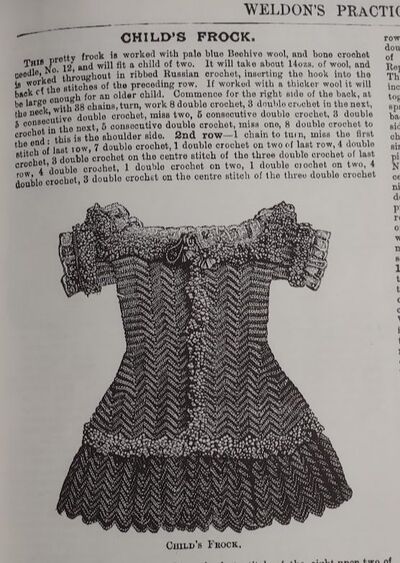
Next week I'll share the results of the Crochet Square for a Quilt shown above. I have a finished baby hat to share. Remember, this hat had no picture to confirm that what I ended up with was what they intended.  Their suggested materials for this "becoming little hat" include 2 1/2 ounces of pale blue double Berlin Wool, a No. 8 bone crochet needle, 2 1/2 yards of pale blue ribbon that is 1 1/2 inches wide for the trim. According to their glossary, double Berlin wool is a worsted weight yarn that was originally distributed from a Berlin depository and was made for Berlin needlepoint. The recommended hook for this yarn is an H, I or J. There is no gauge given for the pattern. I’ll be using 100 yds of Red Heart Soft in the color Guacamole and an H hook. I have some ¾ inch black ribbon that’s close to half the width they’re suggesting that I'll try. Let's get started! Their directions are in italics and my notes are bolded. Commence with 3 chain, join round. I just did a magic circle here. Work 8 treble (double crochet) in the circle, do not join again but continue working round and round like a serpent for 6 rounds, closely and evenly; I love the serpent description for working in a spiral! In the first of the rounds increase upon the foundation by working 2 treble (double crochet) on each of the 8 treble (double crochet) inserting the hook in the top loop and afterwards increase here and there where ever necessary to make the work lie flat. This will complete the crown. I did a basic increase pattern on this. The first round was increase in every stitch. The second round was double crochet in first stitch, increase in second and so on. Then shape the head, work three rounds straight on without any increase. So far this seems pretty straightforward. 10th round to commence the brim: 1 double crochet (single crochet), *3 chain, miss two treble (double crochet), 1 double crochet (single crochet) on the third, and repeat from * and join at the end of the row. 11th round – work 6 treble (double crochet) under every loop of the three chain of previous row; join and break off. This is the first part I questioned. Do I really need to cut the yarn? Couldn't I just turn the work without cutting it? I cut it but even after finishing it I didn't think it was necessary. 12th round – turn the work so as to get the wrong side of the treble (double crochet) stitches to the right side of the crochet already done, work 1 treble (double crochet) on each consecutive treble (double crochet) of the last round. 13th round – 1 treble (double crochet) on each consecutive treble (double crochet) of the last round 14th round – 2 long treble (double crochet) on two consecutive stitches of the previous round, * 4 chain, 1 double crochet (single crochet) in the forth chain from the needle, 1 chain, miss two treble (double crochet) of the last row, and work 2 long treble (double crochet) on the next two consecutive stitches; repeat from *; join round and fasten off neatly. I'm not sure what a long treble is and they don't define it. They give me a description of a long double crochet in the first pages of this series (aka half double) but not a long treble. I decided I was just going to do a treble (aka double crochet). That gives me an edging like the one below. I think the intention was to leave enough room for the ribbon. 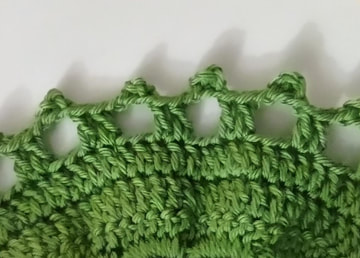 The finishing instructions say to: Trim with a plain band of ribbon round the head joined together in front with a small bow, also a small bow on the crown towards the front. Fold 30 inches of the ribbon in half lengthways and run it in through the holes round the brim of the hat, join neatly. Use the remainder of the ribbon for strings, Sew in a little white cap. I wasn't really sure where to put the ribbon. Running ribbon through the edging shown above is going to make that brim a little droopy. I ended up putting it through the openings made from rounds 10 and 11 at the base of the hat before the brim starts. Here is what my finished version looks like:
I'm not planning on rewriting this one. I think the instructions above are good enough and I didn't like it enough to make it again.
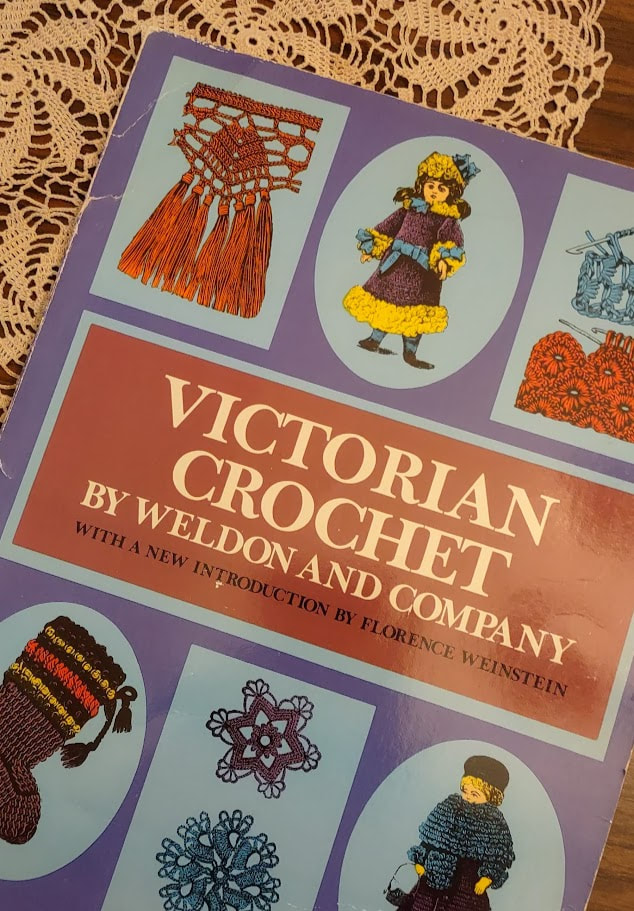
Here's the rating: Is the pattern easy to understand? I think the crochet part is pretty easy to understand. The ribbon finishing was a more difficult to understand. Still, I'll give it a point here. 1.0 Does it look like the photo or drawing? No drawing. 0.5 Would someone wear this? A very small baby could wear it. 1.0 Did I enjoy making it? Yes but I don't think I want to make another one. 1.0 Total score = 3.5 out of 4 The Weldon and Company edition I’m working from was published in 1974. It contains the first through nineteenth series that were originally published around 1895 in London. Fortunately, the editors included explanations of some of the terms for the garments themselves along with stitches and some substitutes for the yarn mentioned in the series.  I'm starting at the beginning with Weldon’s Practical Crochet. (First Series) How to Crochet 36 Useful Articles for Ladies, Gentlemen, and Children. Forty-Five Illustrations. The First Series starts out with “Details of Crochet” where they give a very brief history of the craft as they know it and descriptions and diagrams of some of the stitches including chain, single crochet (slip stitch), double crochet (single crochet) and more. They include directions for increasing and decreasing and special stitches like Tricot Stitch (Tunisian/Afghan stitch) and Krotchee Crochet (Hair-Pin). The 36 Useful Articles include:
The directions for the basic stitches are shown in the photo below. They seem pretty clear to me but I'm also familiar with the stitches they're using so I can't say this would be easy for someone who hasn't done it before. This is where I could confirm that not only are they using Victorian terms but also what we would now think of as UK terms for the basic stitches. That makes sense since these were published in England.  Here are two interesting projects from the first series that I won't be making because they're pretty involved and I could never get them done in a week. These black and white inserts show so much detail!
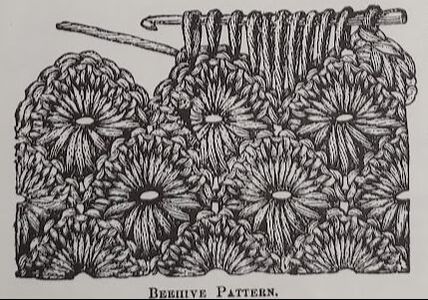
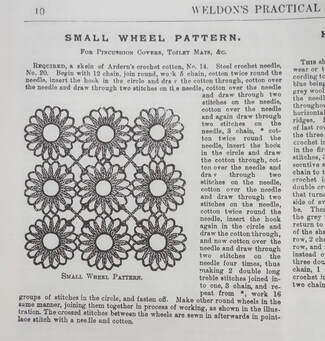
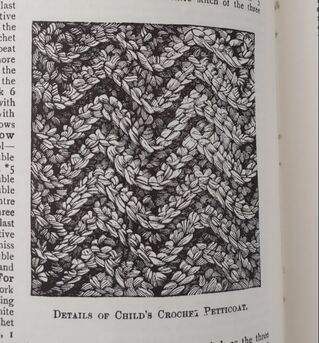
Not every pattern has a photo or drawing but there are photos of stitch patterns and occasionally they'll give you a close up of the stitch pattern instead of the finished item.
For next week, I'll be working on a baby's hat that doesn't have a photo so I won't have any idea what it should look like before it's done.
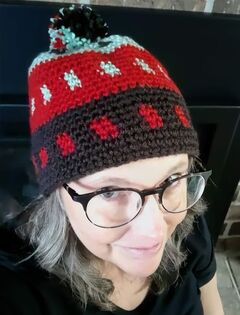
Here is my rewritten version of the Gentleman's Cap. This hasn't been completely tested so if there are errors, let me know and I'll update the pattern. 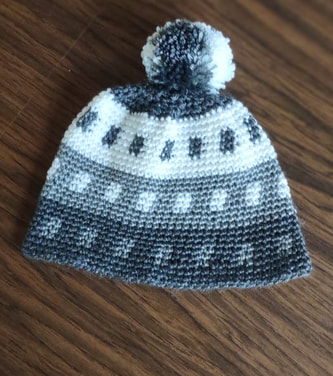 Materials:
Gauge
Stitches and techniques used:
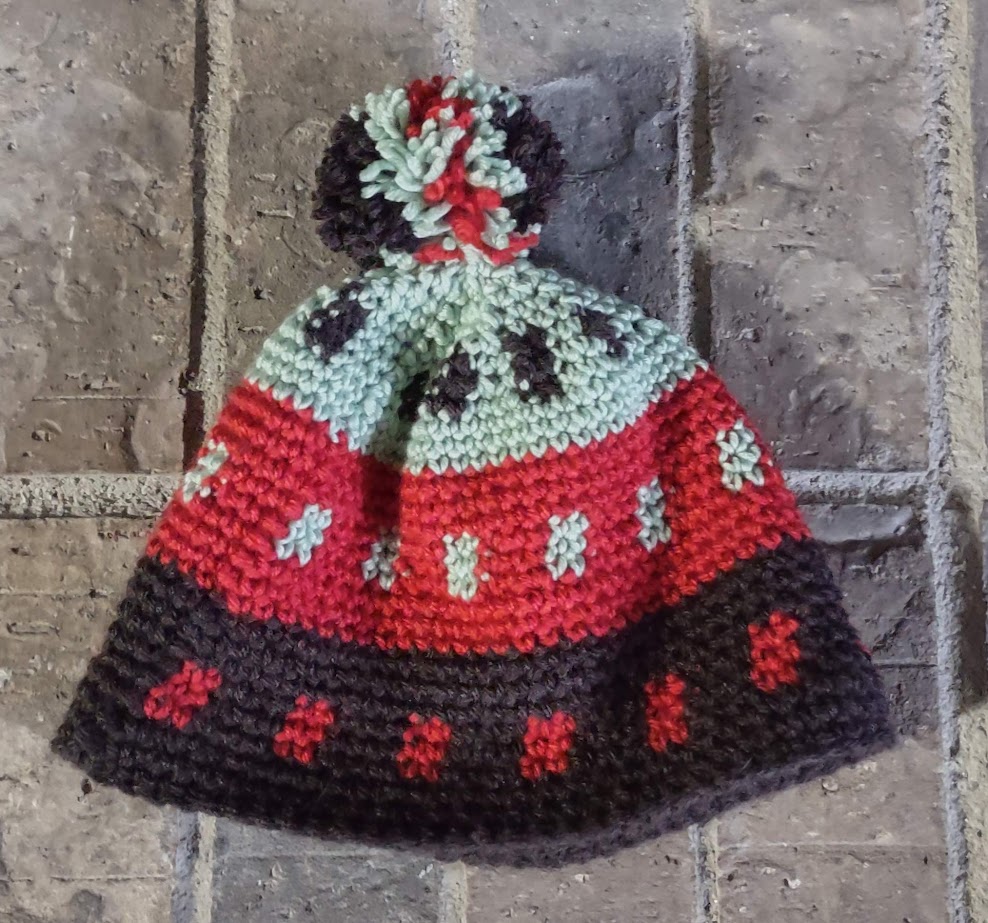
Other pattern notes: You can use whatever colors and order of colors you like. You could make this with dots being smaller scraps of yarn in multiple colors. Or, you could make the whole thing in two colors or 9 colors or whatever makes your heart happy. If you want to make the hat taller you can add an additional 9 rows of the color change pattern (Rnd 10-18) or just add more rows of single crochet at the end. Rnd 1: Starting with color A, make a single crochet foundation row of 70 sc. Check to make sure this is approximately the circumference of your head without stretching it. If the size isn’t right, you can change the number of stitches as long as it’s a multiple of 5. You can also use a smaller or larger hook. Join to the first single crochet without twisting the foundation. (You can use a chain instead but remember to use a multiple of 5 plus 1 for the chain.) Rnd 2: Chain 1, sc in the same sc as you joined, 69 sc, join to first sc in the current round (70 sc) Rnd 3: repeat Rnd 2 Rnd 4: Chain 1, sc in the same sc as you joined, sc 2 Color A, *sc 2 Color B, sc 3 Color A* repeat around to the last two stitches. The last two stitches should be Color B. Switch to color A in the last stitch and join in the first sc of the current round. Rnd 5-6: Repeat Rnd 4 Rnd 7-9: Repeat Rnd 2 in Color A, changing to Color B in the last stitch of round 9. Rnd 10-12: Repeat Rnd 2 in Color B Rnd 13-15: Chain 1, sc in the same sc as you joined, sc 2 Color B, *sc 2 Color C, sc 3 Color B* repeat around to the last two stitches. The last two stitches should be Color C. Switch to color B in the last stitch and join in the first sc of the current round. Rnd 16-18: Repeat Rnd 2 in Color B Rnd 19-21: change to Color C and repeat Rnd 2 Rnd 22-24: Chain 1, sc in the same sc as you joined, sc 2 Color C, *sc 2 Color A, sc 3 Color C* repeat around to the last two stitches. The last two stitches should be Color A. Switch to color C in the last stitch and join in the first sc of the current round.(70) Rnd 25: In Color C, chain 1, *sc 3, decrease 1* around, join in first sc of current round (56) Rnd 26-28: Repeat Rnd 2 in color C, changing to Color A in the last stitch Rnd 29: Chain 1, *sc 2, decrease 1* around, join in first sc of current round (42) Rnd 30: Chain 1, *sc 1, decrease 1* around, join in first sc of current round (28) Rnd 31: Chain 1, *sc 5, decrease 1* around, join in first sc of current round (24) Rnd 32: Chain 1, *sc 1, decrease 1* around, join in first sc of current round (16) Rnd 33: Chain 1, decrease around, join in first sc of current round (8) Sew top closed and add a pom pom. Let me know if you make one! Making the Gentleman's Cap was not completely pain free. In some cases my experience helped and in some cases the wording that they used made it harder to understand. As I said last week, there are no pictures or even drawings in this book to compare my work to. Let's start out with the stitch. This pattern is done entirely in what they call double crochet. Since this book was described on the cover as "From the Latest London Edition" I am assuming that they're using what we generally refer to now as UK terms and we would refer to that stitch as a single crochet. It wasn't too difficult to confirm this because they tell you (sort of) how to make these two stitches. The first one is how they make a muffatee (a wrist warmer). The second one seems to be just a stitch description.
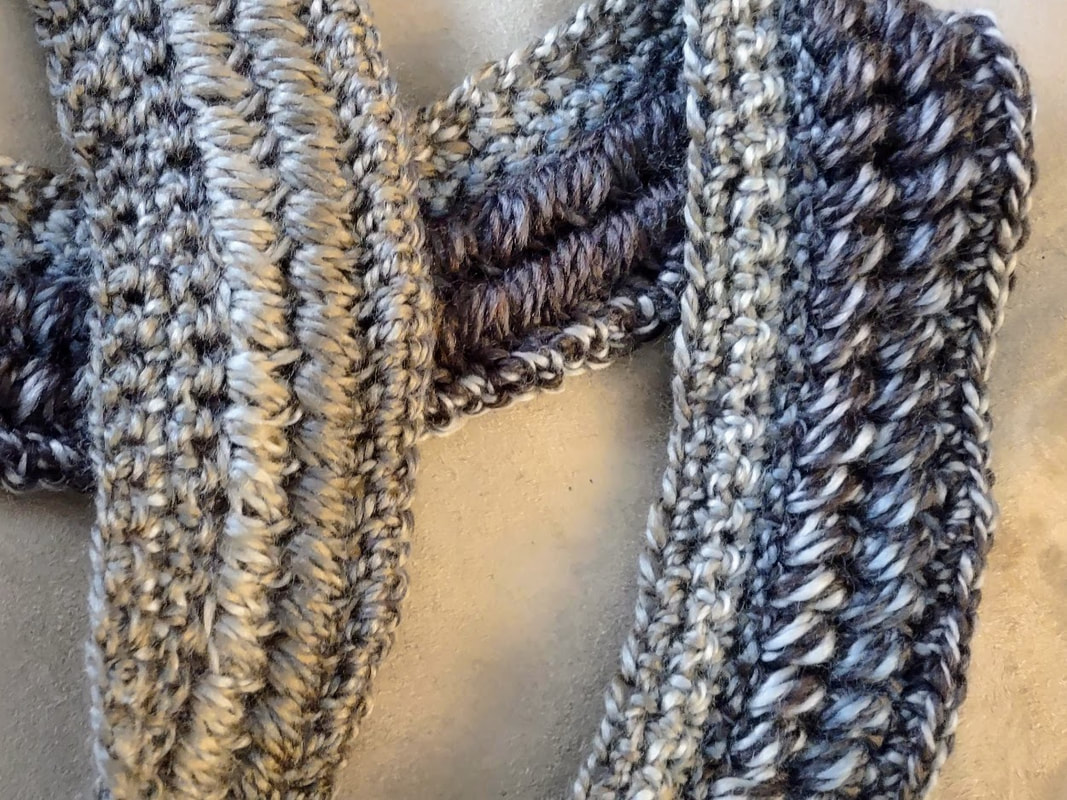
The fiber they suggest using is German lambs' wool or 3 ply fleece in dark brown, scarlet and light green. I used Vanna's Choice 100% acrylic yarn in Espresso, Scarlet and Martha Stewart yarn in Eucalyptus. All are worsted weight yarns leaning towards the heavier side of worsted. The hook they suggest is a coarse ivory hook. I'm including their directions and I'll tell you how I interpreted it. 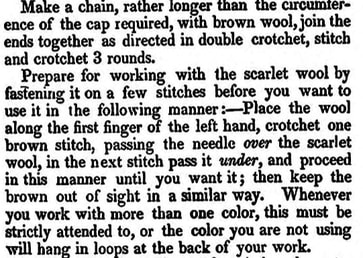 "Make a chain rather longer than the circumference of the cap required". What does "rather longer" mean? This one took a couple of attempts. To start, I read the whole pattern and realized that the color pattern is a 5 stitch pattern so I used a multiple of 5 +1. The first attempt was 76 chains since that seemed longer than the circumference of my head. After getting about 6 rounds in I realized this was going to be pretty big so I started over with 71 chains. For me, rather longer = about 5 more chains than the circumference of my head. I joined the ends together, chained 1 and did three rows of brown single crochets. It doesn't say whether you should join the rounds or work them in a spiral so I went with joining to the first single crochet in the round, making a chain 1, and starting the next round. "Prepare for working with the scarlet wool by fastening it on a few stitches before you want to use it in the following manner" This is from the second paragraph above. Then they use a lot of words to tell you to crochet over the unused yarn every other stitch. I probably would gone over the unused yarn in every stitch but this is fine. 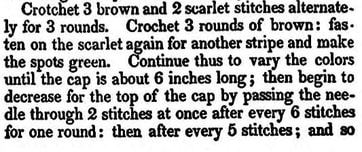 "Crotchet 3 brown and 2 scarlet stitches alternately for 3 rounds." I wasn't sure that meant they wanted me to do 3 brown and 2 scarlet in one row and then alternate to 3 scarlet and 2 brown or just do 3 brown and 2 scarlet in each row. I tried the first way and then realized they were looking for spots in the next sentence (good thing I read it so carefully the first time) so I ripped that out and did three rows of 3 stitches in brown and 2 in scarlet so they lined up and would look like spots. Then I did the next three rounds in brown. Now you can see the pattern! 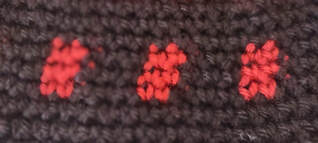 "Fasten on the scarlet again for another strip and make the spots green". I fastened on the scarlet and immediately started doing the color changes which was, of course, wrong. To make it look like spots I need the three rows of red first just like the section below. When they said, "strip" they meant the entire 9 row pattern. I ripped that first row of scarlet and green out and did 3 rows of scarlet, then 3 rows of color change and then 3 more rows of scarlet. This is where I suddenly noticed that they didn't tell you how to change colors and when to add that new color to the stitch. They assume you don't know how to carry yarn but do know how to change colors. "Continue thus to vary the colors until the cap is about 6 inches long". I decided the next row would be green with brown spots and got close to 6 inches after the first three rows of green. "Then begin to decrease...by passing the needle through 2 stitches at once after every 6 stitches". I know multiple ways to decrease but I don't think you can pass the needle through 2 stitches at once except maybe in a post stitch? The only way I could think of that this made sense was what we now call an invisible decrease where you're picking up the front loop in each of the next two stitches. You aren't really doing them "at once" but it's closer than a more typical decrease so I did invisible decreases. It ends with "and so on until you have very few stitches left. Fasten off with a cross stitch needle and sew on a tassel". Since I was so close to the top, I just did two additional rows in the green to finish it off and add a pom pom. While this wasn't pain-free it wasn't terrible and the hat turned out looking like a hat.
Next week, I'll post their pattern rewritten in more modern terms along with a few adjustments that should make it a little easier. As we go through the year of Victorian patterns I may attempt to do this if I think the pattern would benefit from it and it's something people might want to make. If I don't do it for a pattern and it's something you would like to see, let me know and I might add it to the list. Here's the rating: Is the pattern easy to understand? I'm giving them credit for a least describing the stitch. It didn't start well with "rather longer" as a description for the starting chain. Overall it wasn't too difficult so I'll give it a 0.5 Does it look like the photo or drawing? There wasn't a drawing or a photo. I don't necessarily want to drop the rating for not having a photo so I'll give it a 0.5 if there isn't a photo. Would someone wear this? Yes! 1.0 Did I enjoy making it? Yes. 1.0 This gets a 3 out of 4. 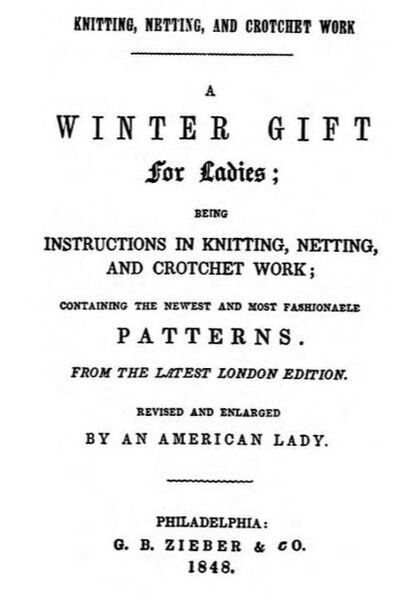 One of my main sources for vintage patterns is the Antique Pattern Library and I found a few options there to supplement the Weldon’s series. One is a pdf of a booklet called “An American Lady, Winter Gifts for Ladies” from 1848. It’s 65 pages and includes knitting, “crotchet” and netting patterns. There are no photos of any of the patterns. I had to laugh when I read this interesting introduction,
“To the Ladies of America. It is customary amongst the German ladies to have at hand some light piece of work, with which they can at any time be employed. When passing the evening in one another’s society, even when passing a morning visit, or after dinner at a dinner party, or while sipping coffee, or taking ices at the public gardents (sic), the consider their knitting or netting needles an indispensable accompaniment. And there appears to be a charm in the occupation that promotes rather than impedes conversation. Our American ladies will doubtless find the custom worthy of imitation. Many an hour which would pass tediously if they were forced to find topics of conversation, may be whiled pleasantly and profitably away, by the assistance of some agreeable employment, which interests without engrossing the attention. The facility of carrying about almost all species of knitting and netting render them peculiarly well adapted to this purpose. In the following little work, all the different species of knitting, netting and crotchet, are so carefully explained, that a person totally unacquainted with their mysteries, may become proficient wit very slight pains. The most useful kinds of knitting, as well as the more fanciful, have been carefully inserted, and many new stithes (sic) are now offered to the ladies of America, with which we flatter ourselves, they have never before been acquainted. ” Here are my thoughts on that introduction:
On to the actual patterns. The booklet has 65 pages. The knitting and netting patterns start on page 12 and there are about 60 of them. Many of them are edgings and bags. Crocheting patterns and directions start on page 54 of the booklet and there are four patterns. After these four patterns they go back to knitting patterns for the rest of the booklet. The four crochet patterns are:
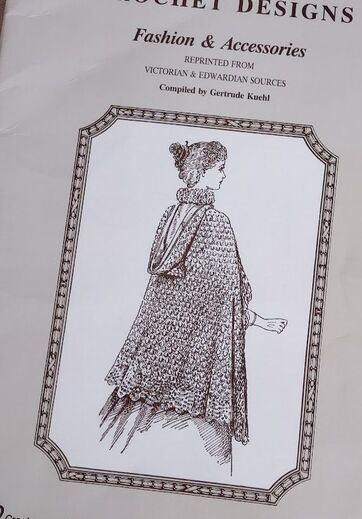
Aside from the hat, none of them list a yarn or a hook. The cap suggests a German lambs’-wool or 3-ply fleecy and a coarse ivory needle. For next week, I’m going to try the hat with a worsted weight yarn and a I hook. Tune in then to find out if there were only “slight pains” to make this. My original plan for 2024 was to do vintage patterns by the decade starting with the earliest ones I had in my collection. I planned to start with a book called, “Crochet Designs, Fashion & Accessories, reprinted from Victorian and Edwardian Sources”. It was compiled by Gertrude Kuehl for the Knitting and Crochet Guild of London in 1990. It has patterns that run from 1830s to 1919. After that I would move on to the 1940s and see how far we got with the decades in order. Then, my friend, Julie shared a book with me called “Weldon’s Practical Crochet” that has their first 19 series of newsletters with 30-50 patterns in each! Weldon’s patterns were published mainly in the Victorian era and now I had a lot of them. A new plan was formed; 2024 will be mostly Victorian age (1837-1901). I can’t promise I won’t veer into more modern patterns but the Victorian era will be the initial focus. This should be an interesting process. Yarns were different, stitches had different names and directions were often vague, some don't even have photos. It should be fun! Next week I'm starting with a booklet I found on the Antique Pattern Library website from 1848. Then I'll move on to these two physical books I have:
There were surprisingly few projects that had less than a rating of 3 out of 5. If I include the ones that I didn't finish (DNF) there are four.
Next week I'll start the 2024 theme!
Welcome to the best and worst of 2023. This week I have the best; next week will be the worst. I try to score these at least consistently if not always objectively. For the best and worst I'm going to leave out the ones that weren't neckwear or dolls. Those vintage patterns I did were chosen specifically for a purpose so they're trending higher. Each bullet point has a link to take you back to that blog post where you can see the photo of the project. 5 out of 5:
 Between 4 and 5:
 4 out of 4:
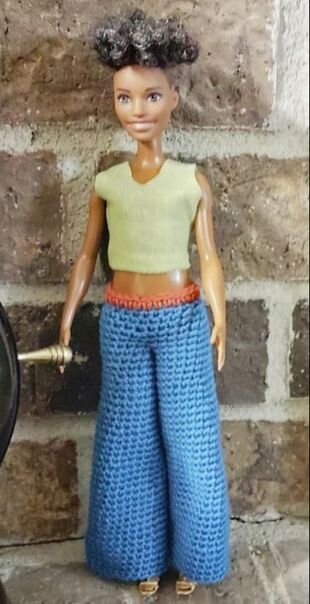
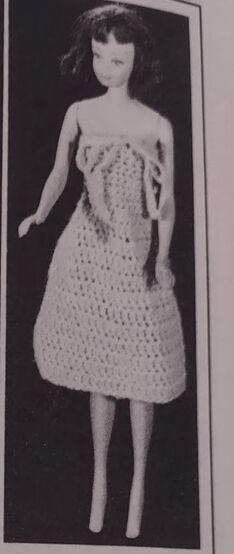
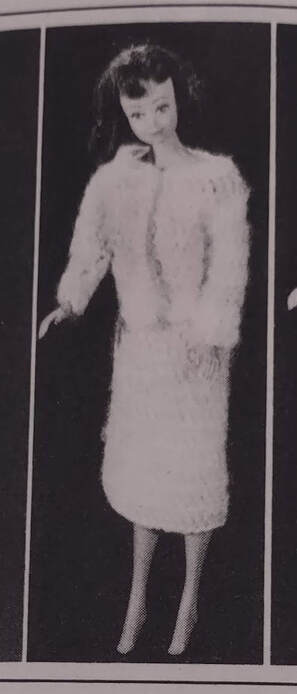
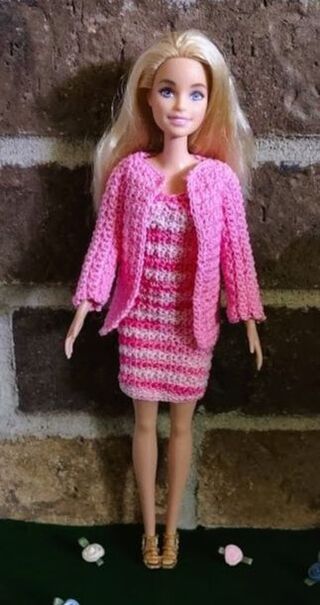
 Did you have a favorite pattern from the list above? Next week I'll have the worst of 2023! This week I have the dress from the Alice Brooks mail order pattern. The drawing of the dress is the middle bottom outfit below. 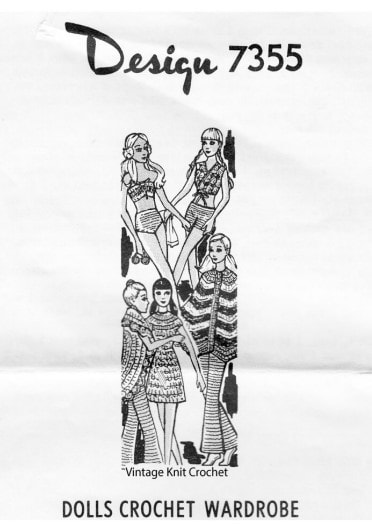 This pattern uses three different colors and a C hook. I used the Mayflower Cotton 8/4 in yellow and green and pulled a third color but decided not to use it when I realized that the pattern wanted me to change colors for every row and I'd have to sew all of those ends in. Instead, I chose to do it mostly in yellow with some green accents. The pattern itself is easy to follow and I had no problems until the the last row was finished off. Unlike the other patterns in this pamphlet, the dress doesn't have any finishing directions and the back is open from the neck to the waist. I'm not sure if it's an issue in the original pattern though. The pattern website I bought this from transfers the instructions to an easy-to-read format in a pdf instead of the text these usually come with. It's possible that a line or two was missed in the transfer. I assumed that it would have you sew snaps in the back so that's what I went with. Here is the finished dress. 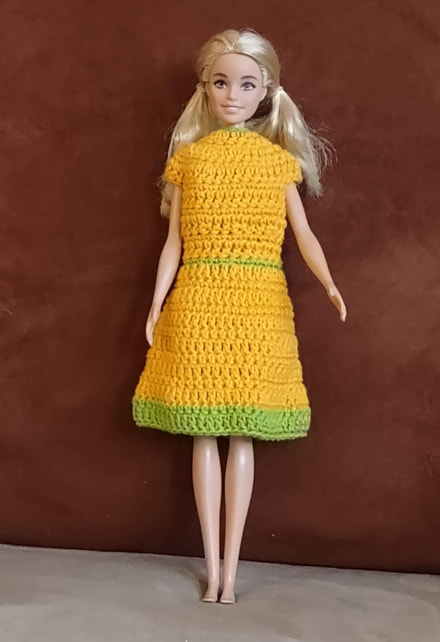 I think this is my least favorite out of the outfits from this set of patterns. Not just because of the missing directions or, that I would have had to sew a lot of ends in if I'd gone with their color pattern. It's just not that cute. Maybe if I'd used a softer yarn it would have had more drape but I think it still would have been a little loose fitting.
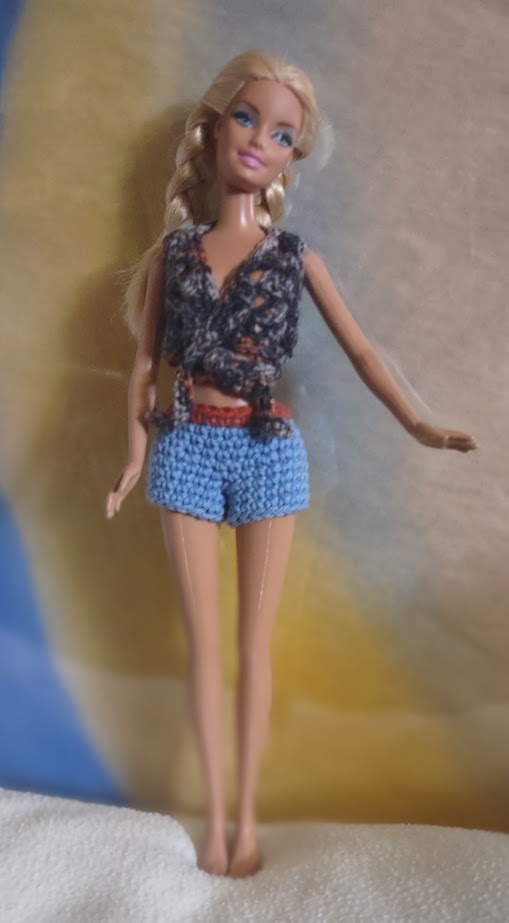
This one gets a 4. Is the pattern easy to understand? I'm marking it down a little for the missing directions 0.75 If there is a gauge, could I match it? 1.0 Does it look like the photo? It's enough like the drawing that I'll give it the full point. 1.0 Would someone wear this? Maybe they would? It's fine, just not great. 0.5 Did I enjoy making it? I would have enjoyed it less if I'd had to sew in more ends. 0.75 I'm taking the rest of November off so I can work on holiday gifts. I'll be back in December with the best and worst of the year and to figure out what to do next year. I've found so many weird and interesting hats that I kind of want to go back to those. I might not have enough for a full year but I can mix in a few other things along the way. As promised, I have more outfits from the same mail order pattern leaflet that we looked at last week. This week I have the flared pants and the vest and shorts outfit on the right in the photo below. The shorts and pants were both variations on the bikini pattern that I did last week and were easy to do. I skipped the elastic on the waist again for both of them and they were done in cotton 8/4. The surplice vest was a little different. I used some scrap yarn for this one. The back is a granny square and the two sides are triangles. The assembly wasn't quite clear to me but the photo above made it a little easier to see how the vest was supposed to look when finished so I could work backwards and make sense of the directions. There are only so many ways to make it work so it doesn't seem like it would be that complicated but somehow it didn't seem right the first time I laid the pieces out based on where the armholes needed to be. The tie is worked at the very end of the assembly across the bottom of the vest. The single crochet tie seems a little thick for the vest and probably could have just been a chain for the part that wasn't attached to the vest. I think these turned out pretty well. Overall, I'm giving this week a 4.5 mostly because of the vest assembly.
I may have one project more from this leaflet; the dress almost done, After that, I'll be taking a break to work on holiday gifts. And then I need to figure out what to do next year...
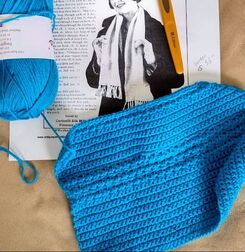
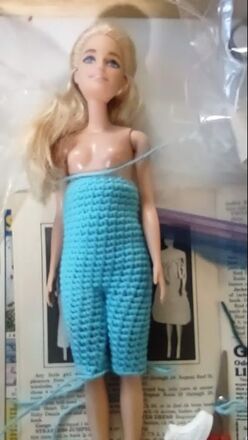
For this week and the next two, I have patterns from an Alice Brooks mail order pattern; Design 7355. Alice Brooks (and Laura Wheeler) patterns were advertised in various newspapers, magazines and other publications from 1933 to 1982. These design offerings were more than just crochet. There were also lots of quilt patterns along with sewing, knitting and other needlepoint work. I have several Alice Brooks and Laura Wheeler design patterns that I’ve acquired from friends and estate sales but I did not have any of the Barbie aka “11-1/2” doll” patterns. I purchased the one for these posts from vintageknitcrochet.net and I have no idea what year it’s from. We can probably narrow it down to sometime in the late 60s or early 70s.  This pattern came with a bikini, shorts, vest, "dramatic" jacket, dress, pants and a cape. For this week I've made the bikini. In this case, the pattern gives a weight of yarn and the amounts you'll need for groups of the patterns. It said I would need 2 oz of fingering weight yarn in the main color and 5 yds in a contrasting color to make the bikini, shorts, vest and pants along with a C hook. The pattern has a gauge given for the different wardrobe pieces but I didn't really check my gauge. I did make sure I could get it on the doll though. I gathered a bunch of fingering weight scraps I had but after trying a few of the wool scraps I ended up using some cotton 8/4. The bikini came together very quickly and I think it took me just as long to weave in the ends as it did to crochet the pieces. I skipped the elastic in the waist band of the bottoms since those seemed to stay up pretty well. The top doesn't stay up very well but it's cute when it does. Here's the finished bikini: 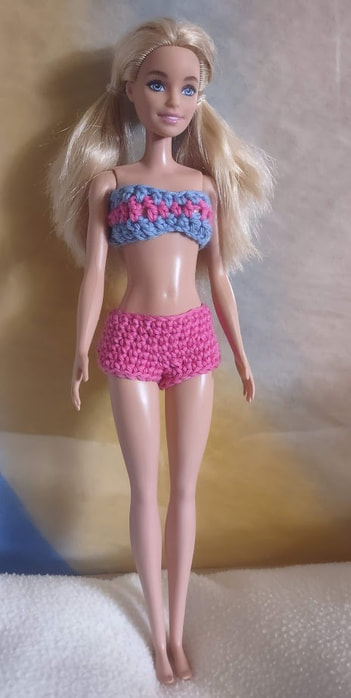 I'm giving this one a 5!
Next week I'll have the vest and shorts! Have you ever made anything from a Laura Wheeler or Alice Brooks mail order pattern? Let's give Workbasket Magazine another chance after last week's challenges. This week I have an ensemble from September 1985. 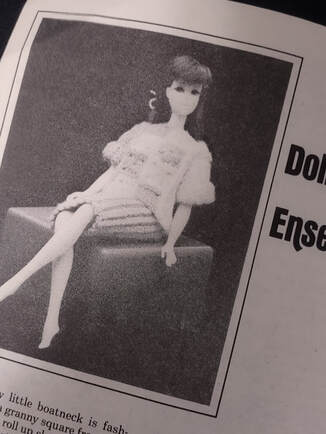 The magazine photo really is this washed out in person. I thought it was interesting that this Barbie appears to be missing shoes. I guess they had a hard time keeping track of those little things too. This Doll Ensemble is a skirt and top set and is described as an easy, “sporty little boatneck...fashioned around a granny square front and back.” It has a simple rib stitch skirt to go with it. The pattern suggests a 3-ply sport weight yarn with a size 1 steel hook (2.75mm). The pattern gives a gauge but I wasn't able to get it right with the sport weight yarn I tried (Premier Cotton Fair) so I dropped down to a fingering weight (Scheepjes Spirit in Dolphin and Berroco Comfort Baby Fingering) and got the gauge with a size 0 (2.5mm) hook. I don’t love sewing squares together but the top only had 16 little squares, eight in each color, to sew together. The squares were very simple to make since they are just one round each and the directions for putting them together made sense. In the next section they add the sides to the assembled squares and I missed where they had one side in color one and one side in color two. I decided I liked the way it looked with just white sides so I left it and made both of the arms white too instead of one in each color. The skirt is 36 rows of single crochet in the back loop, finished with a seam up to within an inch from the top. Add a snap to the waistline and you’re done! 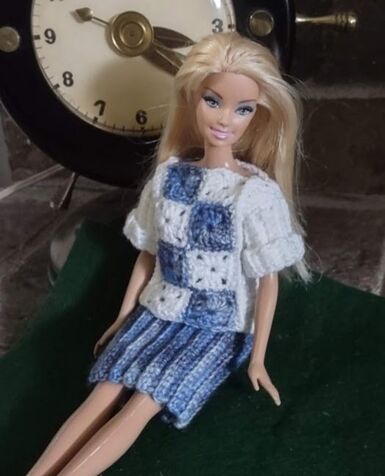 I like the way this one turned out especially after last week’s disaster.
Rating: Is the pattern easy to understand? Yes If there is a gauge, could I match it? Yes Does it look like the photo? Yes Did it fit Susan? Yes Did I enjoy making it? Yes This one gets a 5! This week you get three outfits in one post. The January 1984 Workbasket Magazine has three patterns under the title "Doll Wardrobe"; a strapless jumpsuit, a halter dress and a two piece suit. Let's call this experience the good, the bad and the wtf is this. Buckle up, this is a longer post because I have things to say about these patterns. Here are the magazine photos. They don't look great but they don't look terrible either. It looks like it's mostly double crochet so it should go pretty quickly and to be fair, it does go pretty quickly. I made one per evening. I'm using the Fashionista dolls for the modeling because I need to use the smaller dolls for these outfits. You'll see why. 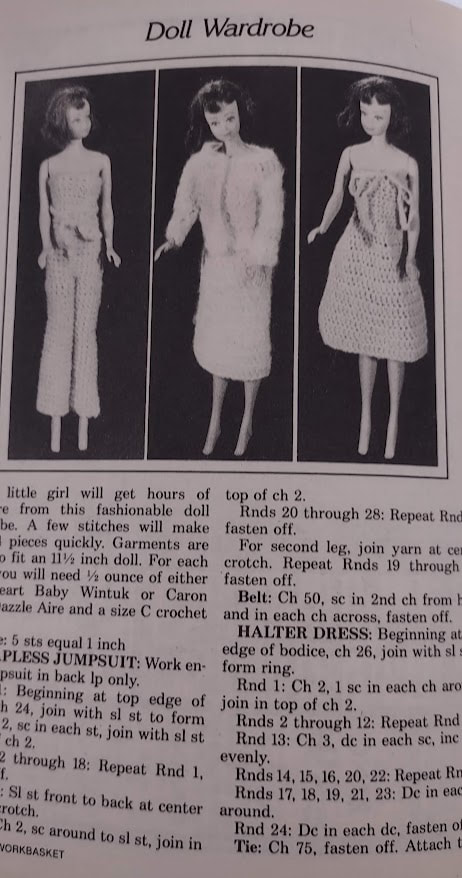 The pattern says you need 1/2 ounce for each pattern of either Red Heart Baby Wintuk which is a 3-ply fingering weight yarn or Caron Baby Dazzle Aire which is a worsted weight yarn with a lot of halo. So, they're telling me to use either a fingering weight or a worsted weight? The worsted yarn may be categorized like that because of the halo so I'll try to give them some grace here. At least the pattern gives a gauge of 5 stitches to one inch so I have something to go by. I tried a fingering weight yarn but that was too small. I moved up to a sport weight yarn (Premier Cotton Fair for the second two patterns) and got the gauge right with the recommended C hook. I'm going to do these in order from best to worst. Good: The Halter Dress I had a scrap of unknown light blue yarn that I got the gauge with so I used that for this dress. Many of the doll patterns I've made make size adjustments around the chest to make it fit better. This one didn't. It starts out from the top down as a tube in single crochet, then increases a few stitches at the waist and changes to double crochet for the dress. Fairly simple to crochet and in this case the directions were ok. There is one part where it tells you to increase by four stitches evenly instead of saying something like "dc 5, inc, dc 6, inc, repeat around". The tie in the photo just has a bow on the front of the dress and the directions say to attach it with a single knot under the first round in the center. There was no way this would stay up without it actually being a halter top so I tied it around the neck. Here's the photo of the finished version. I did weigh my yarn to start with and had slightly more than the half ounce but I still ran out and had to do the hem in a different color. My version seems a little longer but it was a tight fit on the top.
The Bad: The Two Piece Suit The skirt wasn't so bad on this one. Again, this patten mostly a tube that's joined in the back after each round and it's all done in the back loop only. There are a few increases in round 2 but after that it's just double crochets in the back loop to round 12 and it's done. There isn't anything wrong with this but it is tight to get on. Most of the other skirts have a small opening in the back with a snap or closure of some kind to get it over her hips. The jacket was more of a problem. It starts out with chain 30 and double crochet in the second chain from hook. It's hard to do a double crochet in the second chain from the hook. I'm pretty sure they mean third chain since when I got to row six, I was one stitch off. The pattern has you double crochet alternately in the front loop and back loop for the next couple of rows until you get to "Rnd 6" (These are actually rows, not rounds - this is the only pattern in this group that isn't a tube. I don't know why they're still calling them Rnds.) Row 6 is where I figured out that I was off a stitch because it's the first time I can get a stitch count aside from the chain row. This row has you dc in next 6, chain 6 skipping 3 dc, dc in each of next 9 dc, chain 6 and dc in last 7 dc, chain 3 and turn. Technically this works but it would have been nice if they had ended it with; chain 6, skip 3 dc, dc in last 7 dc. Row 7 wants you to dc in next 5 dc, (skip 1 dc, dc in next dc) twice but those aren't double crochets there, it's the chain 6 from the previous row. I tried it with the assumption that they did really mean dc there but I ran out of stitches. This should just read; dc in next 5 stitches, (sk 1 stitch, dc in next st) and so on. Row 6 is the last row of the body of the jacket. Now we'll move on to the sleeves. The sleeves have you join on the inside of the armhole and then work double crochets in the front loop only. I chose to join on the right side of the armhole and work in the back loop because I find it easier to dive in between the loops than to pick up the front loop. The directions say to dc around but don't tell you have many stitches they think that is. The armhole is made of three double crochets at the bottom of the armhole, a dc on each side that you would crochet into the side of and dcs and chains that you skipped in Row 7. I decided to make 3 dc on the top and bottom and 2 on each side. This would turn out to be the wrong thing to do. I should have done more stitches on the top or sides because in Round 2, 3 and 4 you're asked to skip a stitch in each row. I started with a tube of 10 double crochets. If I skipped a stitch in three rows I'd never get Barbie's hand in the sleeve. It was a struggle with the tube of 10 stitches! There is a border of single crochets but it doesn't help the fit at all as you can see in the photo below.
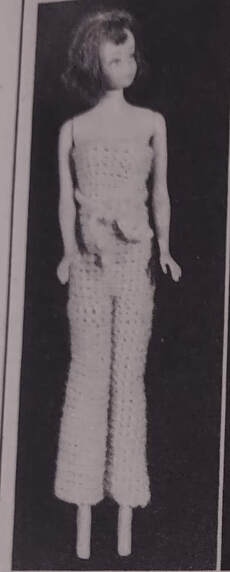
 Does it help if I hold my arms out like I want to strangle you for making me wear this? The WTF: The Strapless Jumpsuit. This is truly a tube at the top and two tubes for legs. Barbie is not a tube though and based on how hard the halter dress was to get on I knew this would be difficult before I even began. The halter dress starts with a chain of 26, the jumpsuit goes two stitches smaller. It's worked from the top down and it seemed to be going ok but when I got to the legs I thought that they also seemed a little tight and then I got to the end of the instructions and wondered what happened to the rest of the pattern. The top is 18 rounds. Round 19 has you slip stitch across the center to form the crotch and then do one leg, cut the yarn and do the second leg. Seems ok but the pattern says the legs are rounds 19-28. That's 10 rounds. The top is 18 rounds. That's a very short leg. I took a close up of the magazine photo and I think that each leg is 28 rounds and they meant to start the count for the legs over at round 1 but missed that in editing. If they did edit this pattern. This one got ripped out.
Here's the score: Is the pattern easy to understand? No. 0 If there was a gauge, could I match it? Yes, but I don't think that mattered. It was a tight fit anyway. I'll give it a point anyway 1 Does it look like the photo? The halter dress does, the skirt on the suit does, the jumpsuit does not. .5 Would Barbie wear this? There are four pieces and 2 are wearable .5 Did I enjoy making it? Does it count if I'm cackling while making because I'm thinking this will make a great blog post? Let's call it .5 Total score 2.5 If I were going to do these again, I'd move up another level on the yarn and try a dk weight and edge toward 4.5 stitches per inch to get a looser fit for the dress and the skirt. I'd skip the jacket. The jump suit might be salvageable with the dk weight and a few extra rows in the top and the legs. This is the worst Barbie pattern so far. Ken has been left out of the fun so it's time to do something for him. This week I'm reviewing this bathrobe pattern from the American Thread Star Book No 192 Doll Clothes Knitted and Crocheted. 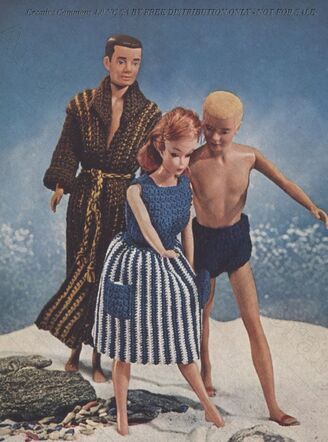 I'm not sure what's going on in this photo. Why is older Ken in a bathrobe watching over the the other two? This pattern asks for one skein of American Thread Company "Dawn" De Luxe Fingering Yarn in gold and one in brown along with a steel crochet hook size 0. A size 0 hook is generally about a 3.25 mm. The pattern gives a gauge of 17 stitches to 3 inches. To make the robe I used Teksrena Wool in brown and a scrap of merino wool in green. Based on the photos I could find, one skein of Dawn is about an ounce. I had more than an ounce of the brown but much less of the green. Just looking at the photo I assumed this was one of those cases where they just tell you that you need a skein even you only need a smaller portion of it so I didn't worry much. The pattern is single crochet in the back loops to give it a ribbed effect and it's worked lengthwise. Once I started, I realized two things; they want you to cut the yarn after every row and switch colors, I wasn't going to have enough green to do that. (I guess they meant more than .3 ounces of yarn.) There are 46 rows in the bathrobe so if I follow their pattern I will have 92 ends to sew, not including the sleeves which are thankfully only one color. Sorry Ken, you don't get all the stripes! I made a design choice to do them on the front of the robe only. The directions for the robe, sleeves and the collar were easy to follow and the tie is lengths of yarn that are twisted so that was easy too. This went pretty fast, much faster than if I'd had to cut the yarn after every row and then weave all the ends in. Here he is in his new bathrobe. 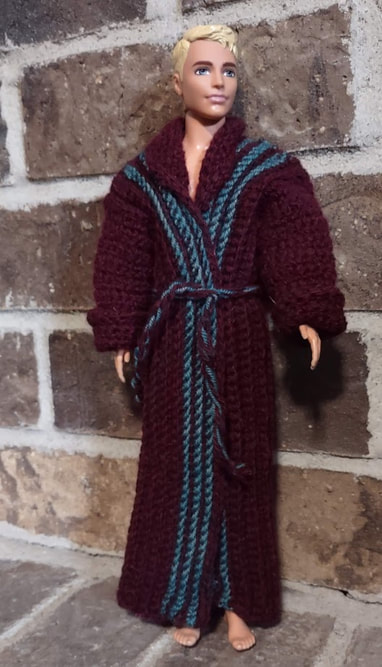 I think this went pretty well. The yarn looks more wine colored than brown but the green looks good with it. I think Ken likes his new robe.
Rating: Is the pattern easy to understand? Yes If there is a gauge, could I match it? Yes Does it look like the photo? Yes and less creepy Did it fit Ken? Yes Did I enjoy making it? Yes though I wouldn't have enjoyed it as much if I'd done their color pattern. This one gets a 4.5 Time to start on that fun booklet I found at the Antique Pattern Library! This week's project is from the American Thread Star Book No. 192, Doll Clothes, Knitted and Crocheted, published in 1965. The booklet has both knitted and crocheted clothes for Barbie and Ken in all of their vintage glory. The cover has a crocheted brides dress and cape while the groom (and per the booklet, the "breadwinner") has knitted pants and a jacket. 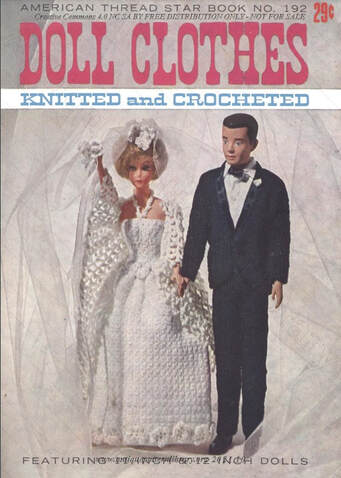 I decided to do one of the easier dresses in the booklet, the Ripple Shift. This dress uses one skein of Dawn De Luxe Fingering Yarn in Antique Gold, a Steel Crochet hook No 1 (about 2.75 mm) and a small button. The dress is the one in the middle below and the gold dress under the jacket on the left. I had a small skein of red variegated fingering weight wool that was gifted to me by a friend that looked perfect for this. I used a C hook instead of the steel hook and still got the same gauge. This is a simple ripple pattern that works from the bottom up with some decreases at the waist and some increases at the chest. The instructions for front and back shoulders were a little hard to understand at first but I worked it out and it wasn't hard once I understood what they wanted me to do. They have you do the front and back shoulders separately and then sew it together at the top of the shoulder. Here is the finished dress on Susan. 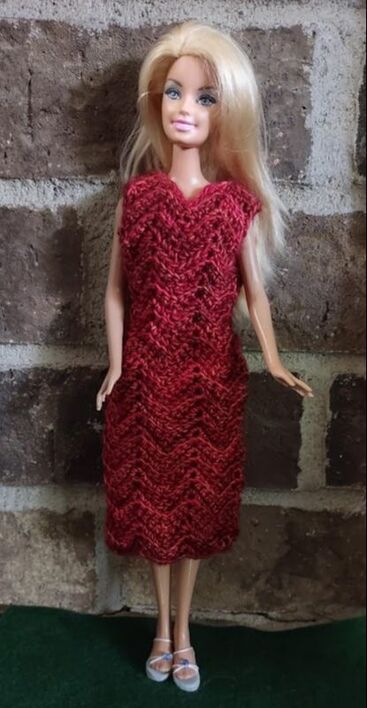 Remember that Susan is a little taller than the average Barbie? This dress is definitely longer than the one in the photo and since we know that Susan is likely to be taller than the Barbies in the booklet photo it's going to look even longer on a shorter Barbie. It fits her, just not quite the way it does in the photo. Maybe the suggested yarn is a little stiffer and the soft wool is draping a little heavier?
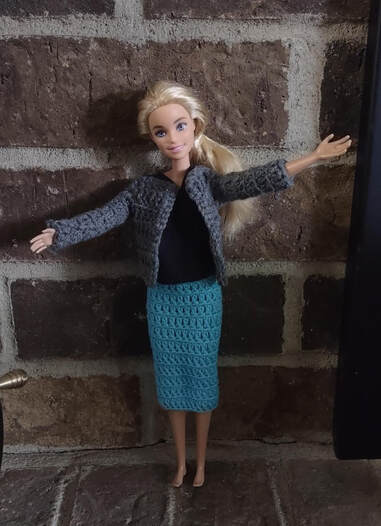
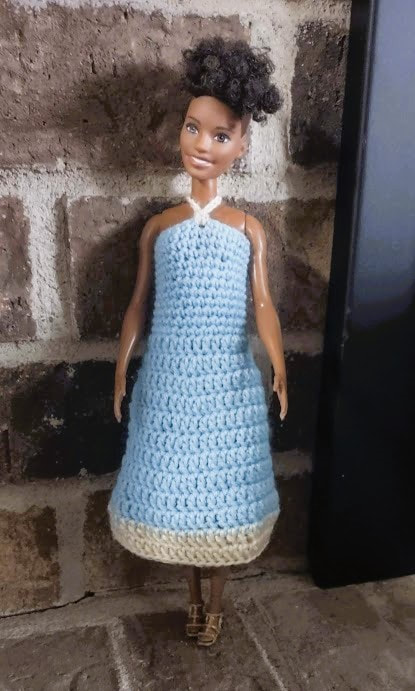
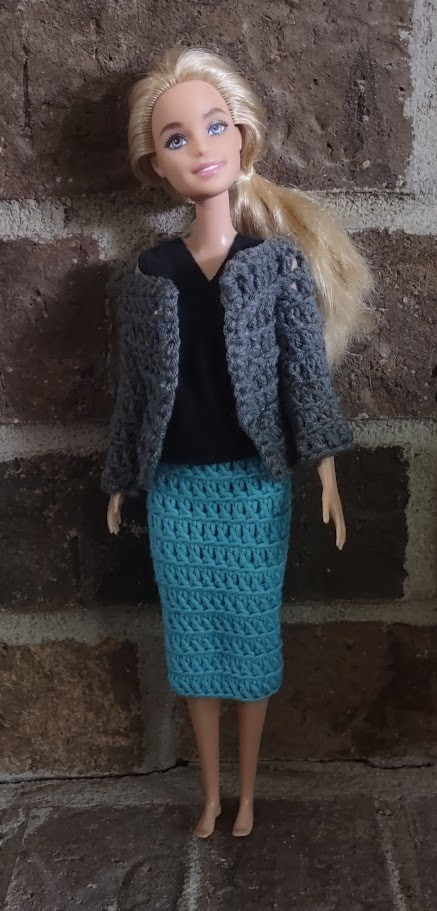
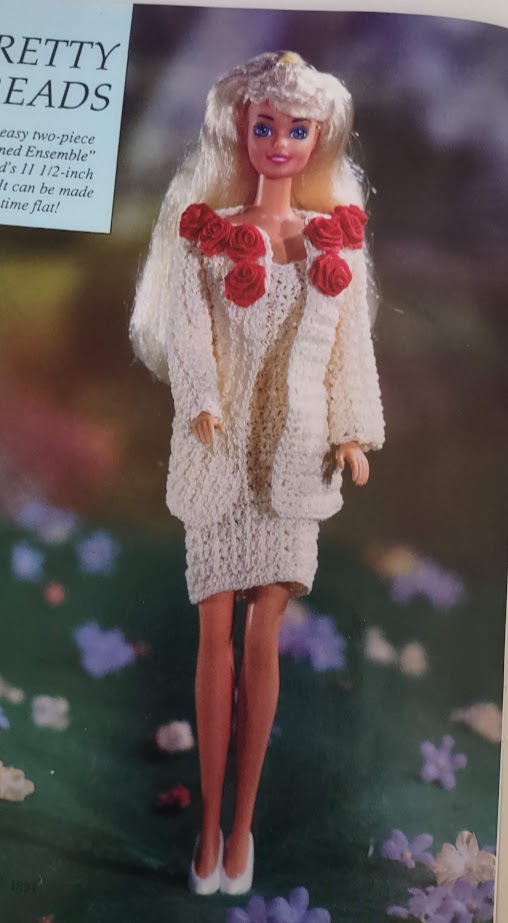
I do like the way the variegated yarn looks in the ripple pattern. Rating: Is the pattern easy to understand? Yes If there is a gauge, could I match it? Yes Does it look like the photo? No Did it fit Susan? Yes but more loose than in the booklet photo. Did I enjoy making it? Yes I'm giving this a 4 out of 5. This week we have a new Barbie model. Susan, who modeled the two previous projects, is 12 inches tall instead of 11.5 inches. 11.5 inches is the more common size for the dolls and the patterns. That explains why the first week's dress was a little shorter on her than I expected. To make sure I had a doll that would fit the patterns I went to the local Unique Thrift store where they had multiple 3-packs of Barbie and Ken. I ended up coming home with one that had two Barbies and a Ken, all from the Fashionista line in the 2015-2018 era. One stereotypical Barbie, one black Barbie with an athletic body type and a 2016 You Can Be Anything Ken Lifeguard. All of three of them have flat feet. Today's Barbie is a Fashionista Barbie from 2015 and she will be modeling my finished version of the Rose Trimmed Ensemble from the Crochet World Fall Special 1991. Here's the magazine photo. It is definitely trimmed with roses...  This pattern is a jacket and a simple sheath dress. The materials list includes, crochet cotton thread, steel crochet hook size 7, 8 red silk ribbon roses and a hot-glue gun. The pattern gives a gauge that I matched with size 10 cotton thread and the size 7 hook. The stitch pattern for the dress and jacket is a single crochet in the back loop, single crochet in the front loop. The dress is done in the round and was pretty simple to do. It was a just a tube until the last few rounds where the neckline starts and the straps will go. The jacket is worked in one piece, folded in half and the side seams and sleeve seams are sewn together. Having minimal increases and decreases made it pretty easy to follow the back loop, front loop stitch pattern but this still took about three times as long as the suit I shared last week. The last step in the jacket pattern had you prepare the roses by clipping off the stem and putting a drop of hot glue on the end so the ribbon doesn't unravel. Then you mark where you want the roses and sew them on. You can probably guess where I wanted the roses... Here is the finished Rose Ensemble:
I made it rose colored instead of rose trimmed and used variegated pink thread for the dress and a solid pink for the jacket. It's definitely a Barbie color. The variegated thread made the dress a little more interesting to do. This dress did not fit Susan and even though the gauge matches it seems a little tighter than the photo and the sleeve length is a bit shorter than the photo.
Now for the rating: Is the pattern easy to understand? Yes If there is a gauge, could I match it? Yes Does it look like the photo? Sort of. Did it fit 11.5" Barbie? Yes but it was a tight fit. Did I enjoy making it? Yes I'm giving this one a 4 out of 5 because it was a little smaller than the version in the photo even though I had the gauge right. I could block it and make it a little bigger if I needed to but it's fine the way it is. Any suggestions on what I should name this Barbie? This week we're trying the Summer Suit from the 1992 issue of Crochet World Summer Special. This one also uses Luster Sheen and while I don't have the Aquamarine color they suggest, I think the other blue I have will be just fine. The white is size 10 thread and I have plenty of that. They use two different size hooks in this pattern; size 7 steel hook for the white and size D for the blue sections. The other materials include 4 snap fasteners, four 4mm beads, and 18 inches of 3/8 satin ribbon.  The pattern has a gauge that I matched and it has stitch counts after most rows (YAY!) It starts with the skirt which is a very simple pattern that is open at the waist in the back for a snap. The blouse instructions are also easy to follow. The blouse is completely open in the back with three snaps for the closure. Adding the white edging was a little more difficult but still not terribly hard. I ended up tacking the collar down because even though it was done in the outside loop it didn't want to stay down. The hat was very simple and adds an extra panache to her outfit. With the D hook this outfit went much quicker than the evening dress done in the same yarn, even with the extra accessory. Here is Susan in my version of the Summer Suit  She kicked off her shoes because it's summer and it's hot. I didn't love the extra ribbons they had in their version. It seemed a little extra. Even though they give you directions to make your own ribbons I added a purchased one to her hat instead of trying to make one. She only has one bead on her top instead of three because I couldn't get them to line up right. Overall, this outfit is a little looser than the evening gown and easier to put on the doll.
Rating: Is the pattern easy to understand? Yes If there is a gauge, could I match it? Yes Does it look like the photo? Yes Did it fit Susan? Yes Did I enjoy making it? Yes This one gets a 5 out of 5. |

Proudly powered by Weebly